Jumio Portal - Single Sign On (SSO) Guide with Azure
This document outlines the step-by-step process and key use cases for integrating SSO into the Jumio Portal using Azure.
Single Sign-On (SSO) is a technology that allows users to access multiple applications with a single set of login credentials. Instead of logging in separately to each SaaS application, users authenticate once through a portal login page, streamlining access and improving the user experience.
Prerequisites for SSO Integration with Azure
Customers using Azure as their Identity Provider (IDP) can enable Single Sign-On (SSO) for the Jumio Portal. To configure the IDP setup:
- You must log in to the Jumio Portal with a role that belongs to one of the following groups: ADMIN, KYX_ADMIN, or SUB_ADMIN.
- The Tenant ID is required for the configuration. It can be: -- Retrieved during the IDP connection setup at the tenant level, or -- Provided by the Jumio Support team upon request.
List of Steps
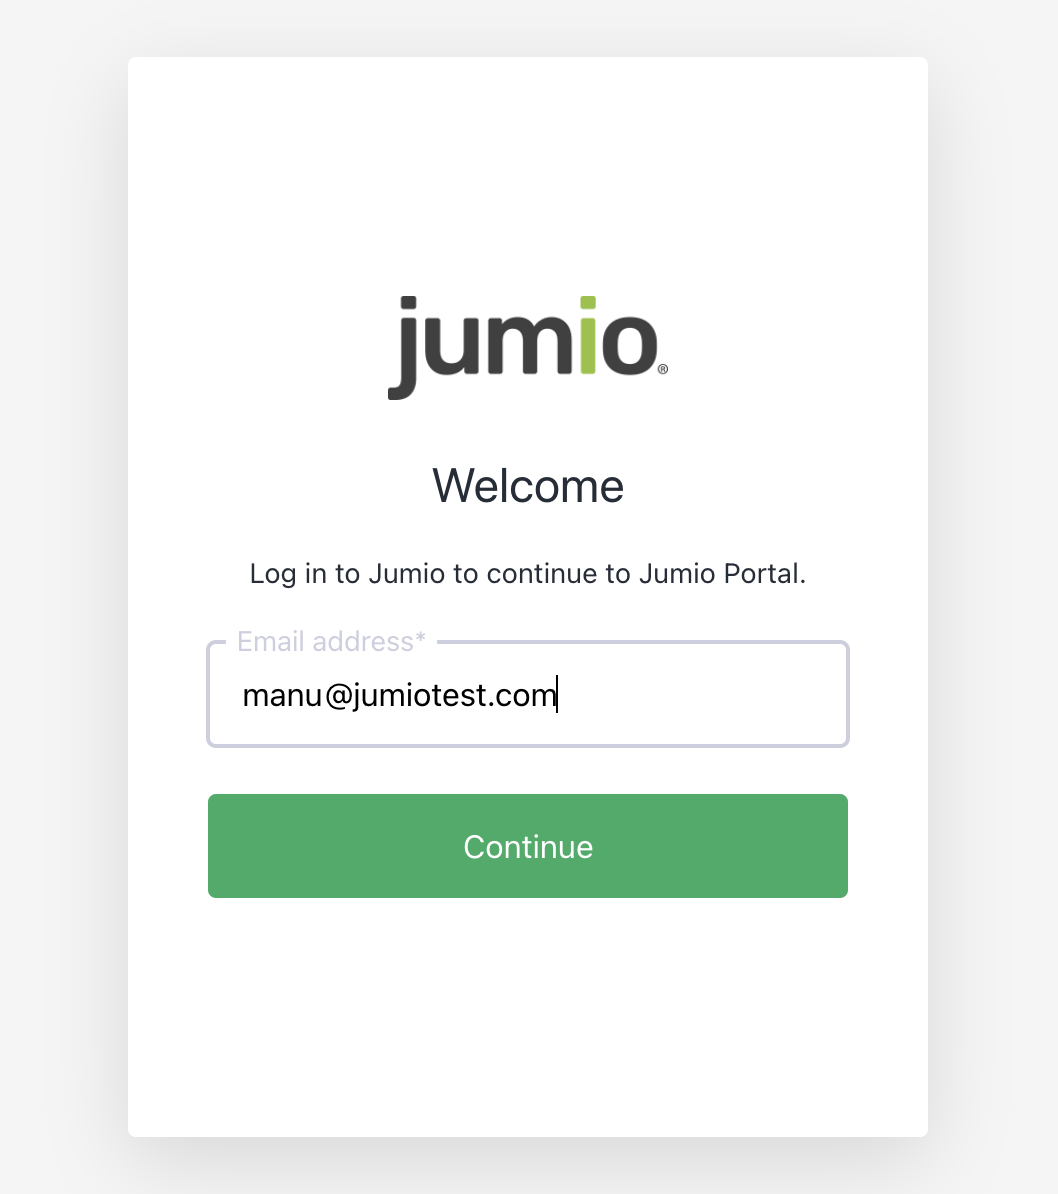
Step 1: Login to Jumio Portal.
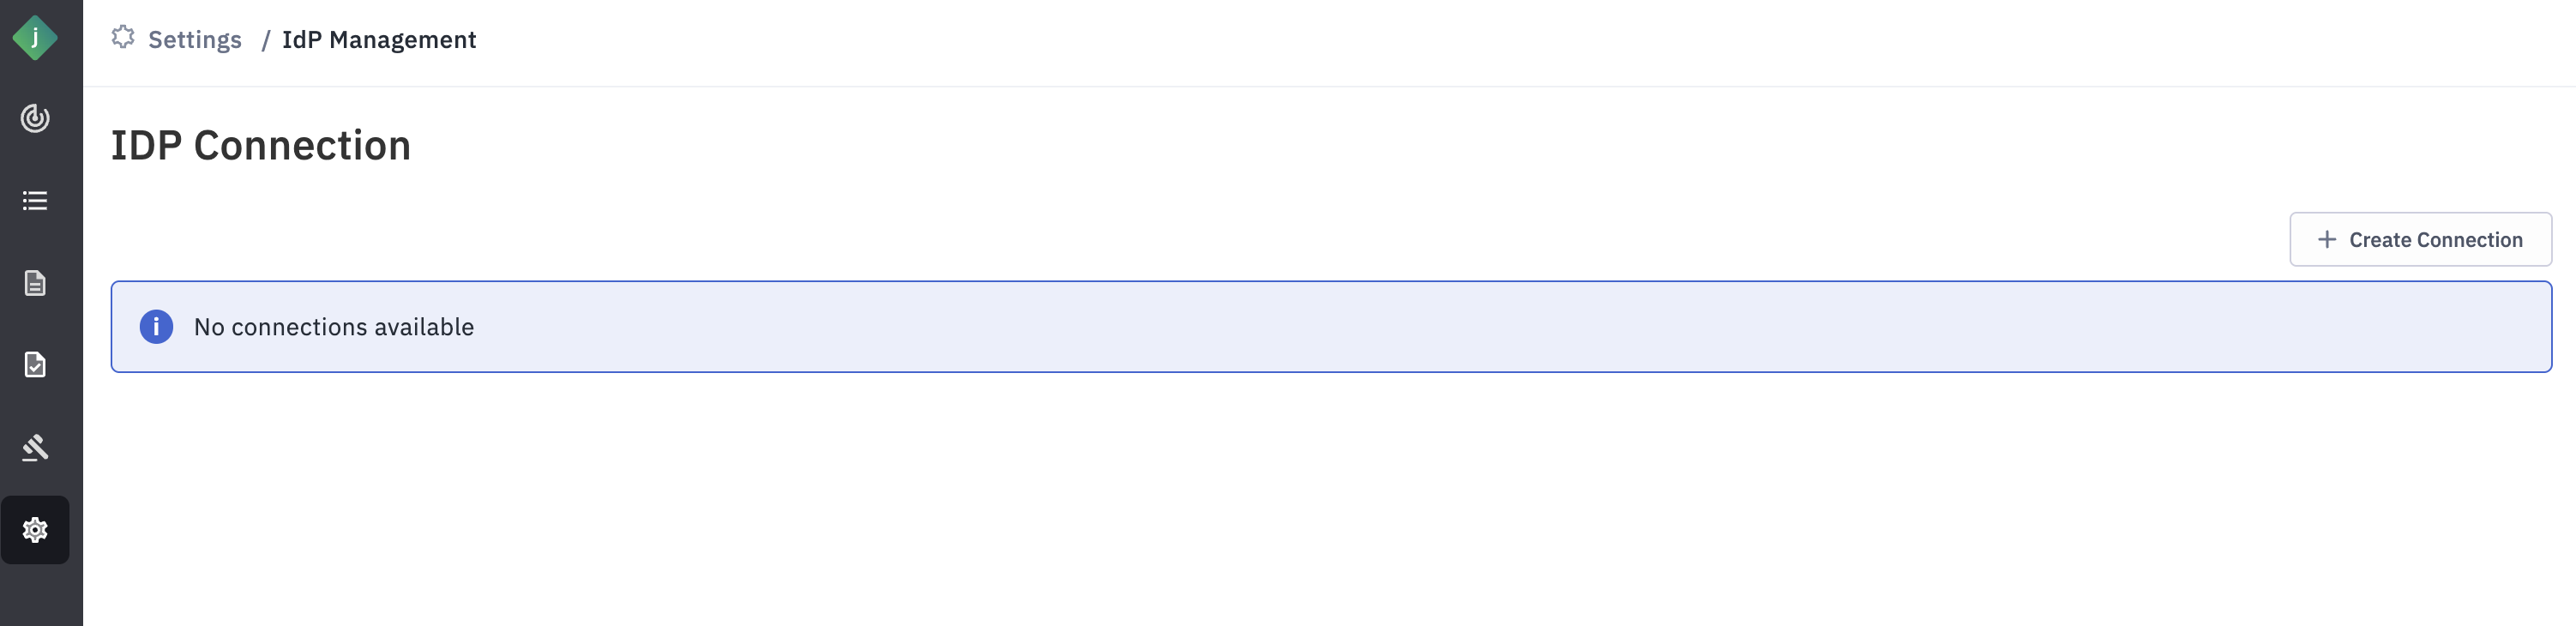
Step 2: Go to Settings -> IDP Management Page.
Step 3: Click “Create" button in the Create Connection pop-up window.
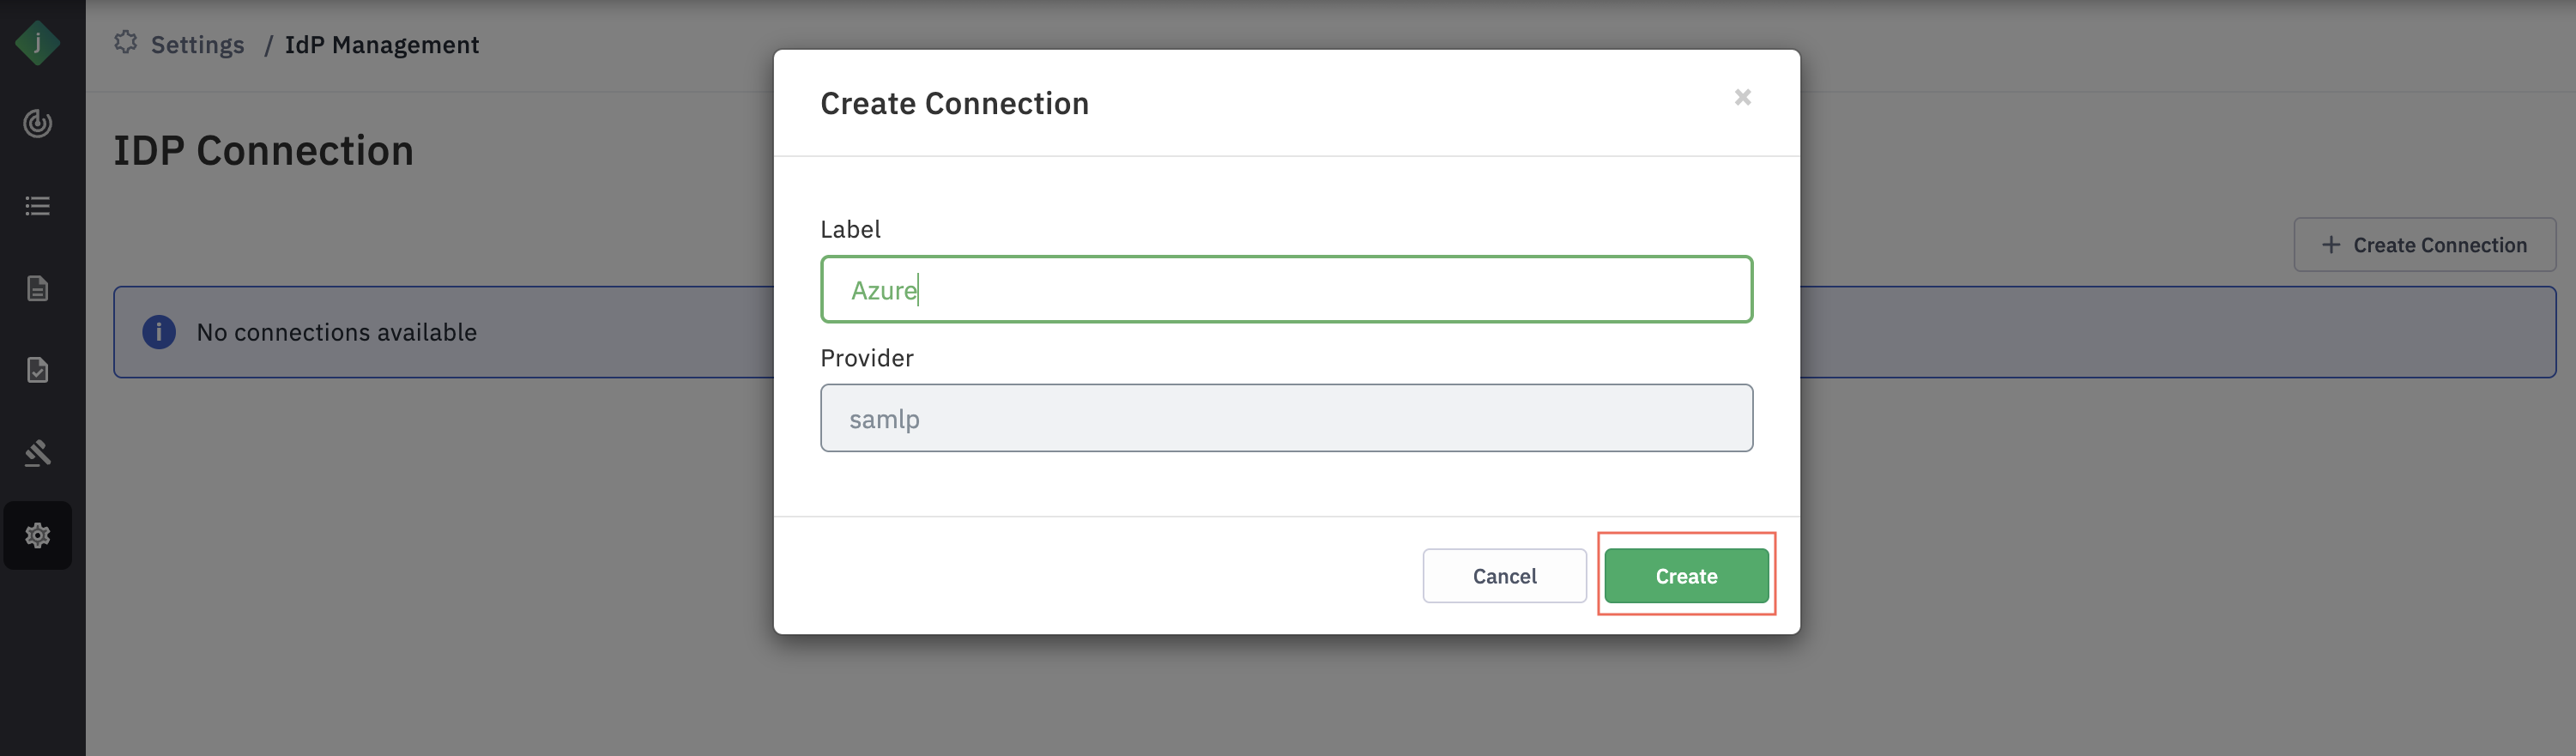
- Label: User-Defined Label for IDP Identification This label is used to identify the Identity Provider (IDP). For example, if an organization uses Okta as its IDP, you can set the label as "Azure". If the organization has multiple Okta IDPs and plans to integrate both, you can distinguish them with labels like "Azure1" and "Azure2".
- Provider: for IDPs that run on SAML protocol, keep the value as samlp
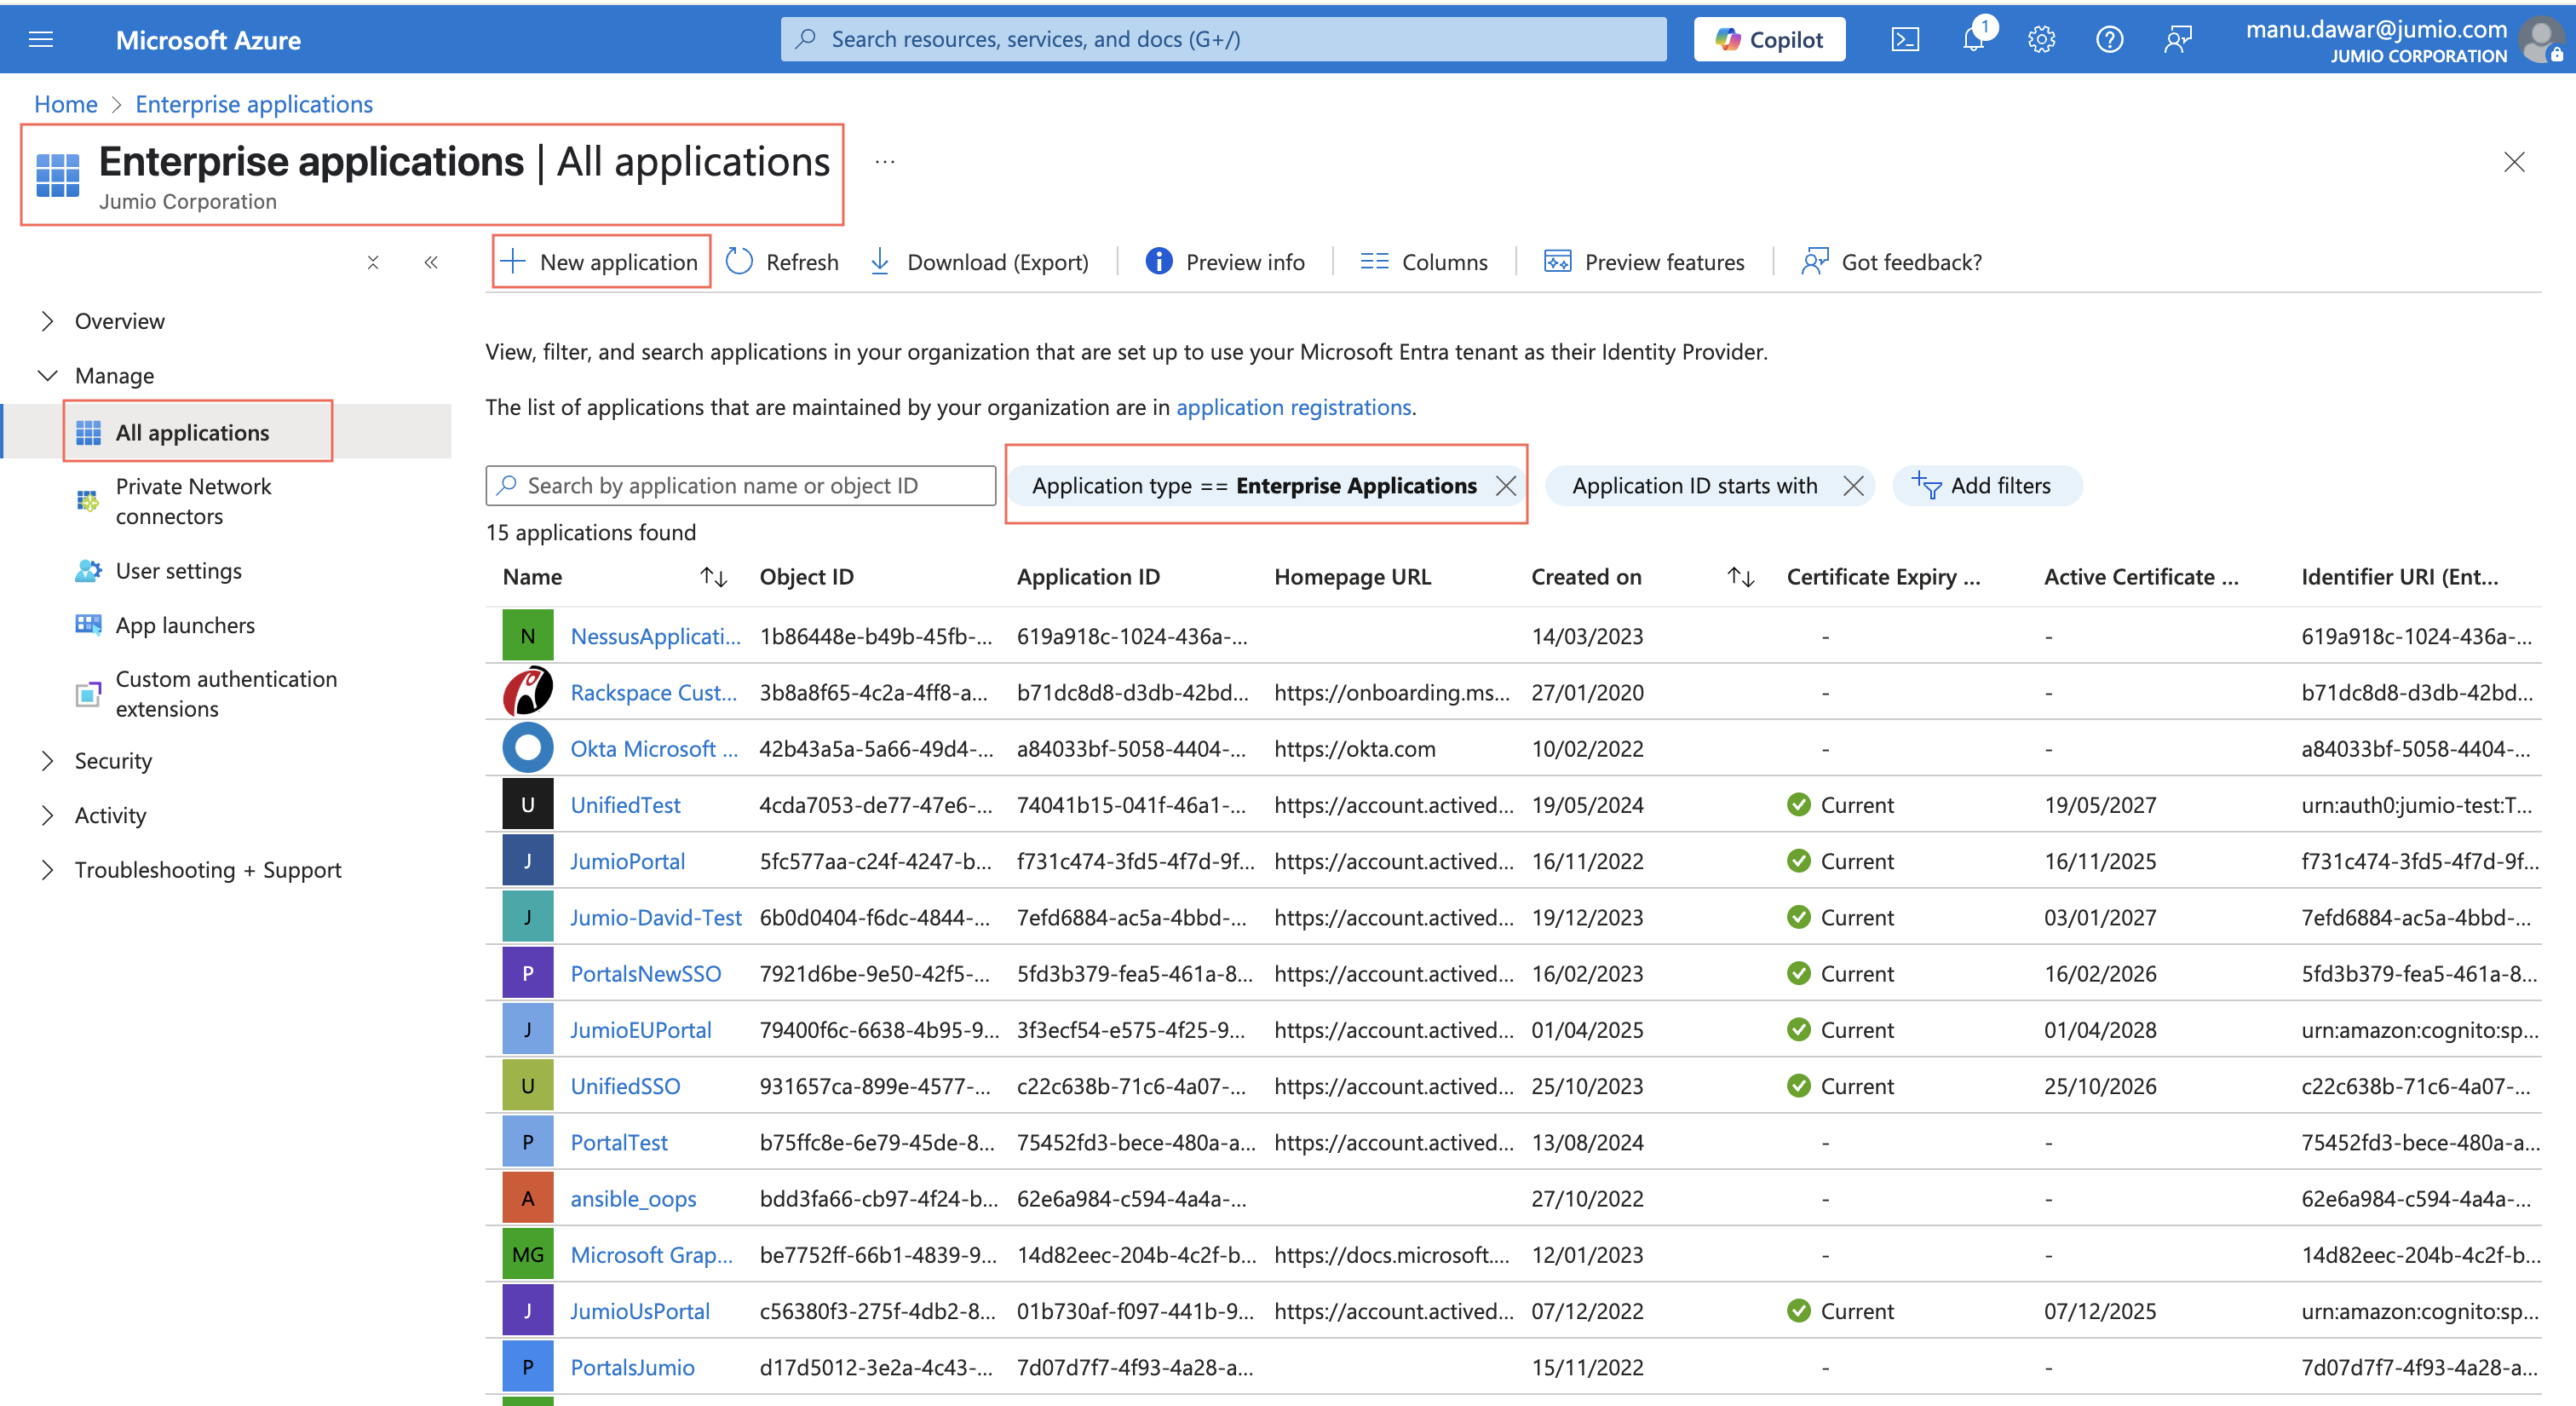
Step 4: Login to Azure Active Directory Admin Centre and navigate to Enterprise Applications and click on “New Application”.
Step 5: You will land on the New Application window.
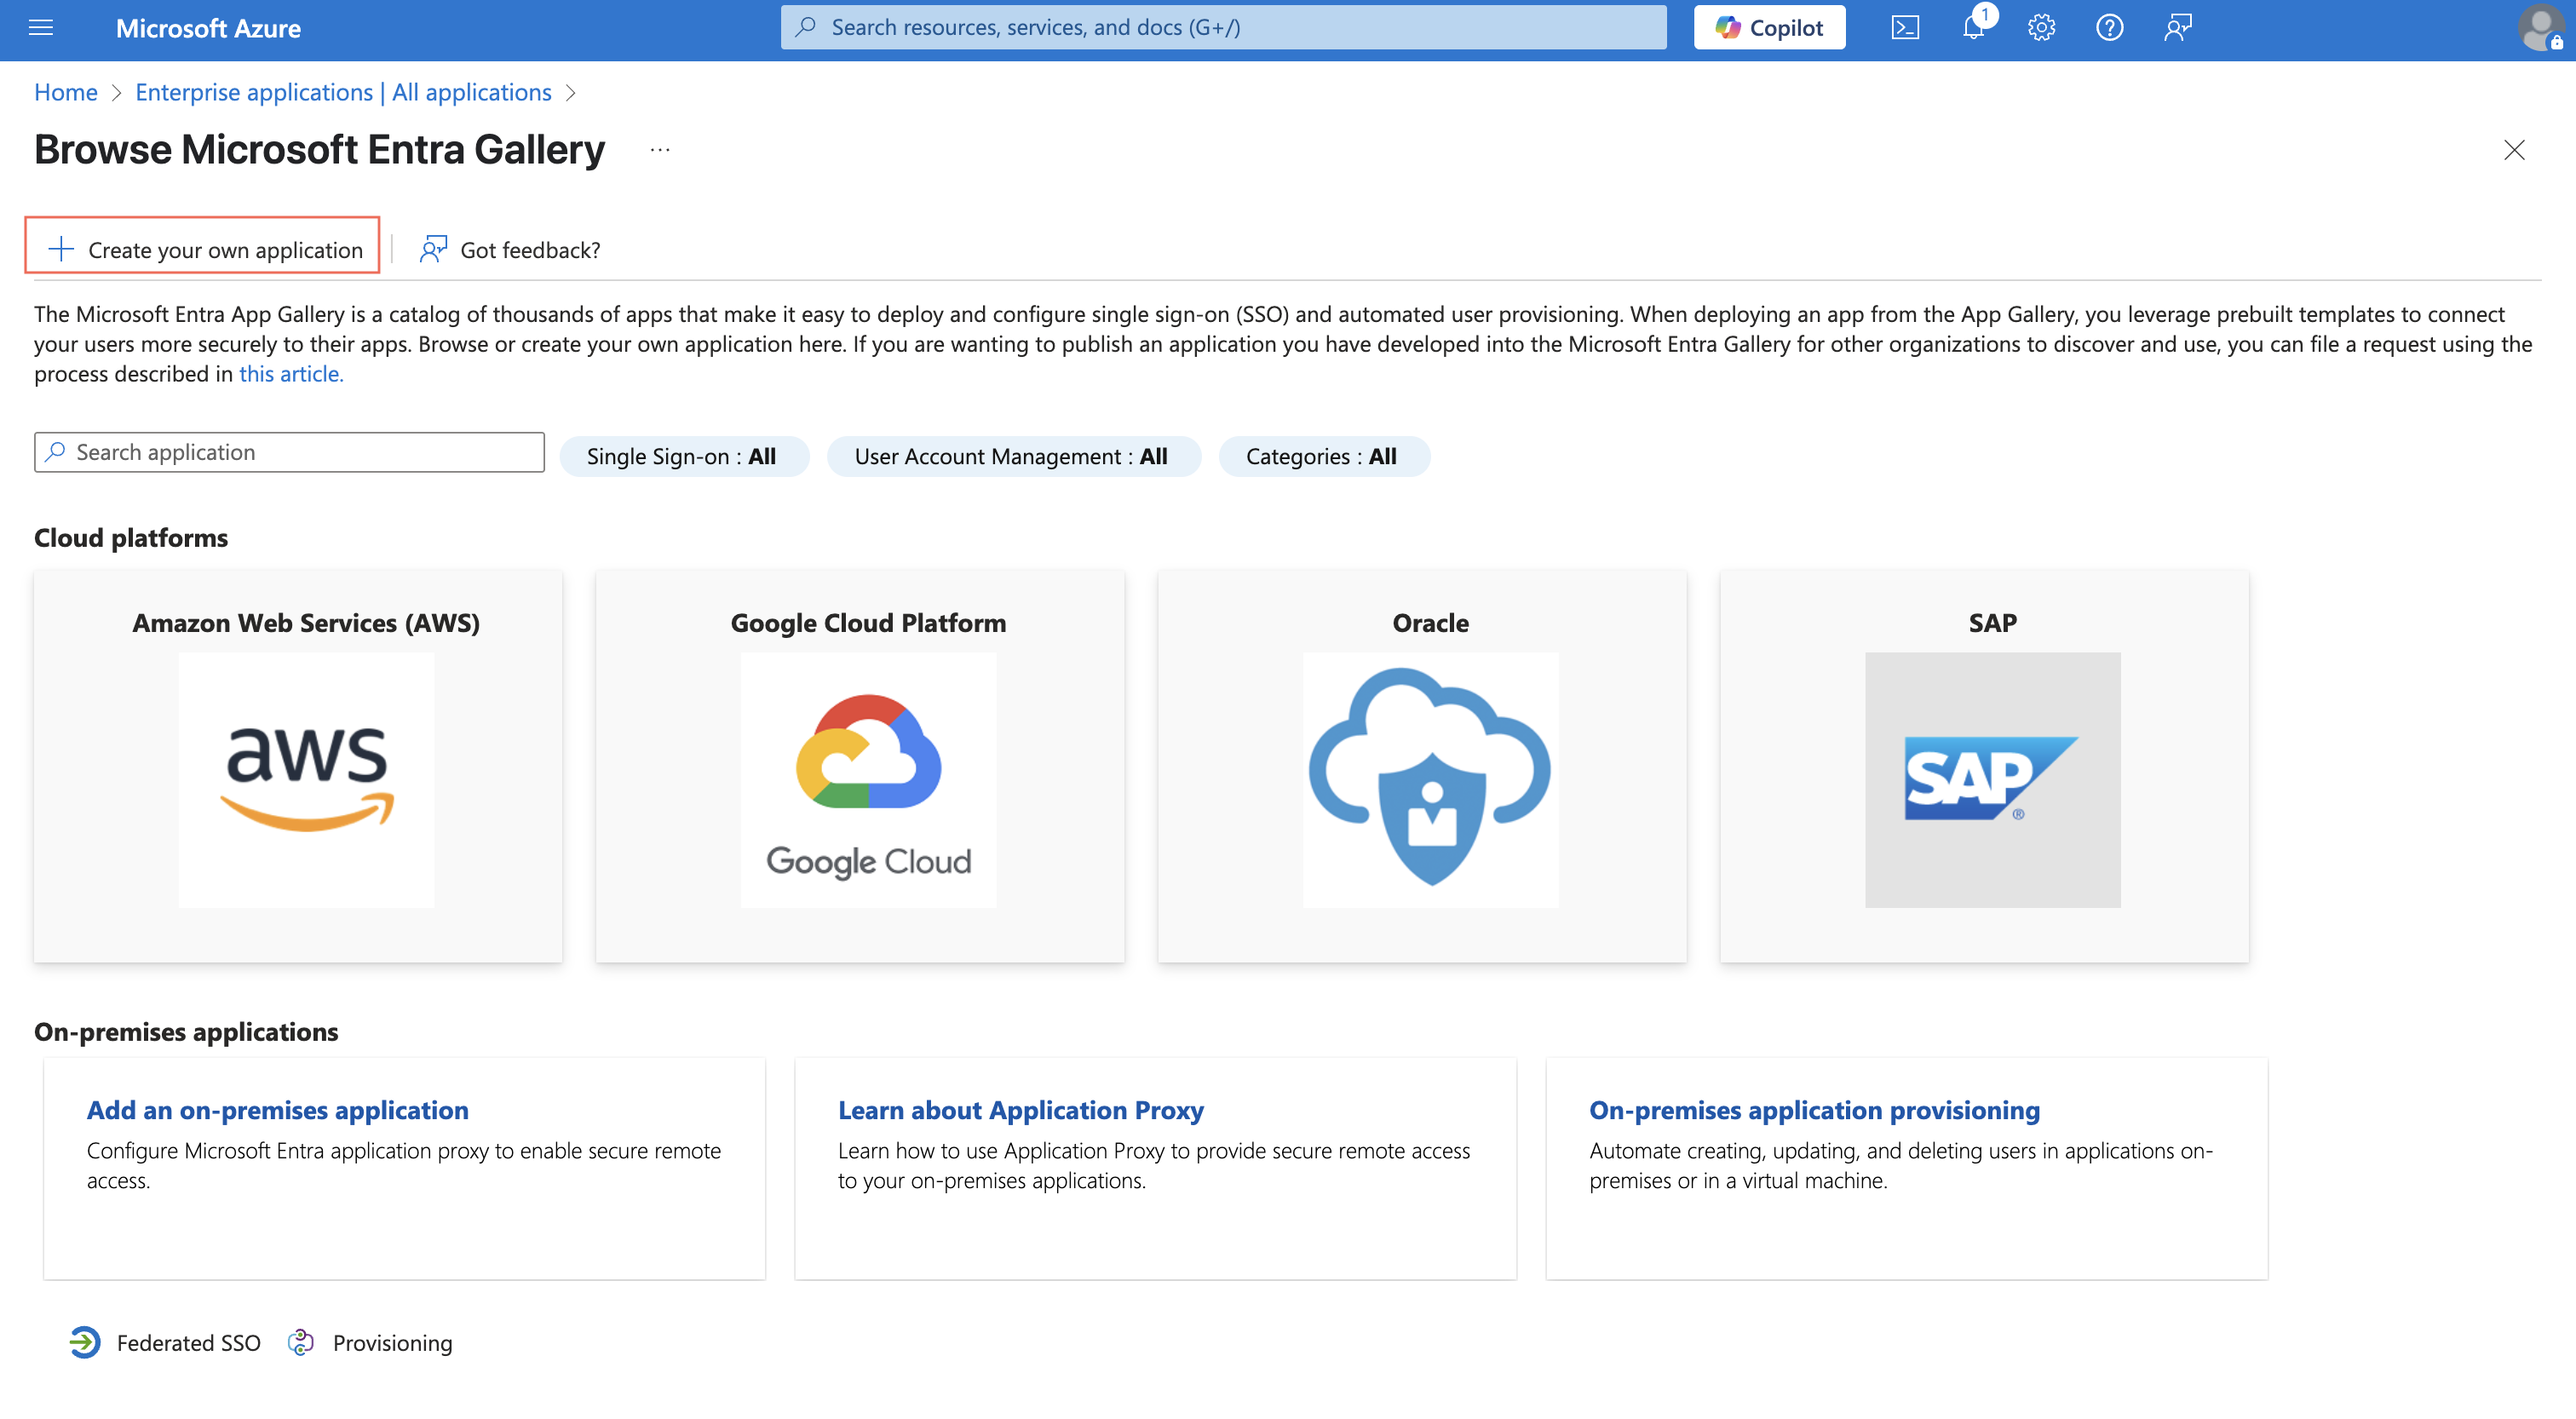
Step 6: Click "Create your own Application", provide the app name as per your convenience.

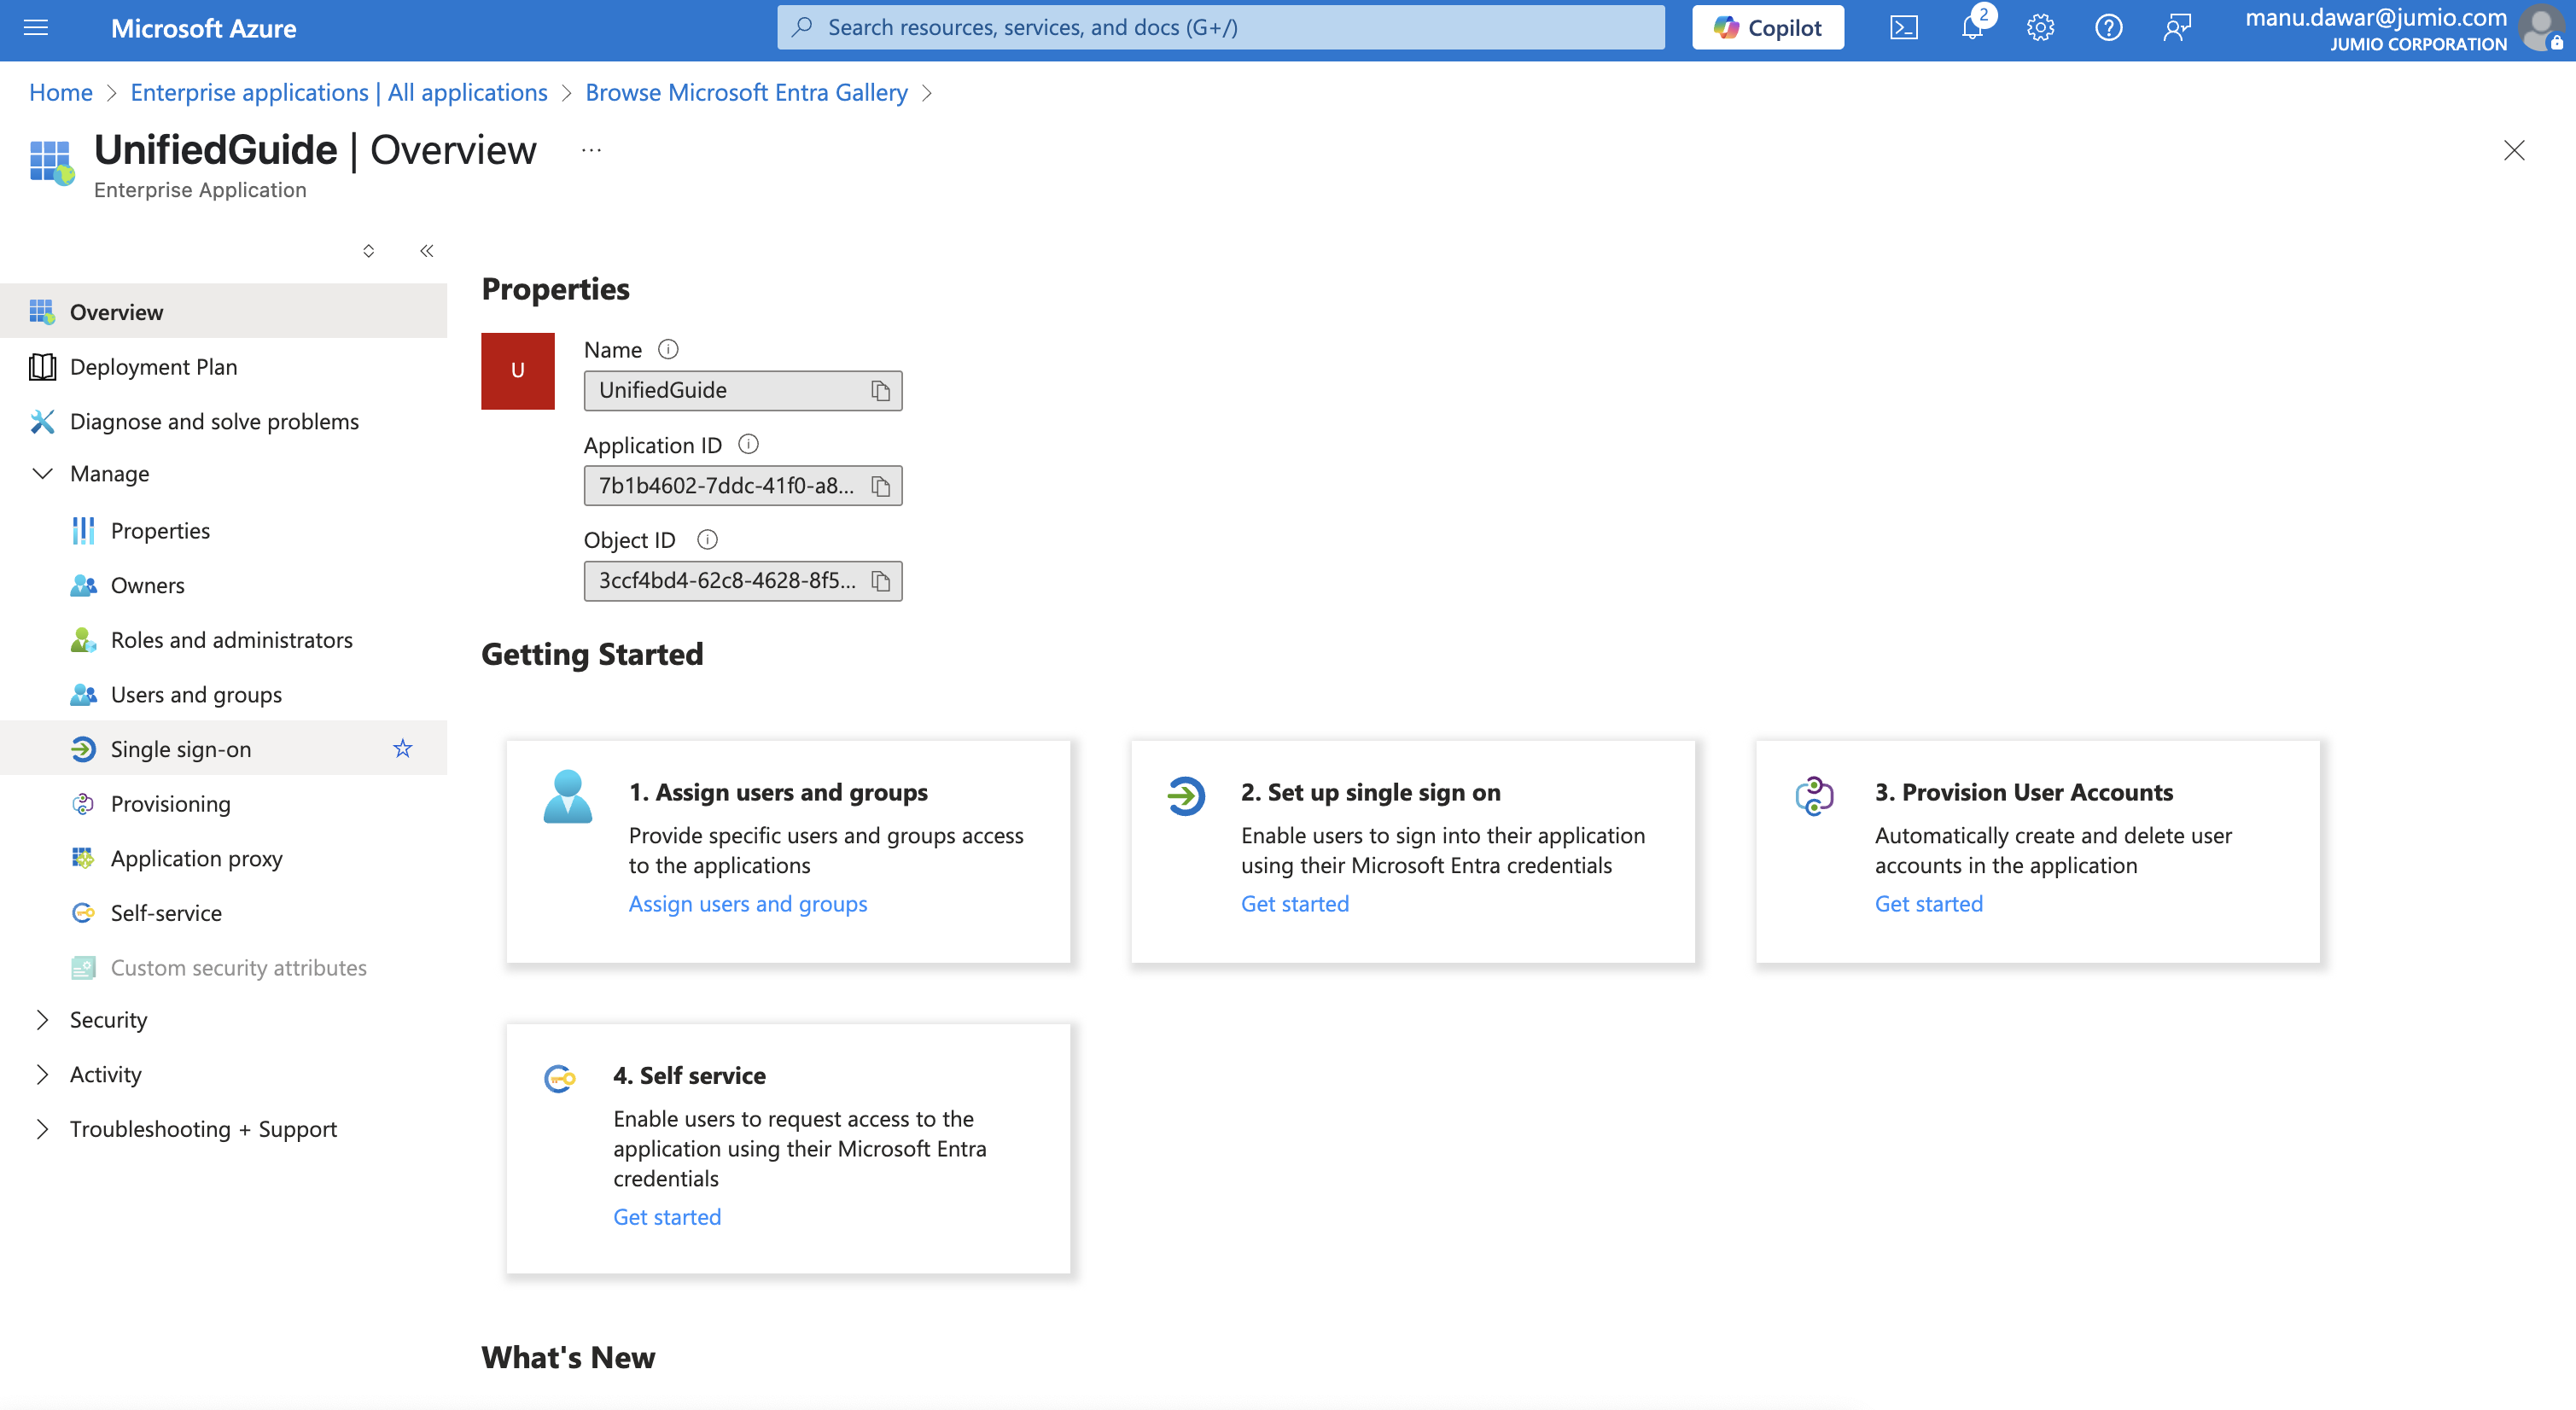
Step 7: Custom App (Jumio) Overview
When the application is added successfully, you will be able to get access to a custom application portal.
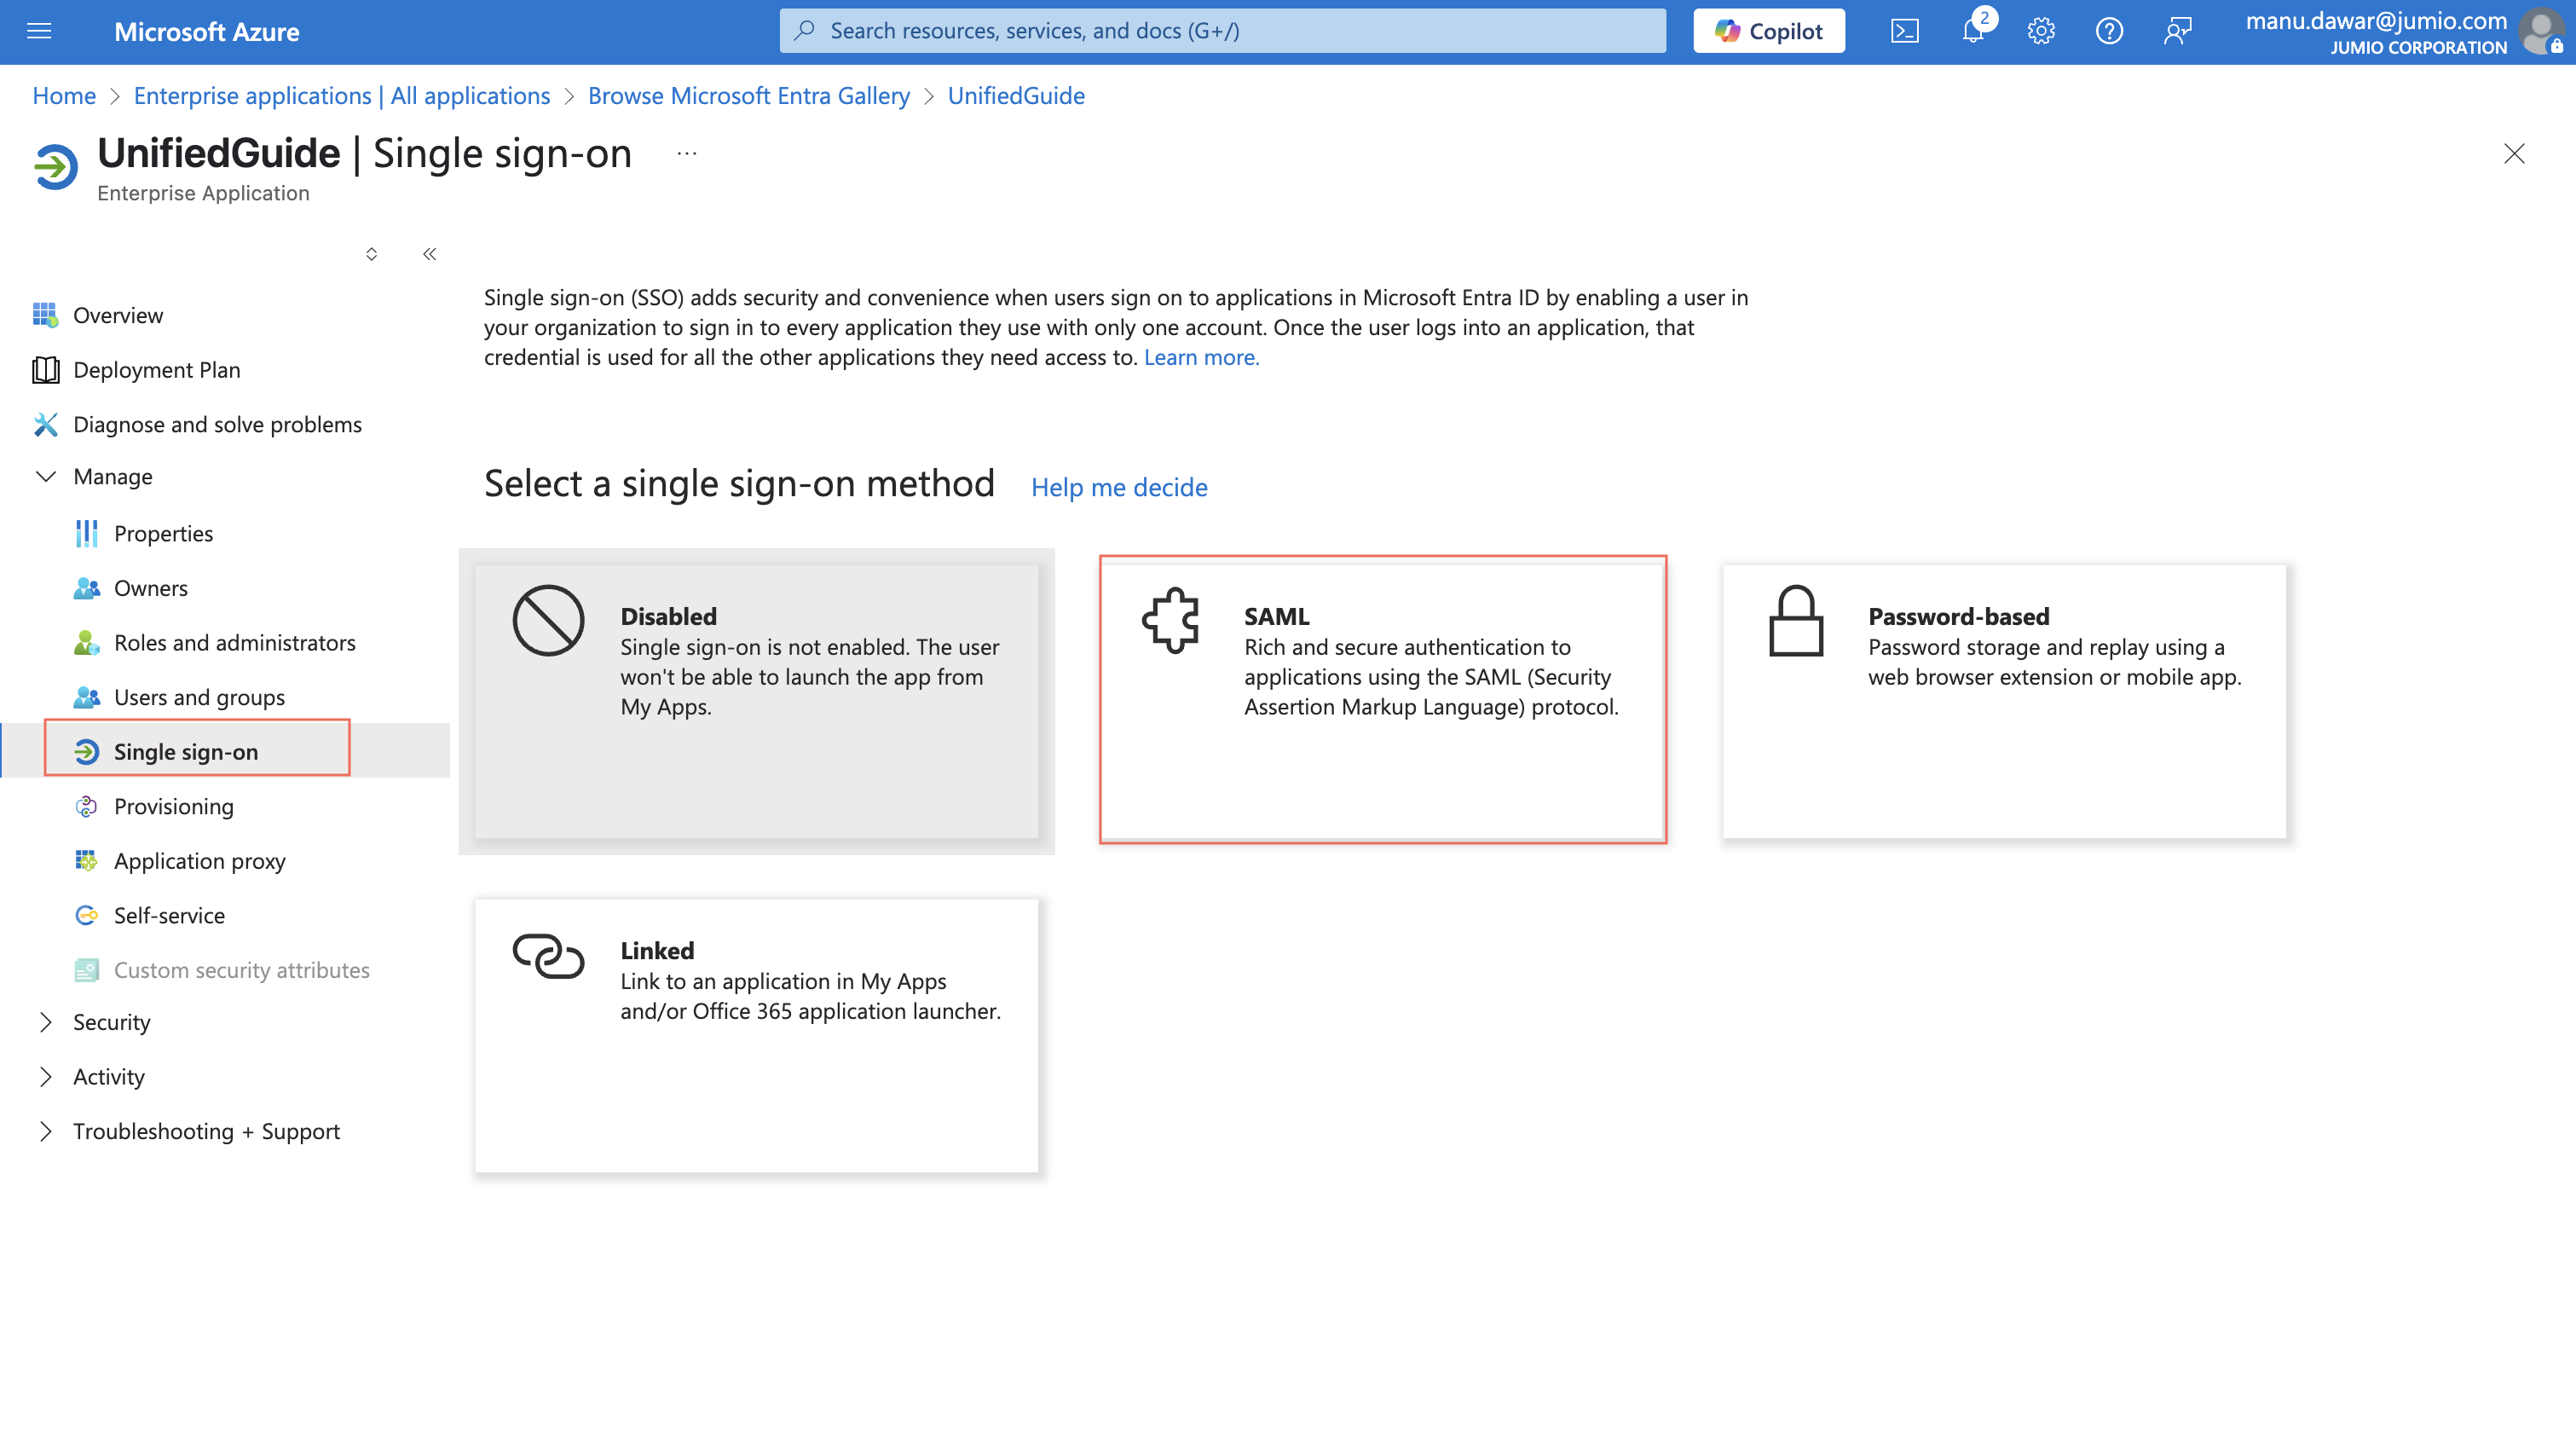
Step 8: Select SAML, click on Manage > Single Sign-On and select the Single Sign-On Method named SAML.
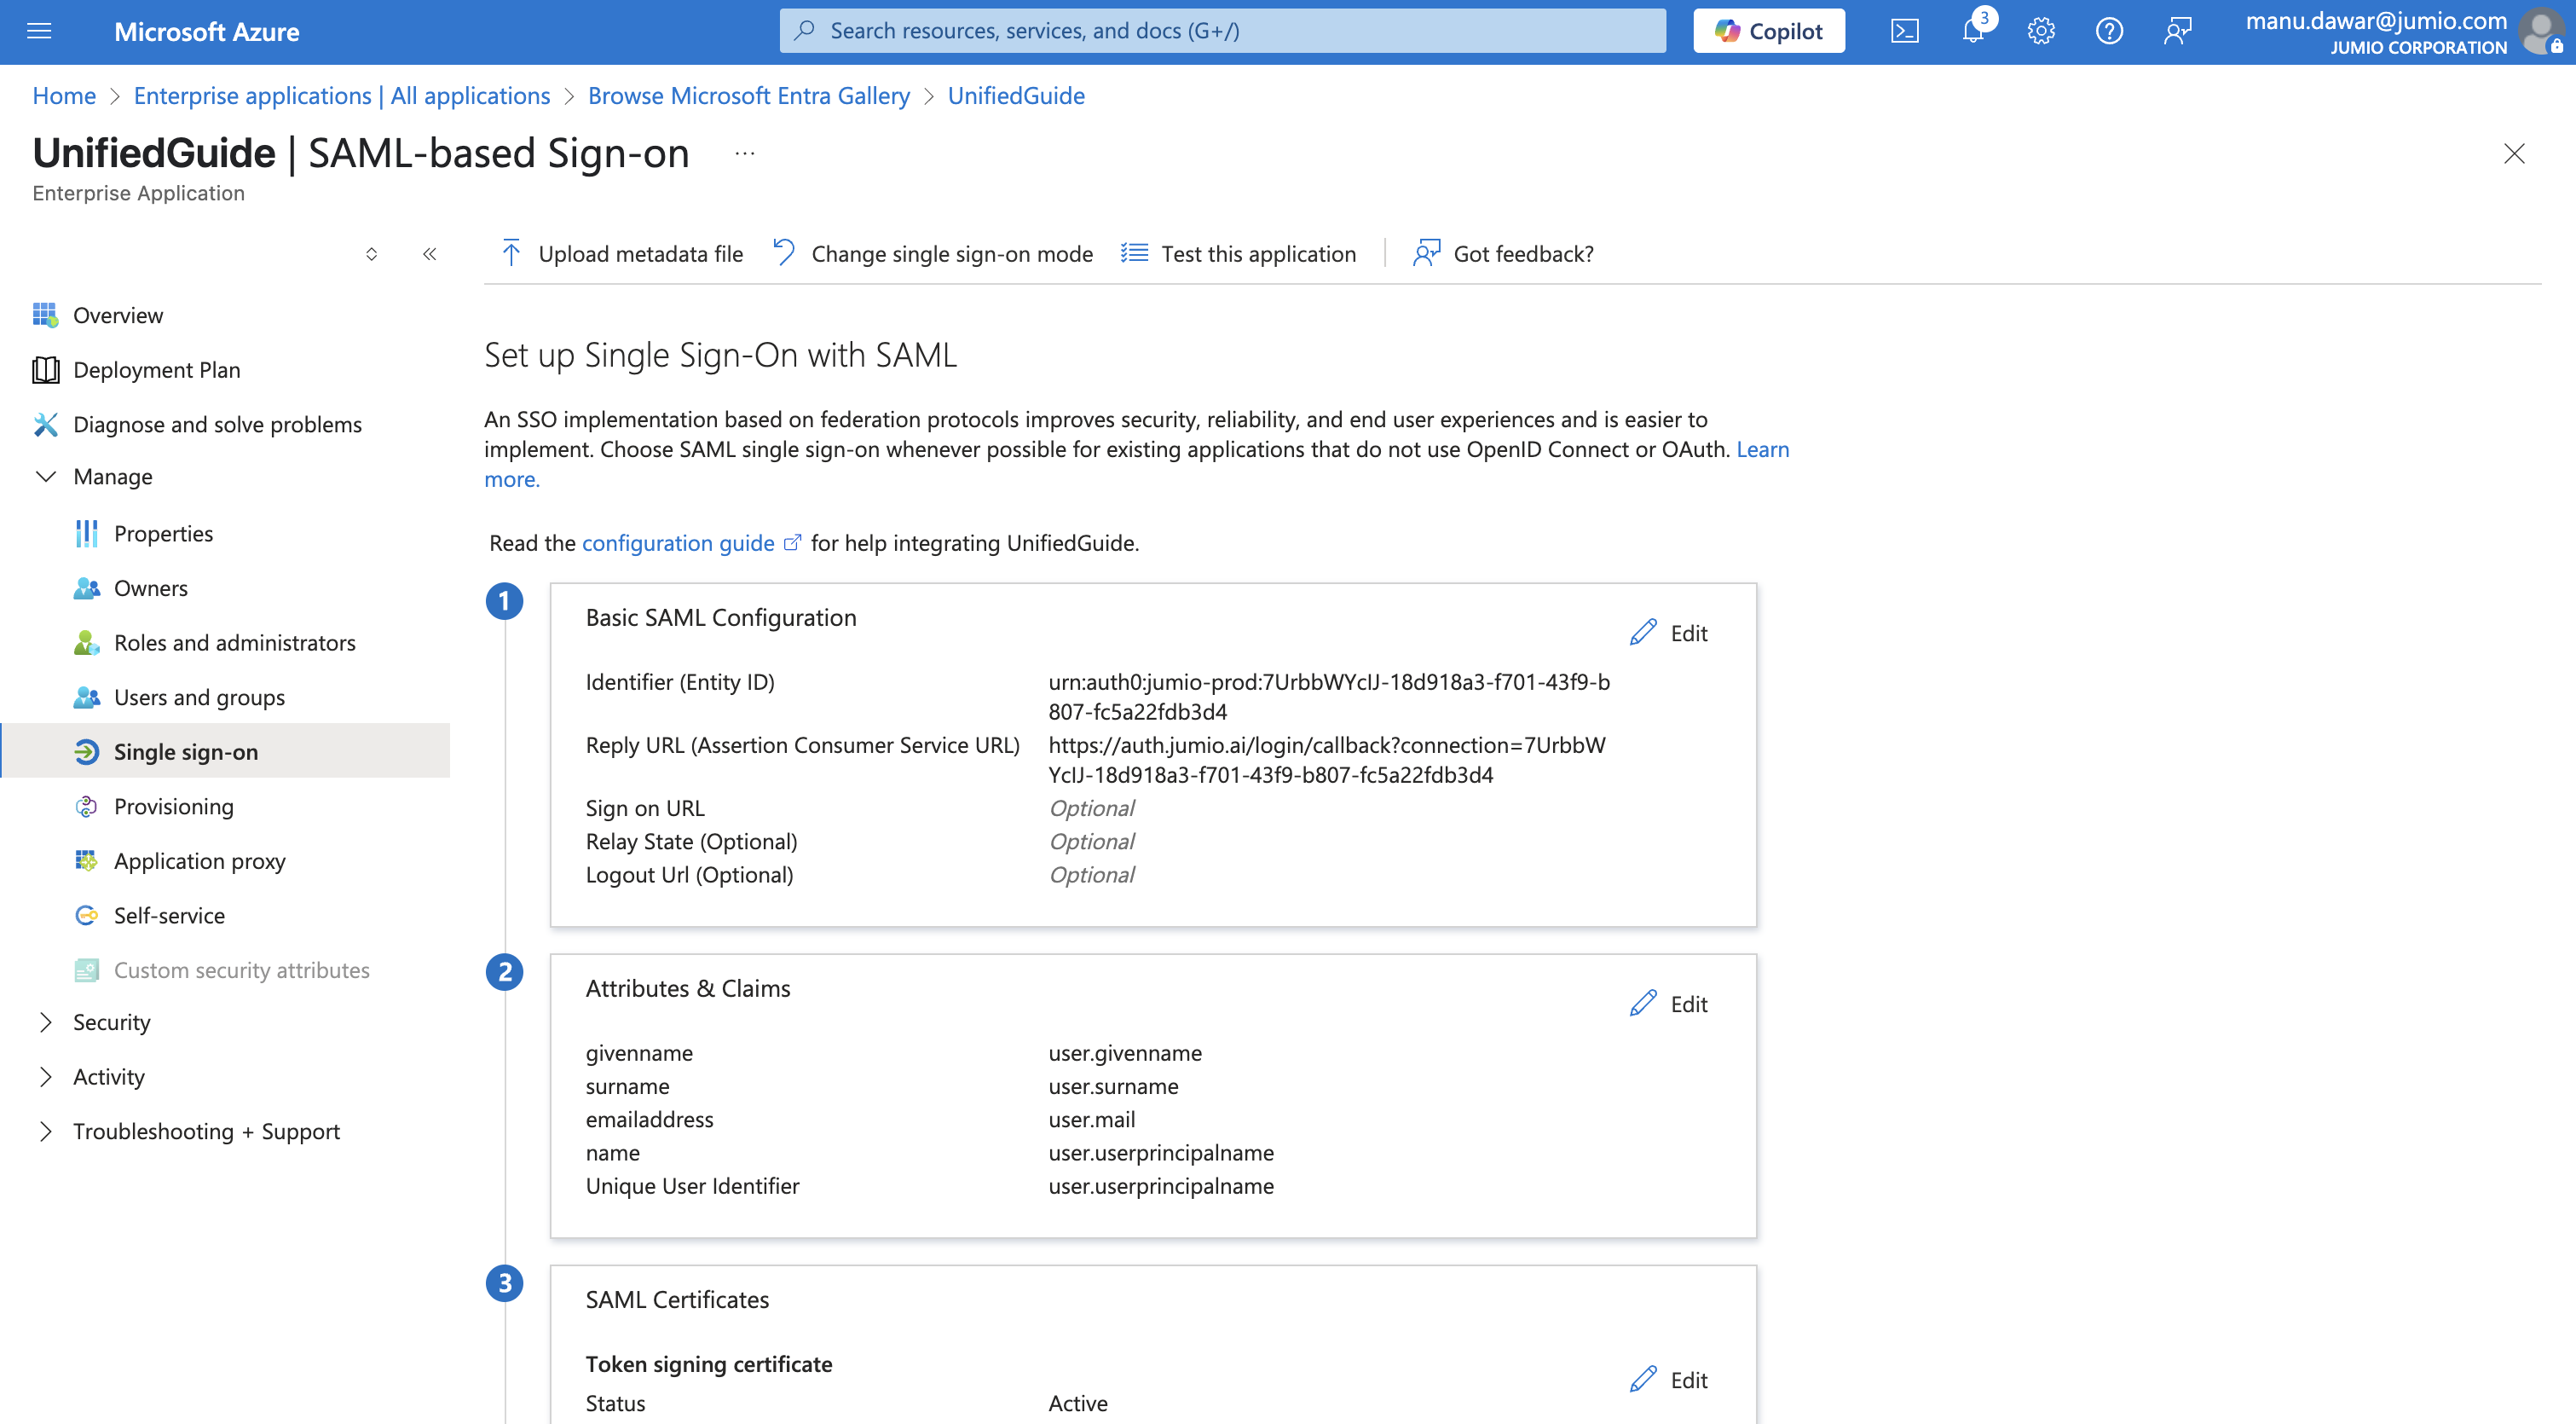
Step 9: Set up Single Sign-On with SAML.
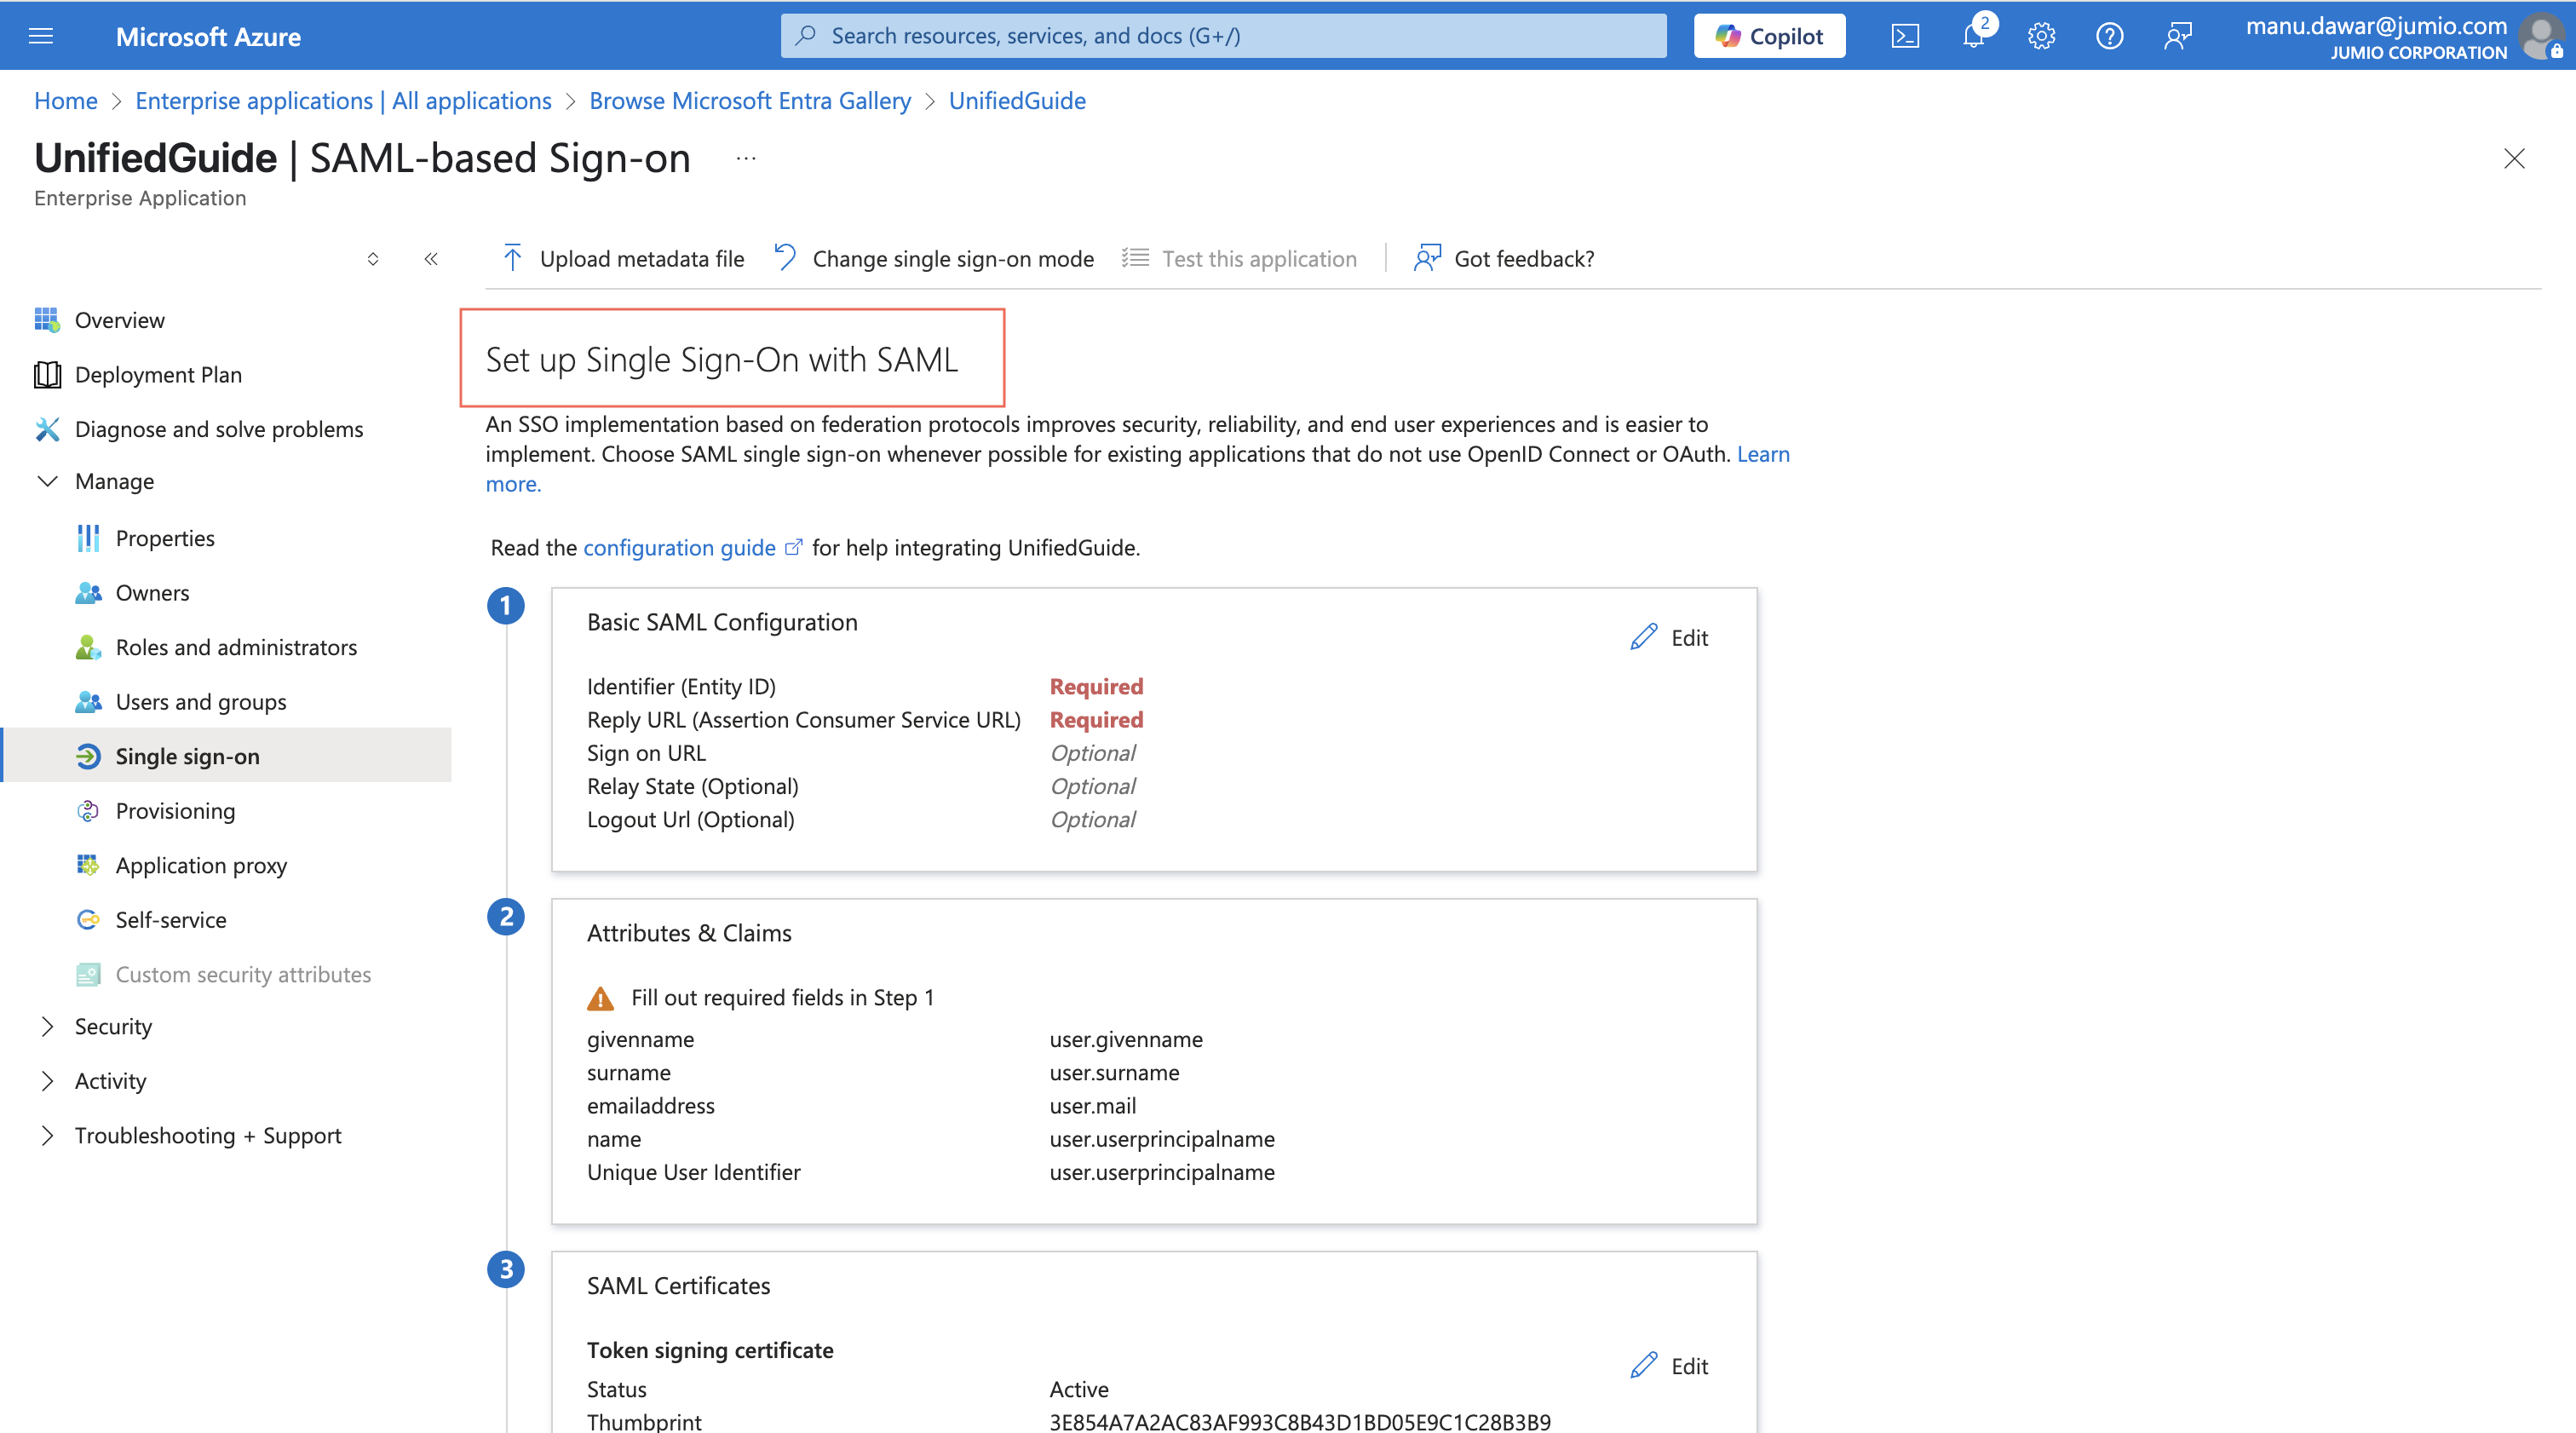
When the SAML based Signed-on panel appears, click on the Edit Button inside the part 1 : Basic SAML configuration.
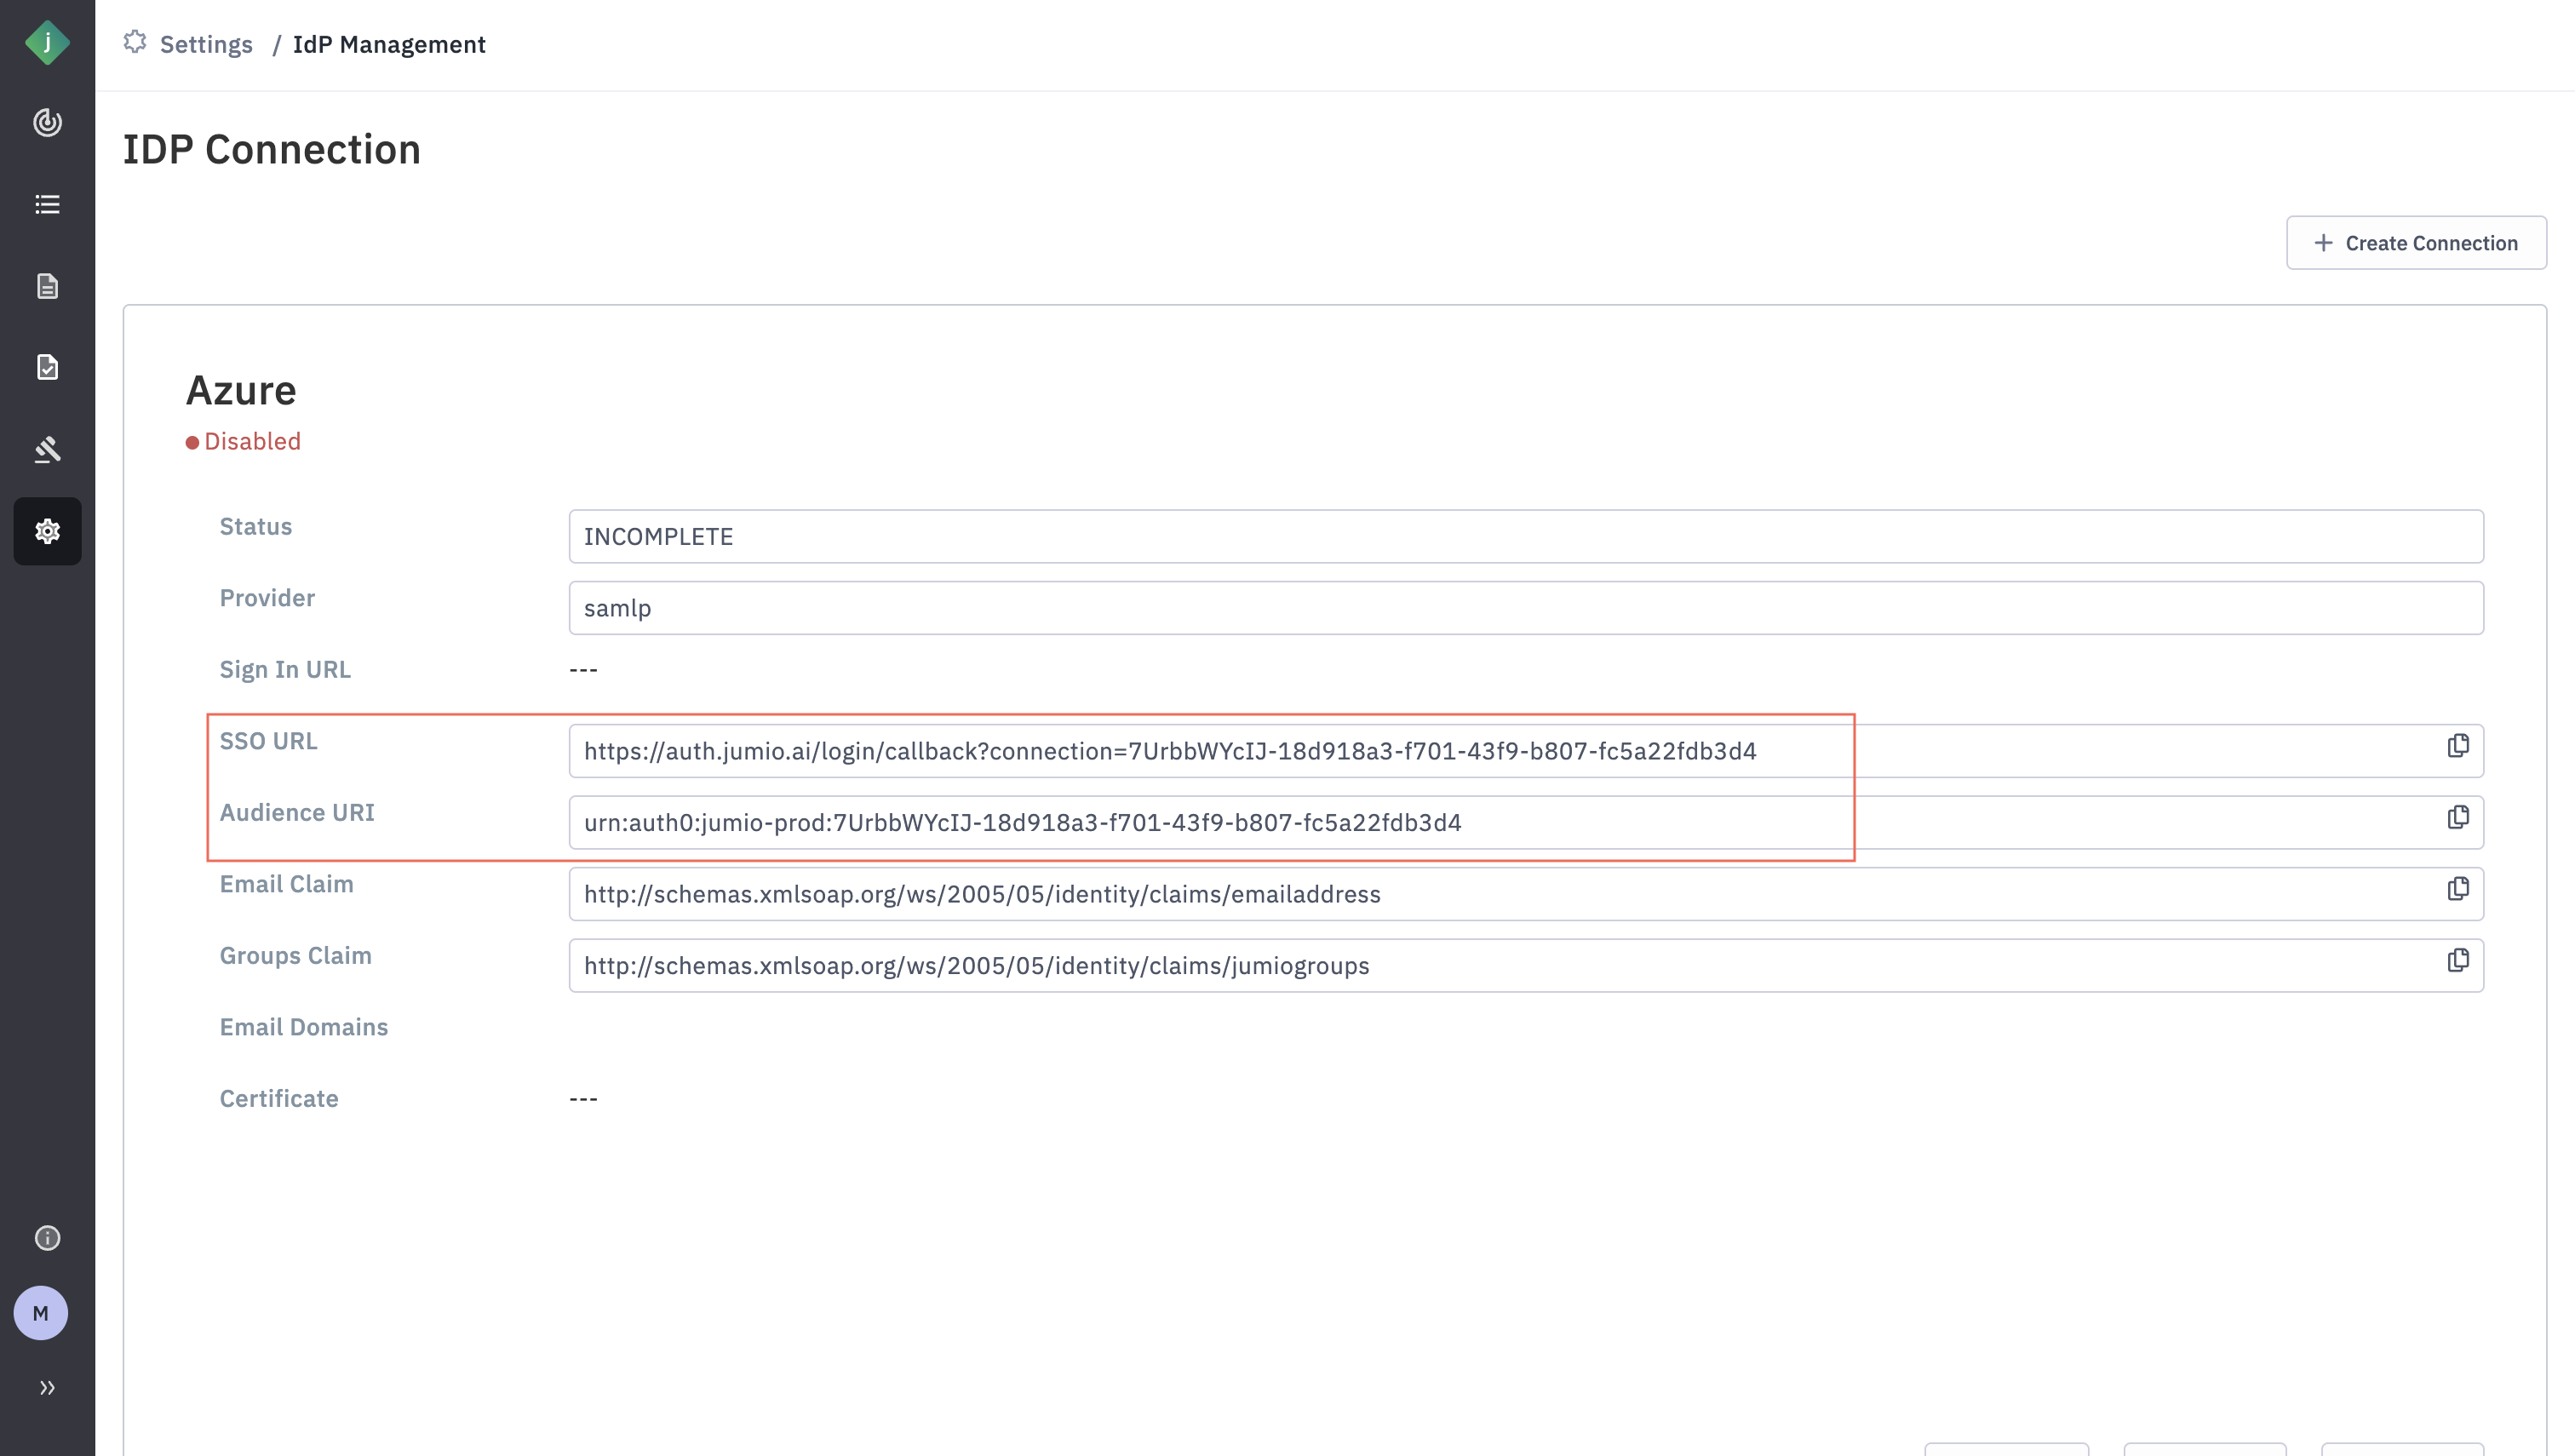
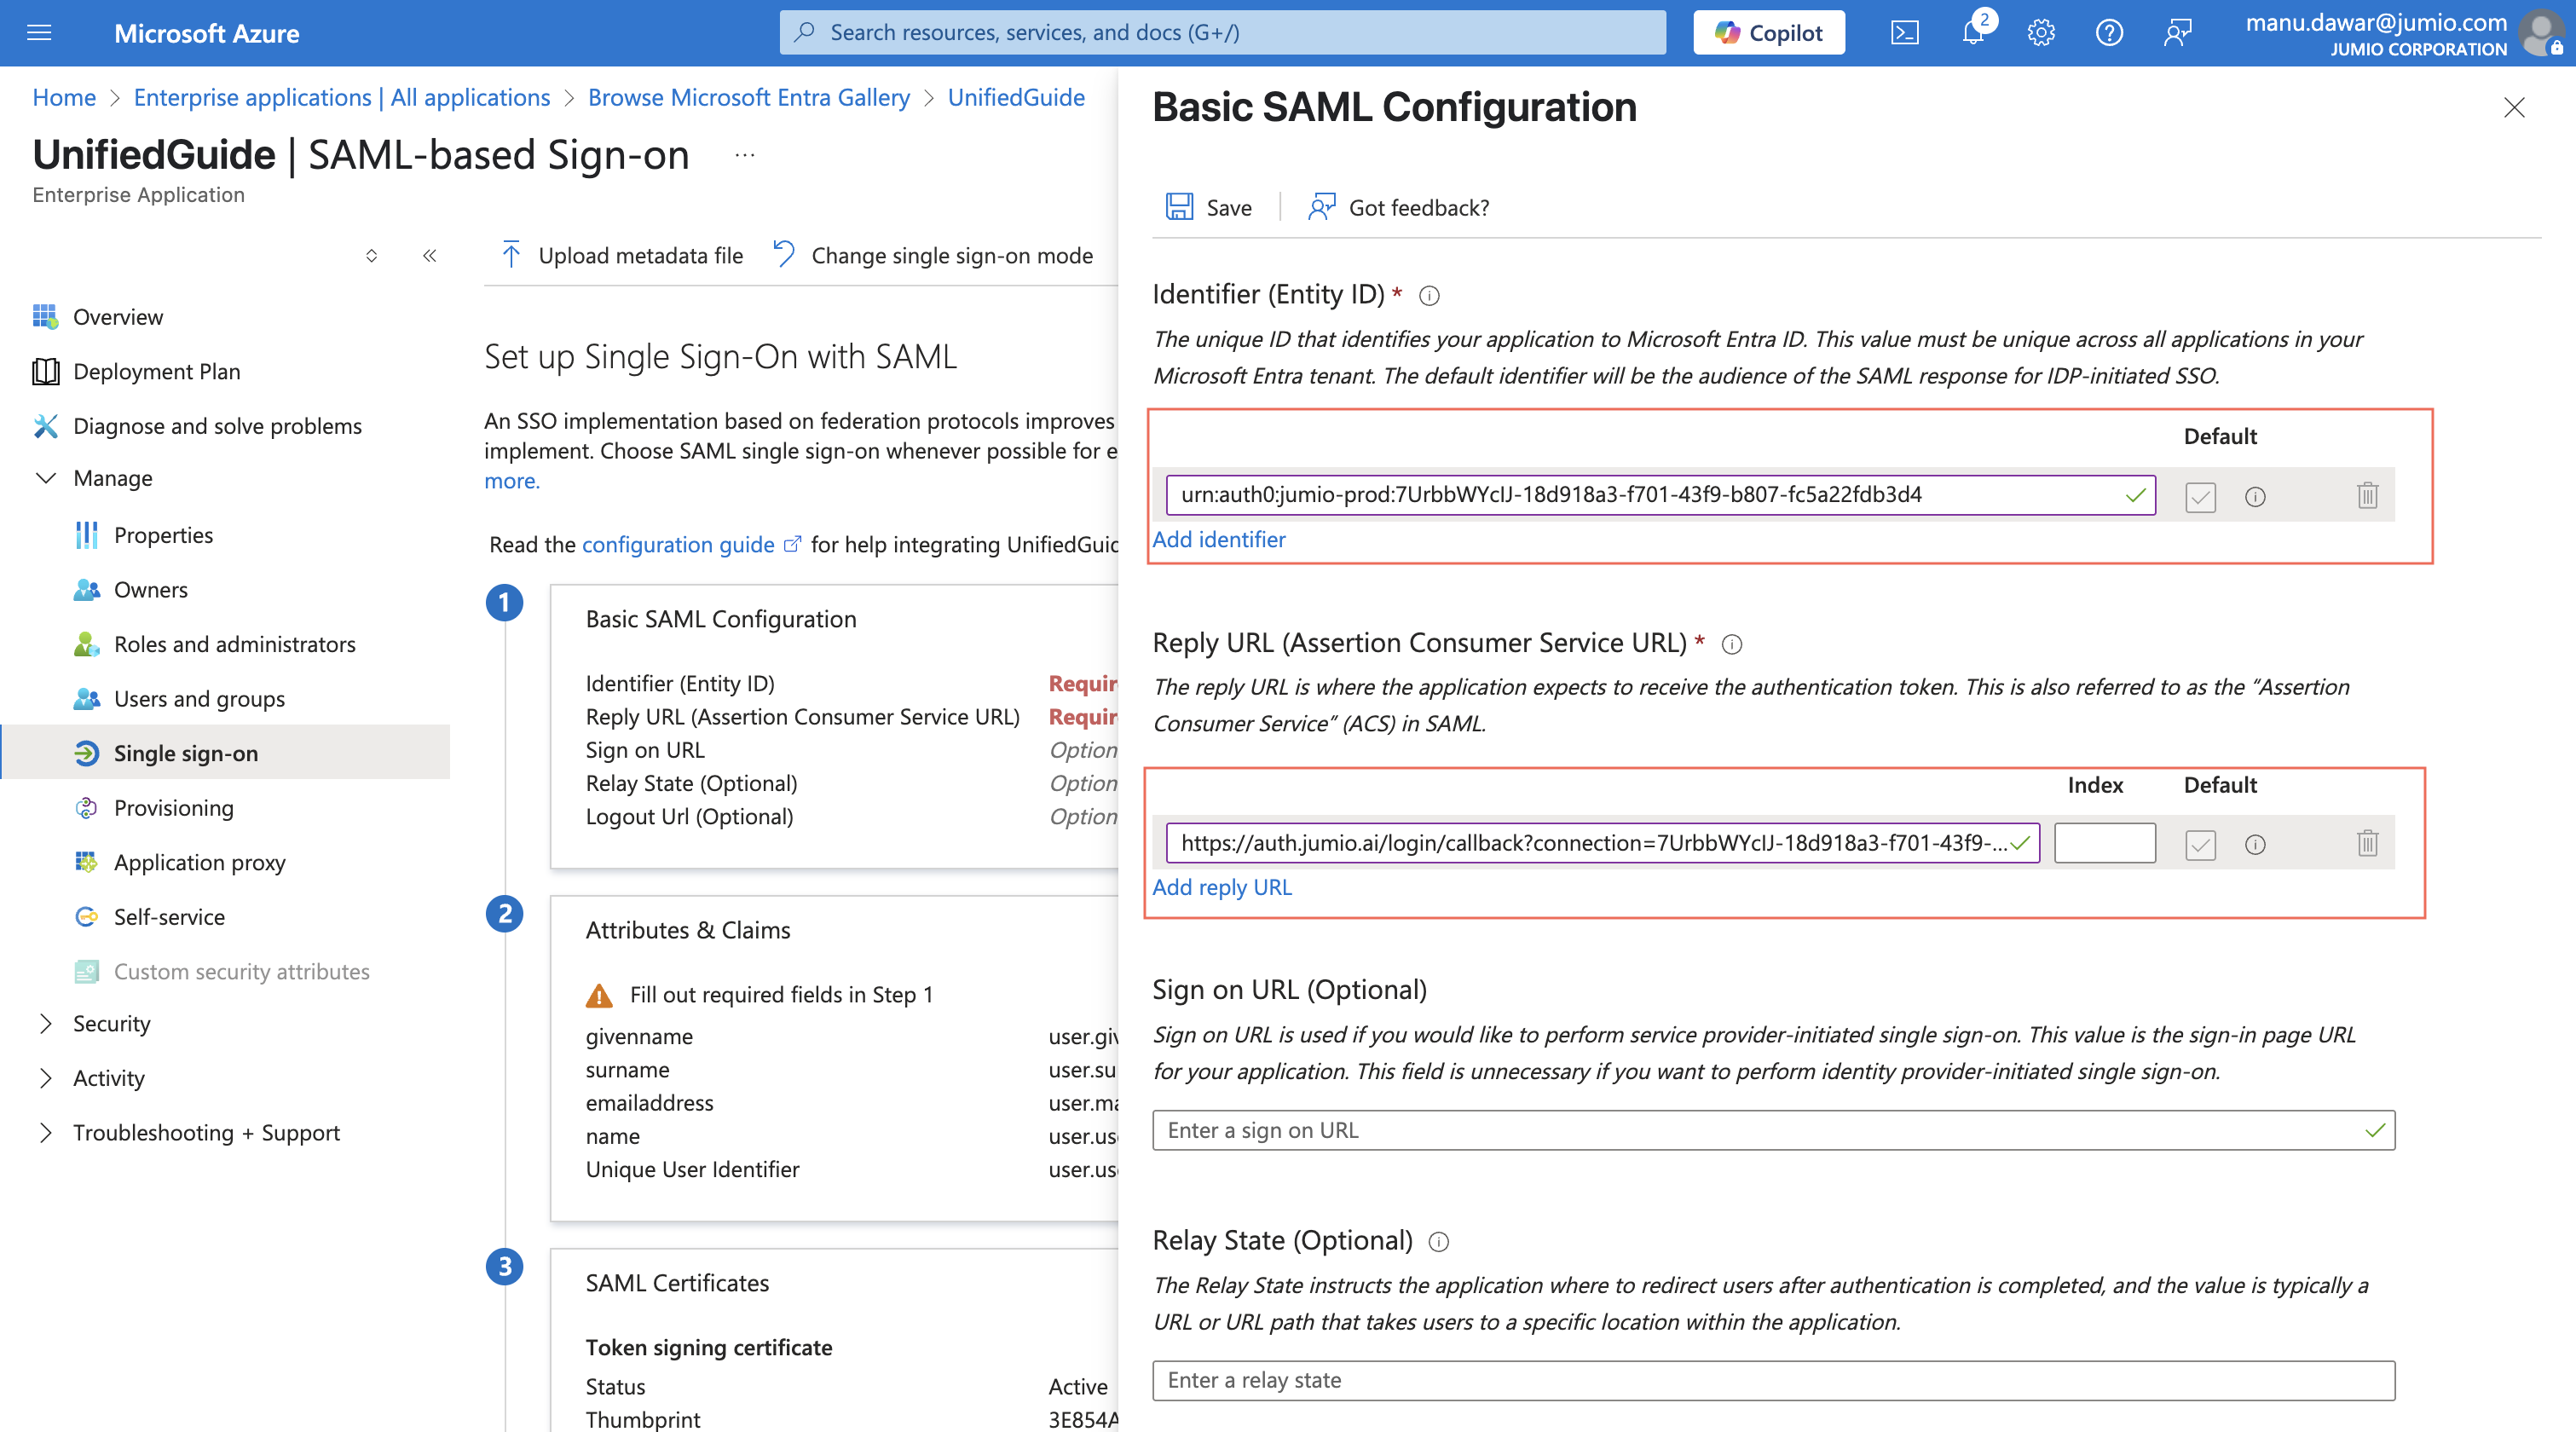
Step 10: Basic SAML configuration
Copy/paste the below attributes from Jumio Portal to Azure.
- Audience URI to Identifier
- SSO URL to Reply URL
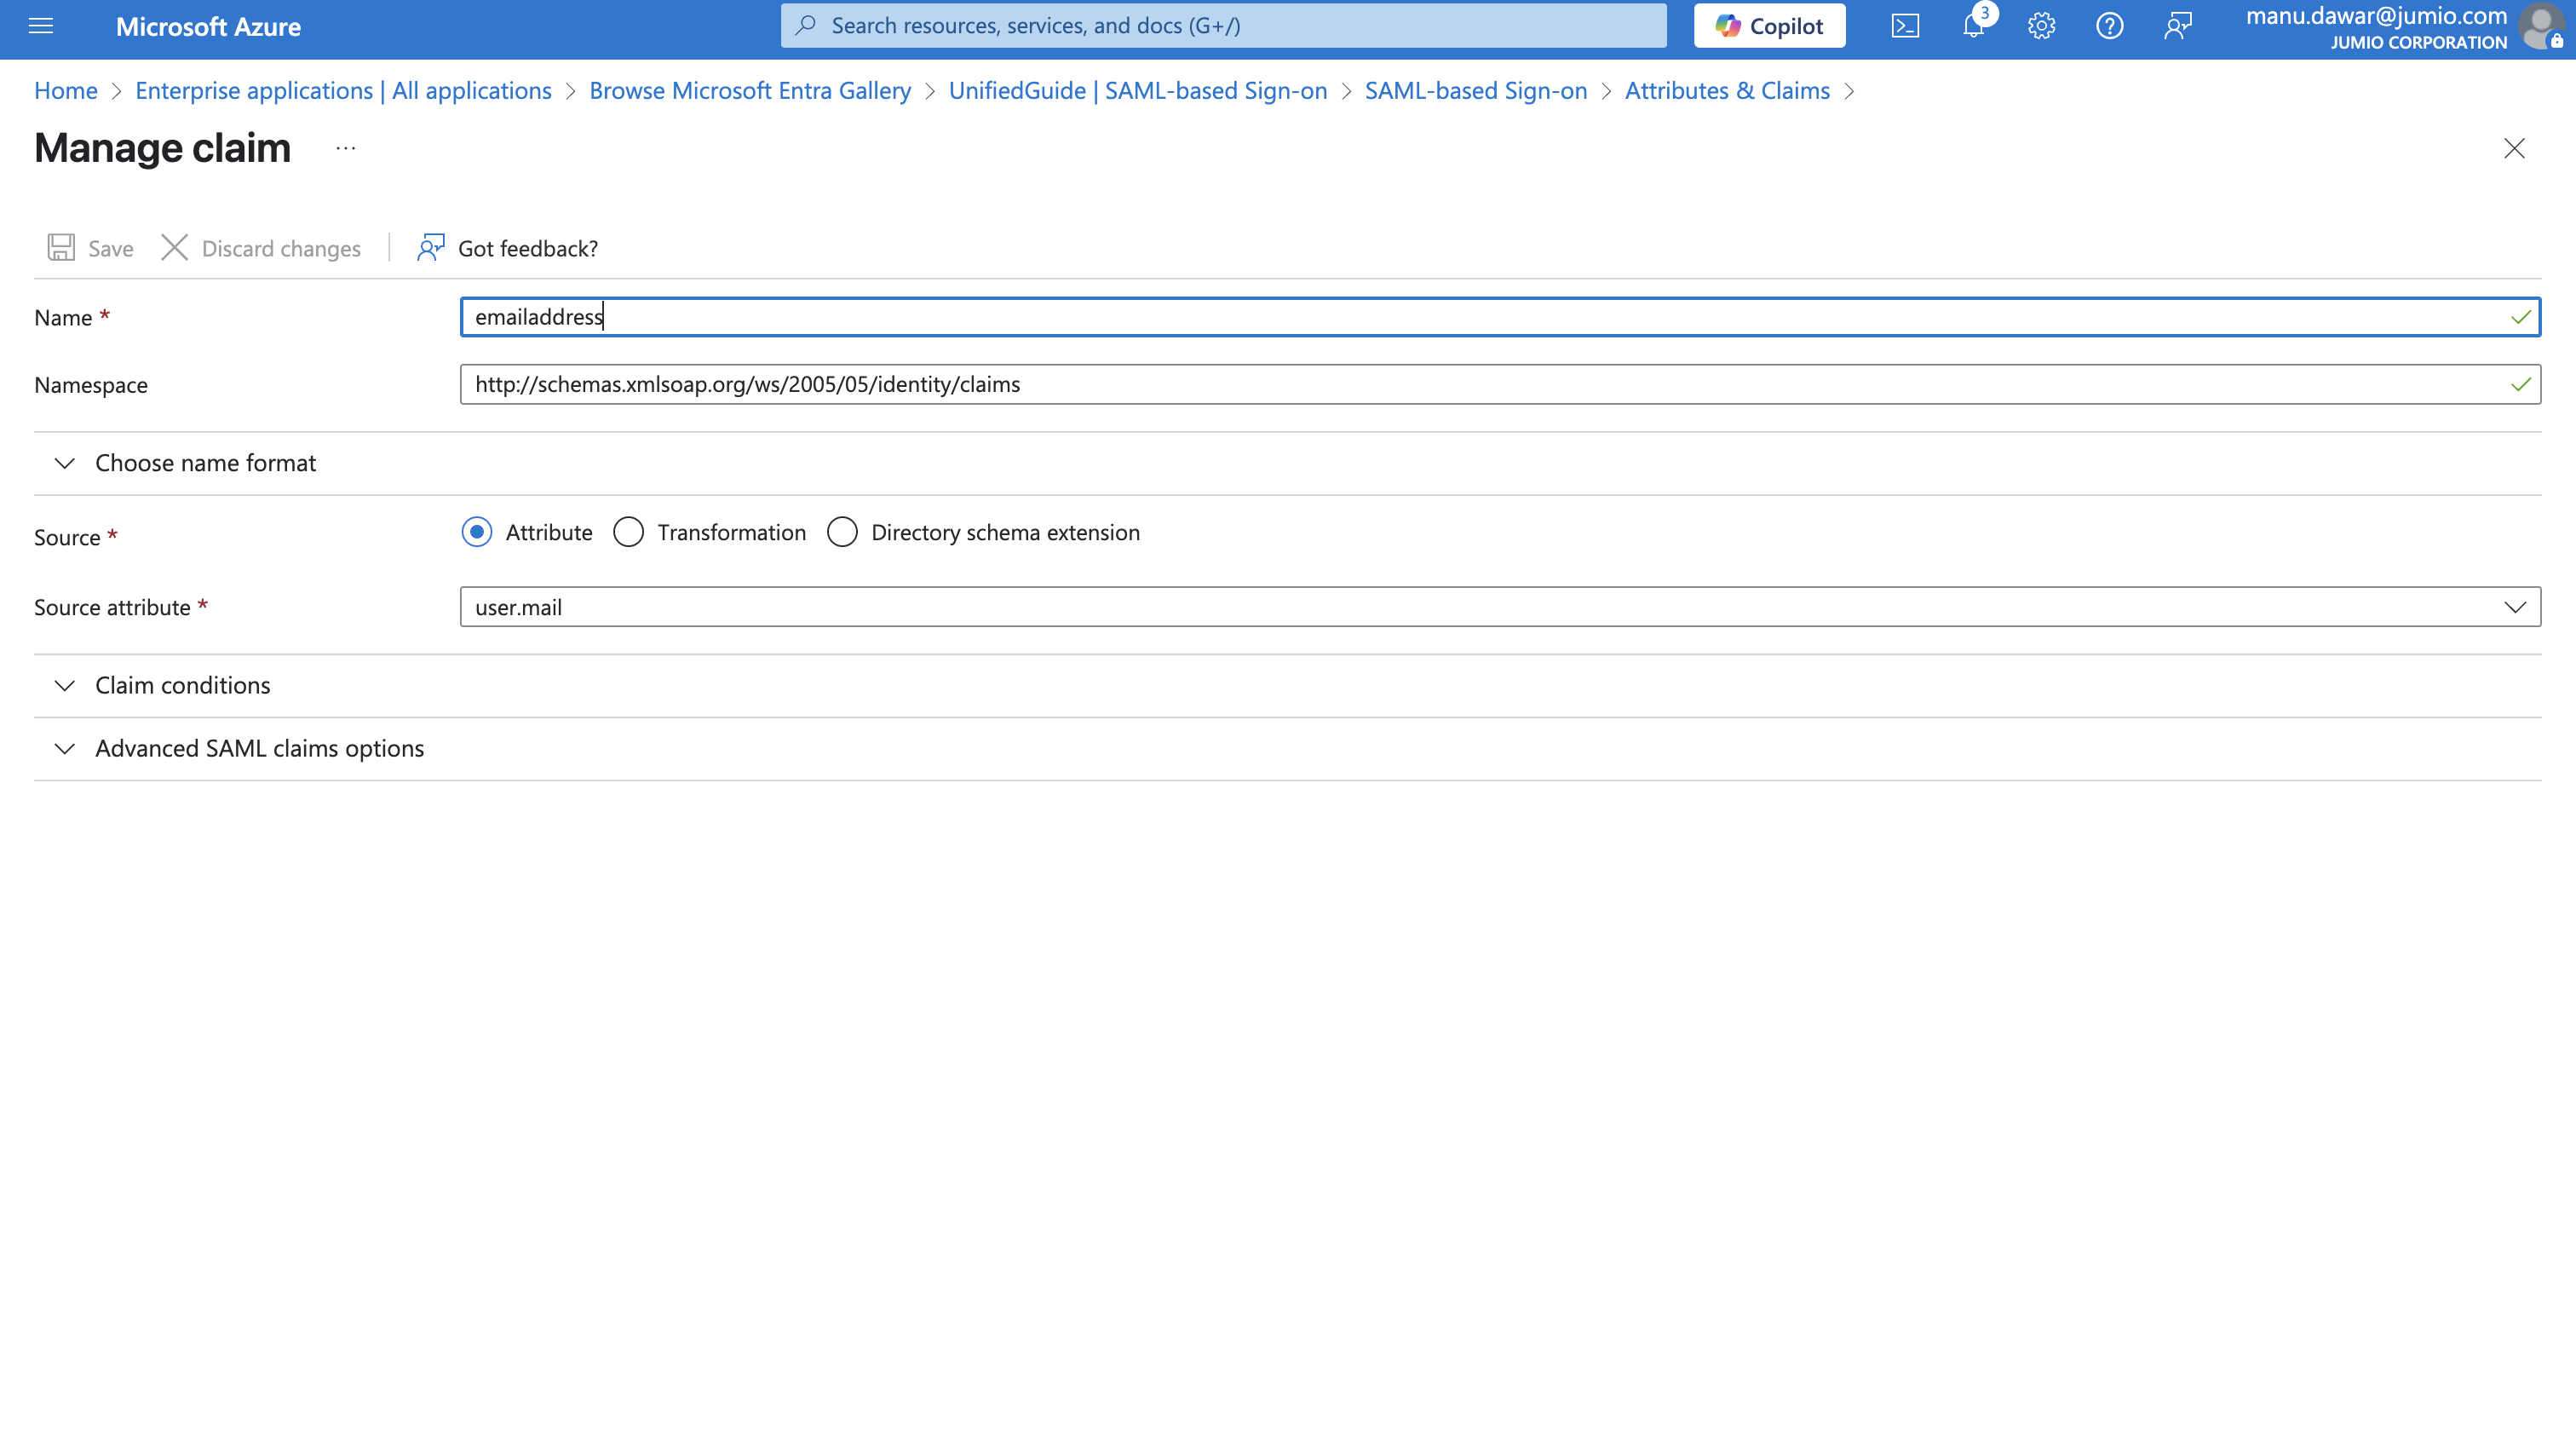
Step 11: Configuration of “emailaddress” and “jumiogroups” attribute
There are two mandatory fields to send to Jumio Customer Portal through SAML 2.0 transaction during Single Sign On Process in order to be authenticated with the corresponding group assigned to the user.
 The “emailaddress” field already exists in Azure AD User Directory as an attribute.
Besides, the “jumiogroups” field does not exist. One will need to create a new claim for “jumiogroups”.
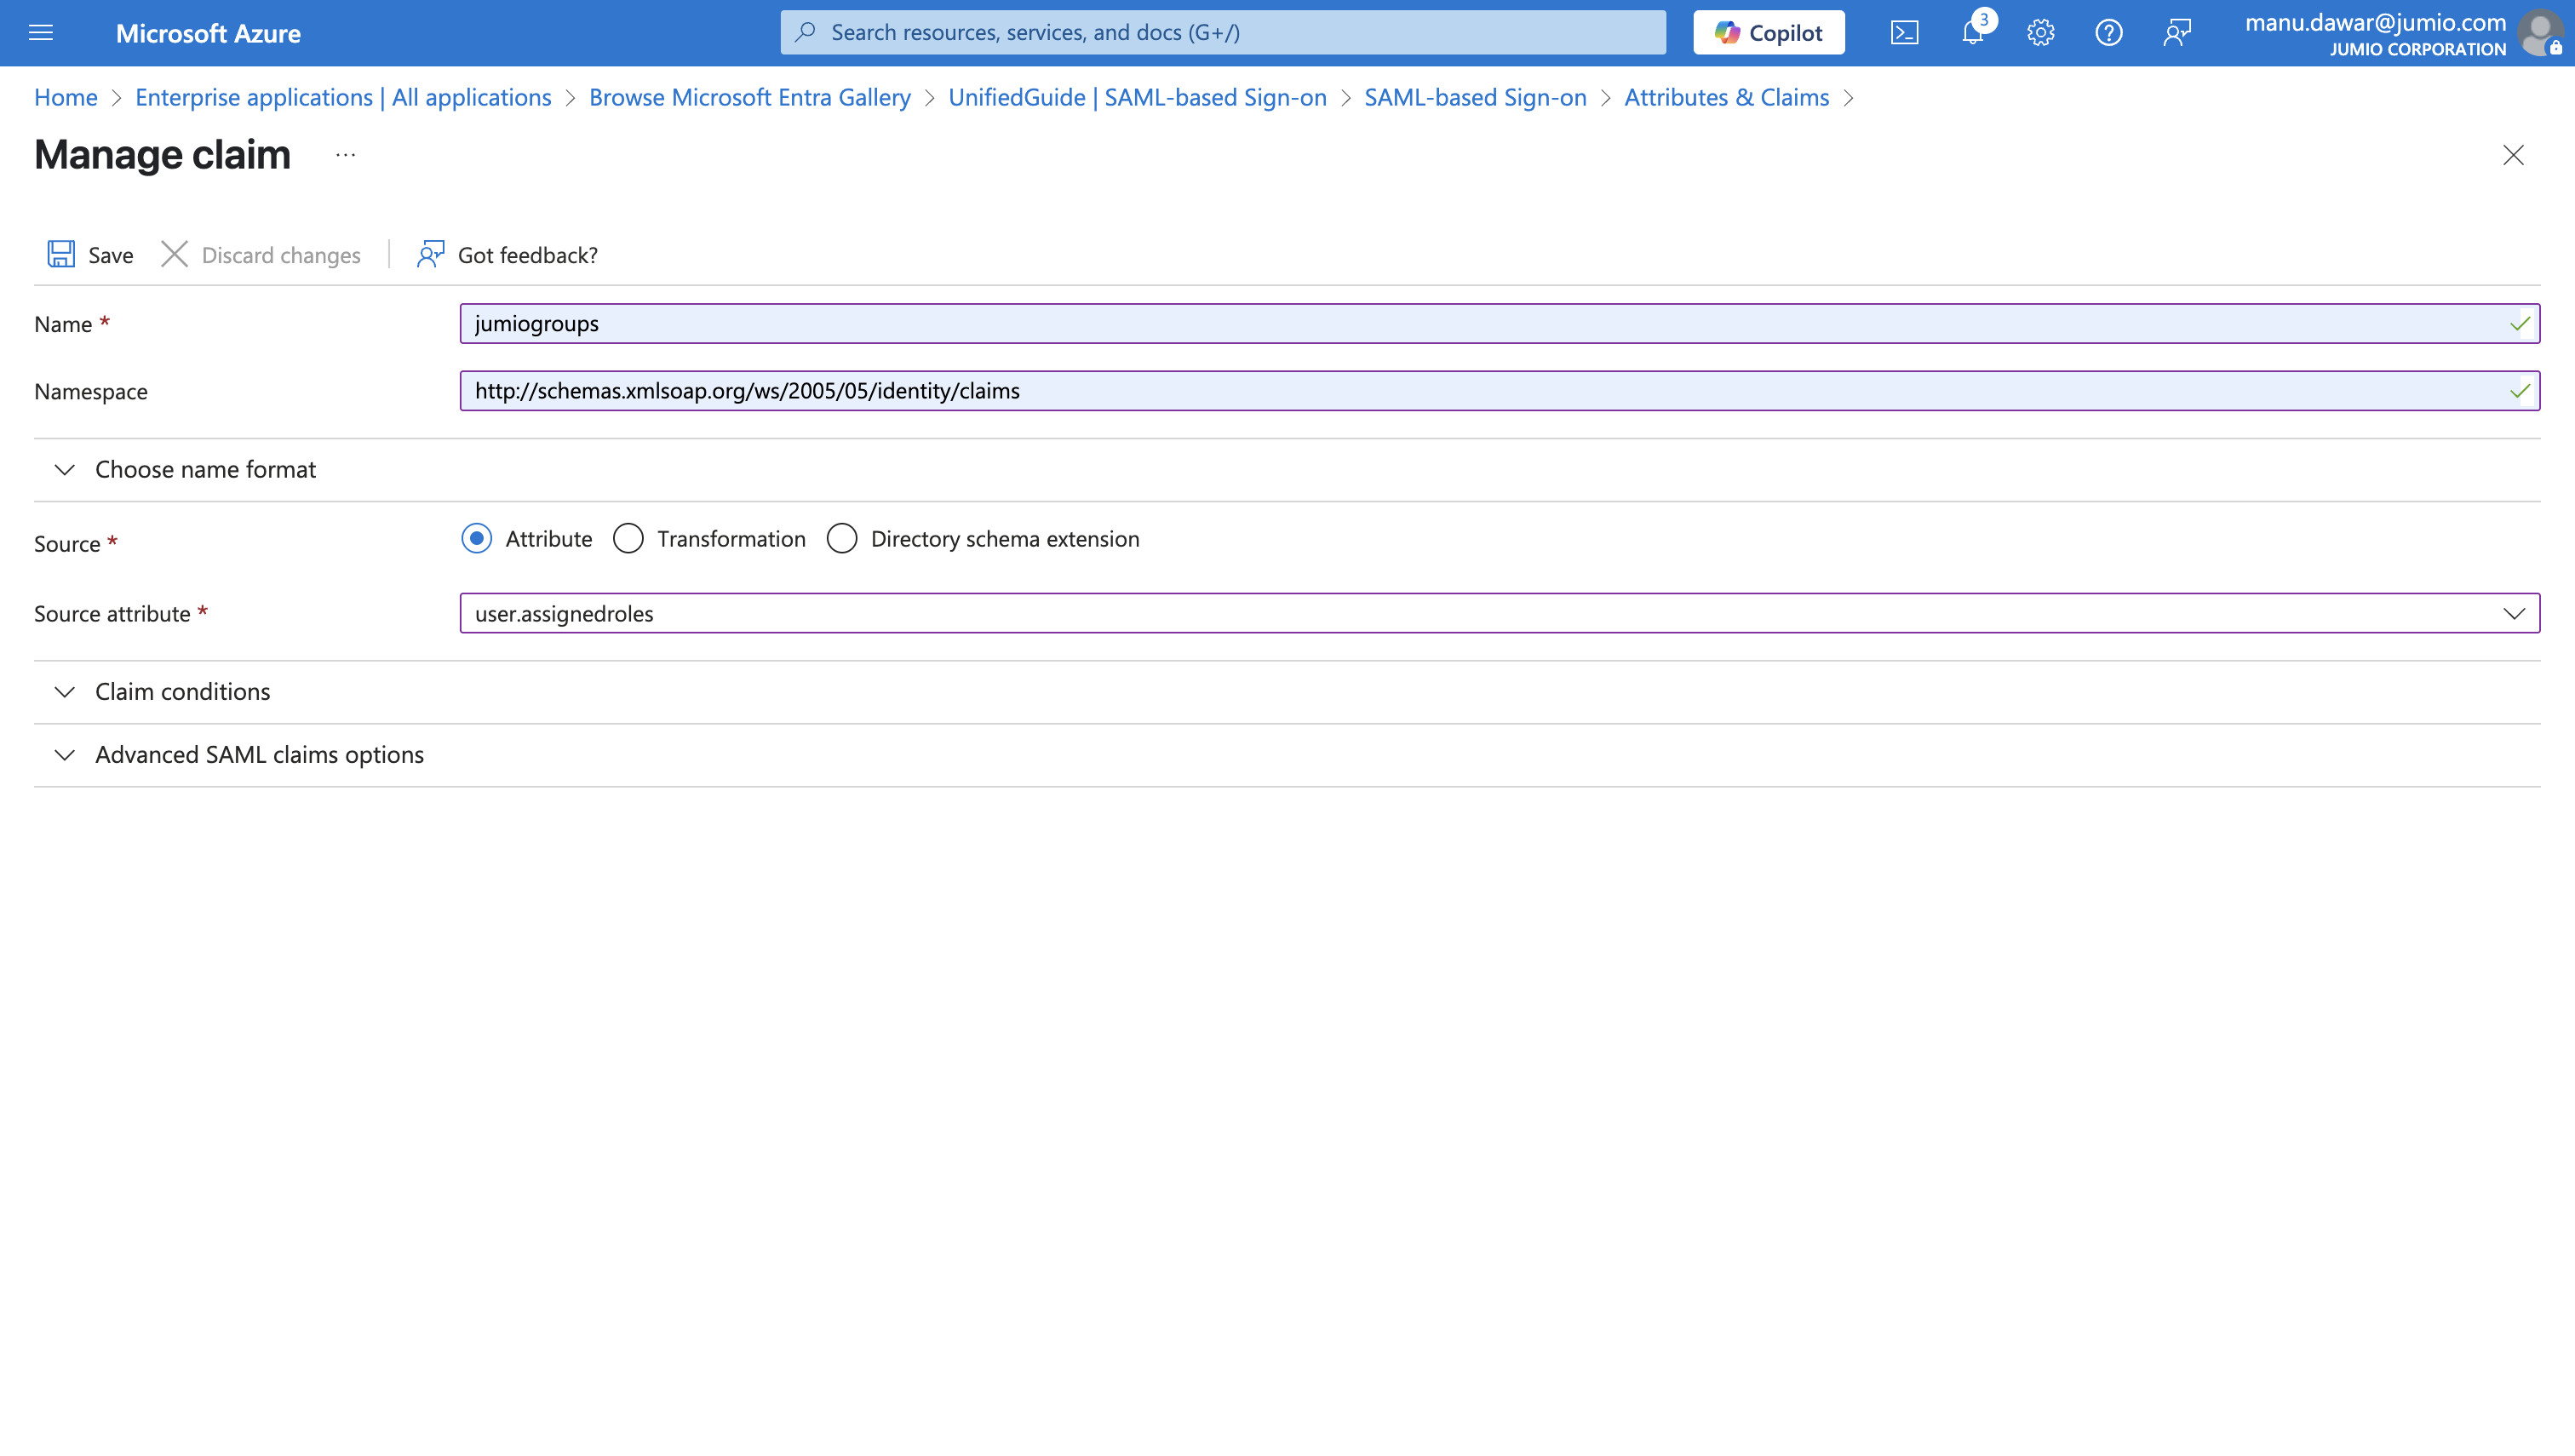
(Step 15 will cover the configuration of new application roles)
Step 12: Export SAML Certificate from Azure Configuration
Download the Base 64 certificate.

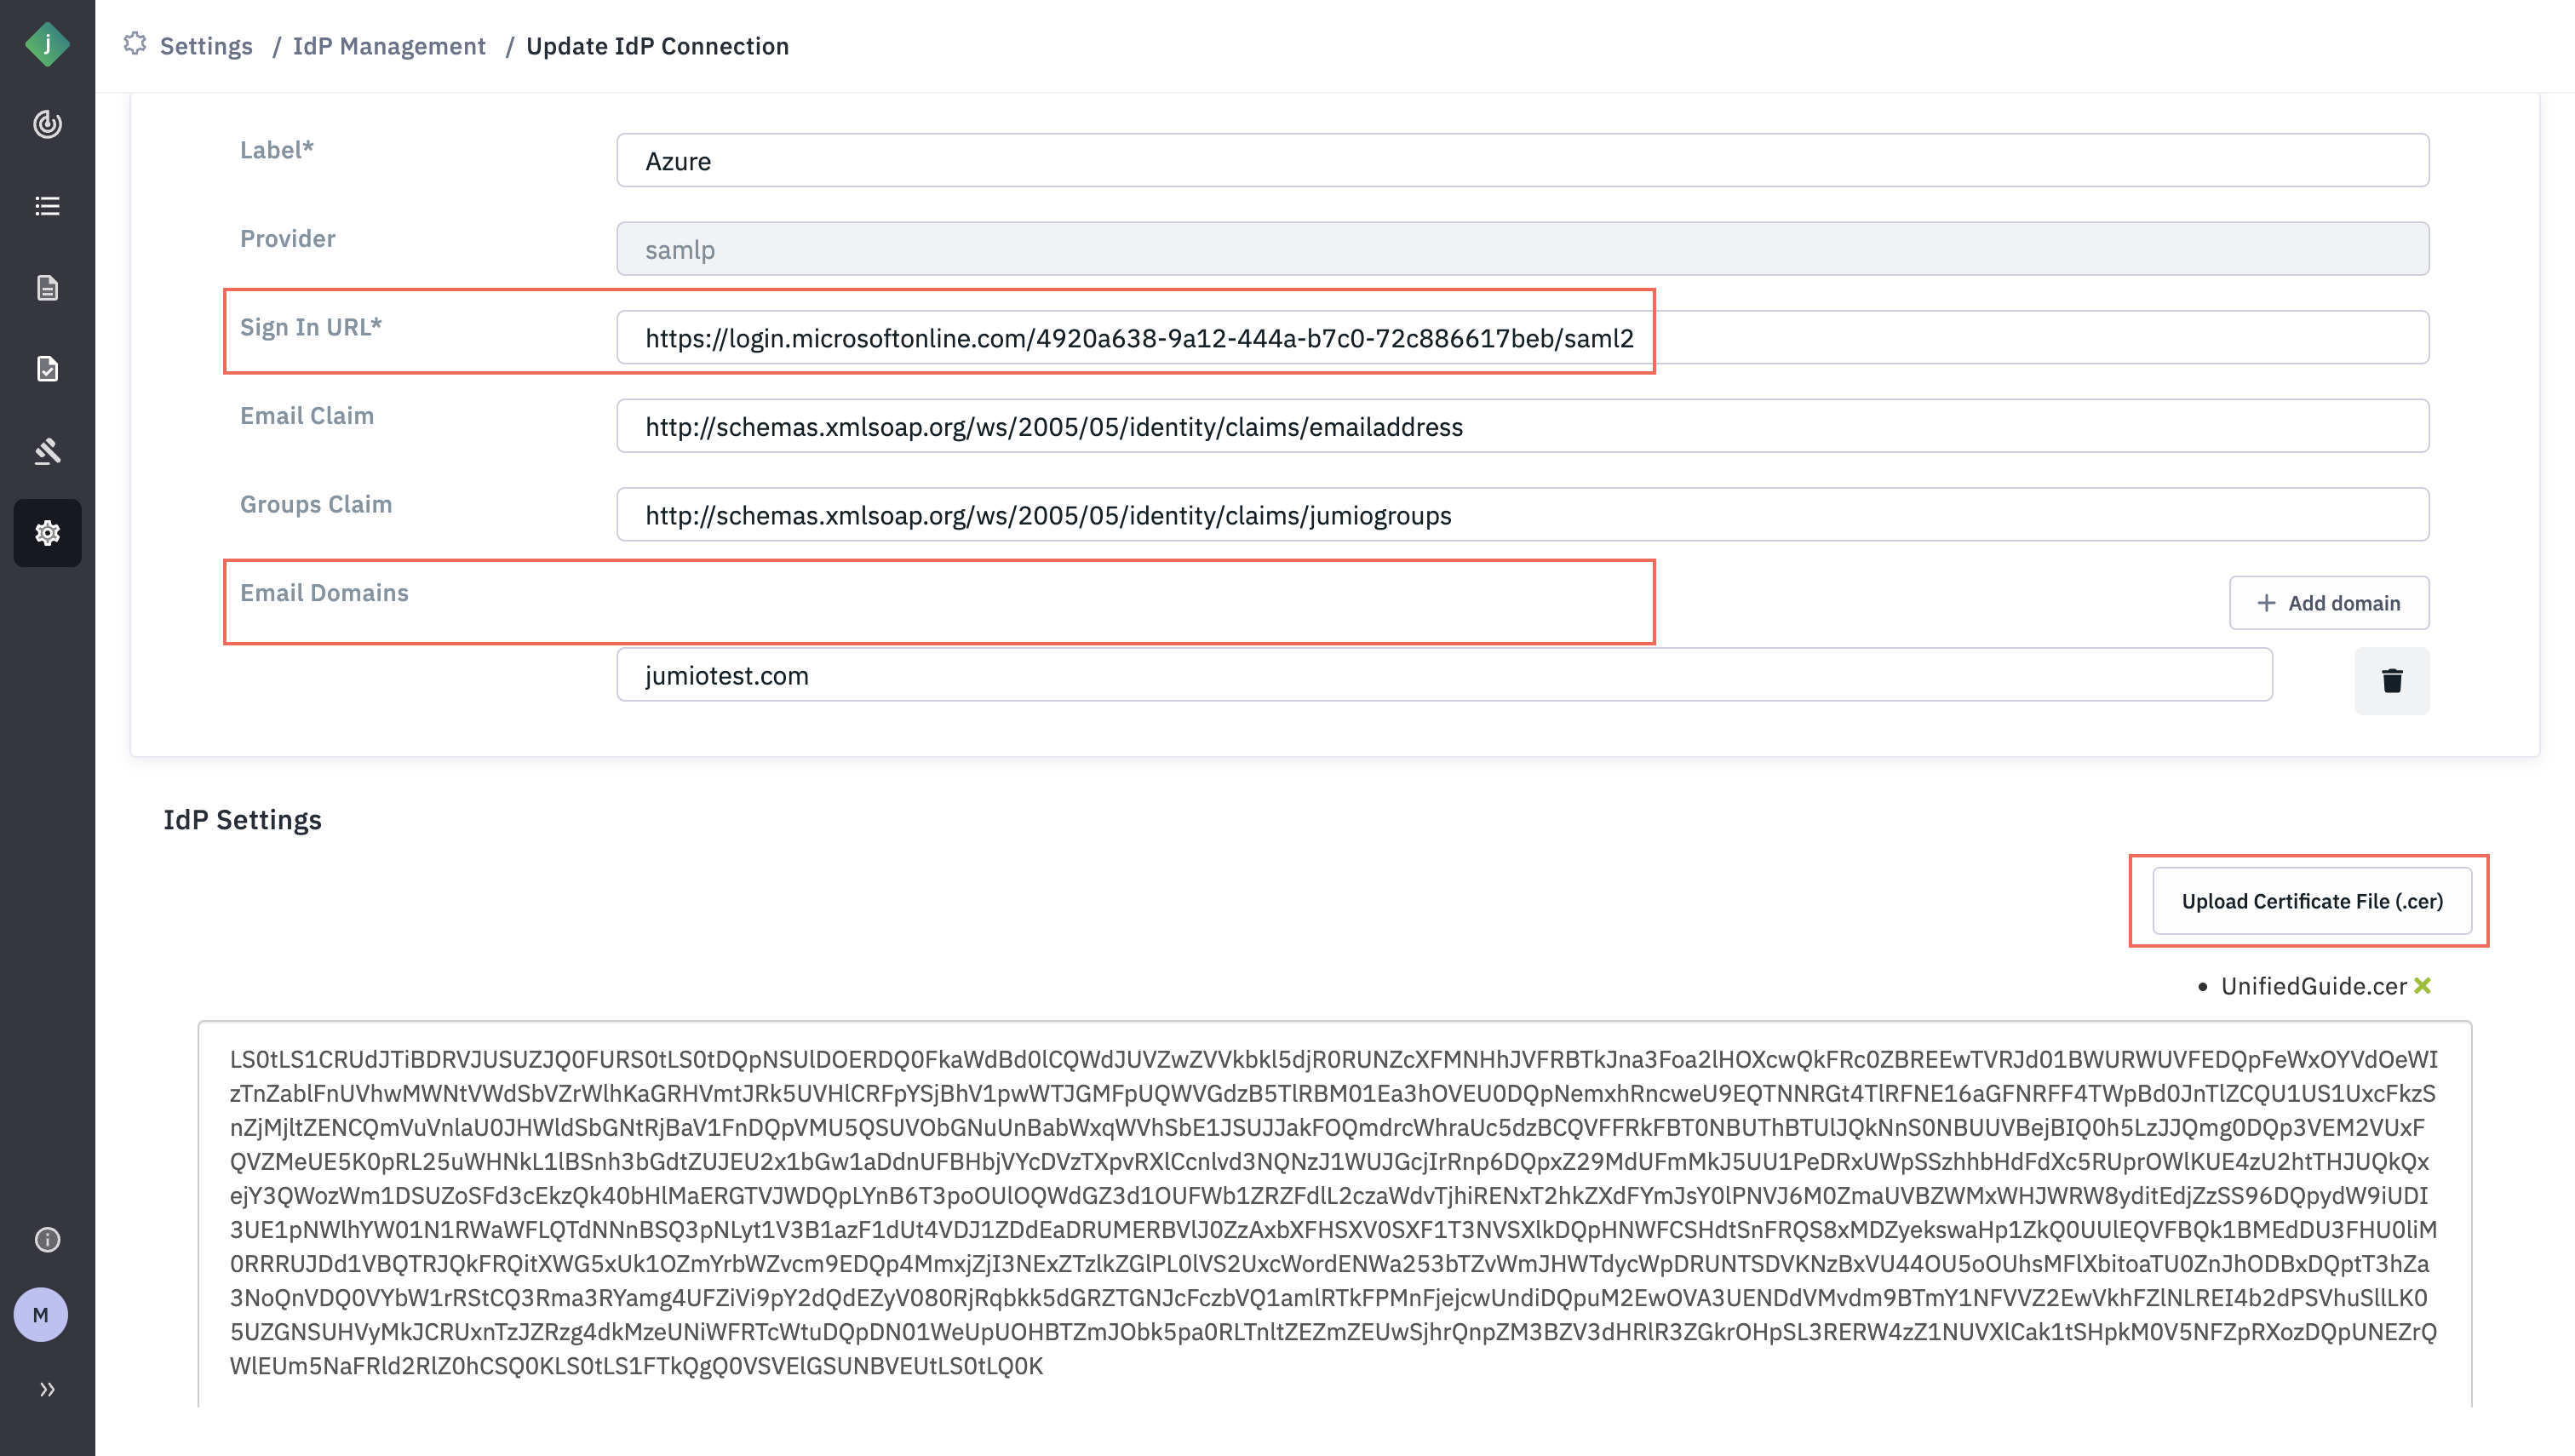
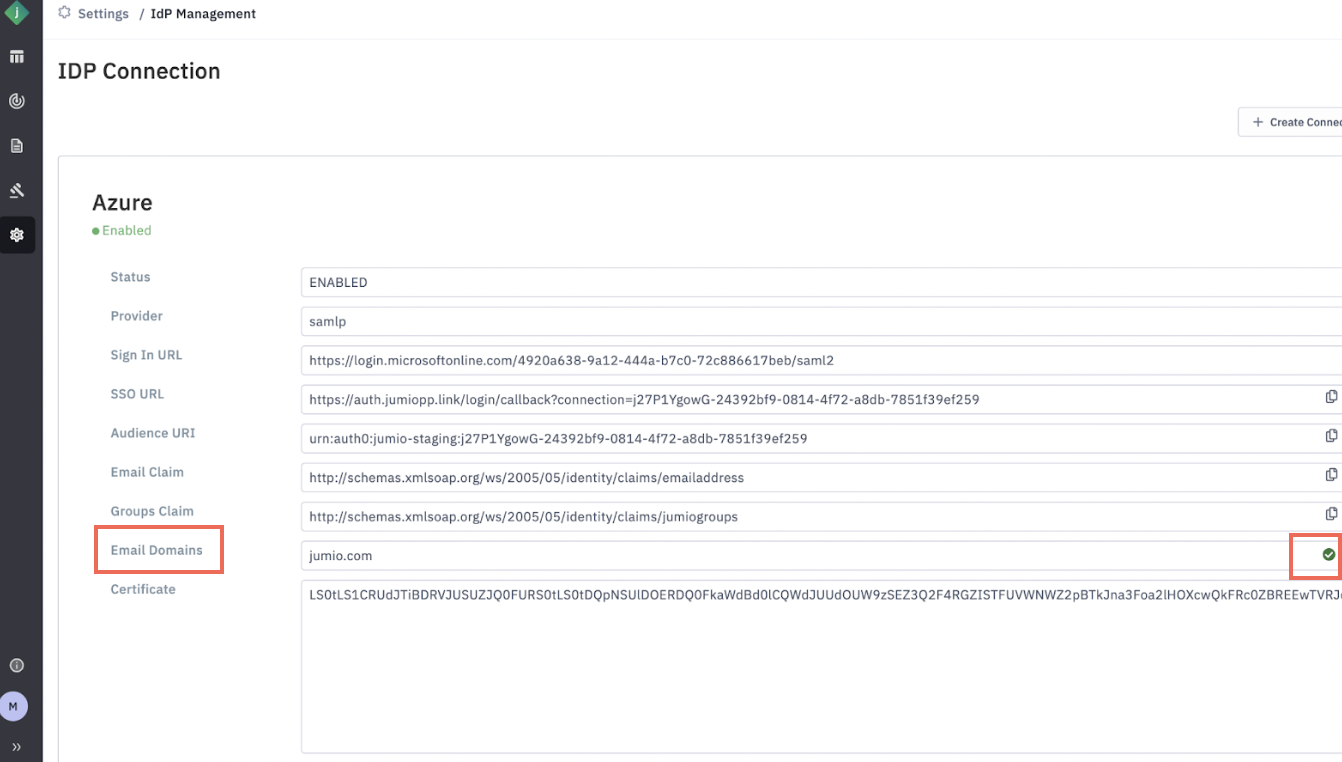
Step 13: Go to Jumio Portal and update the below parameters,
- Login URL (From Azure) to Sign In URL
- Upload the certificate (downloaded in the previous step)
- Email domain: the domain names of the email addresses of the user. For instance: for if airbnb has employee email address as airbnb.com, the email domain will be airbnb.com
Step 14: Click Submit.
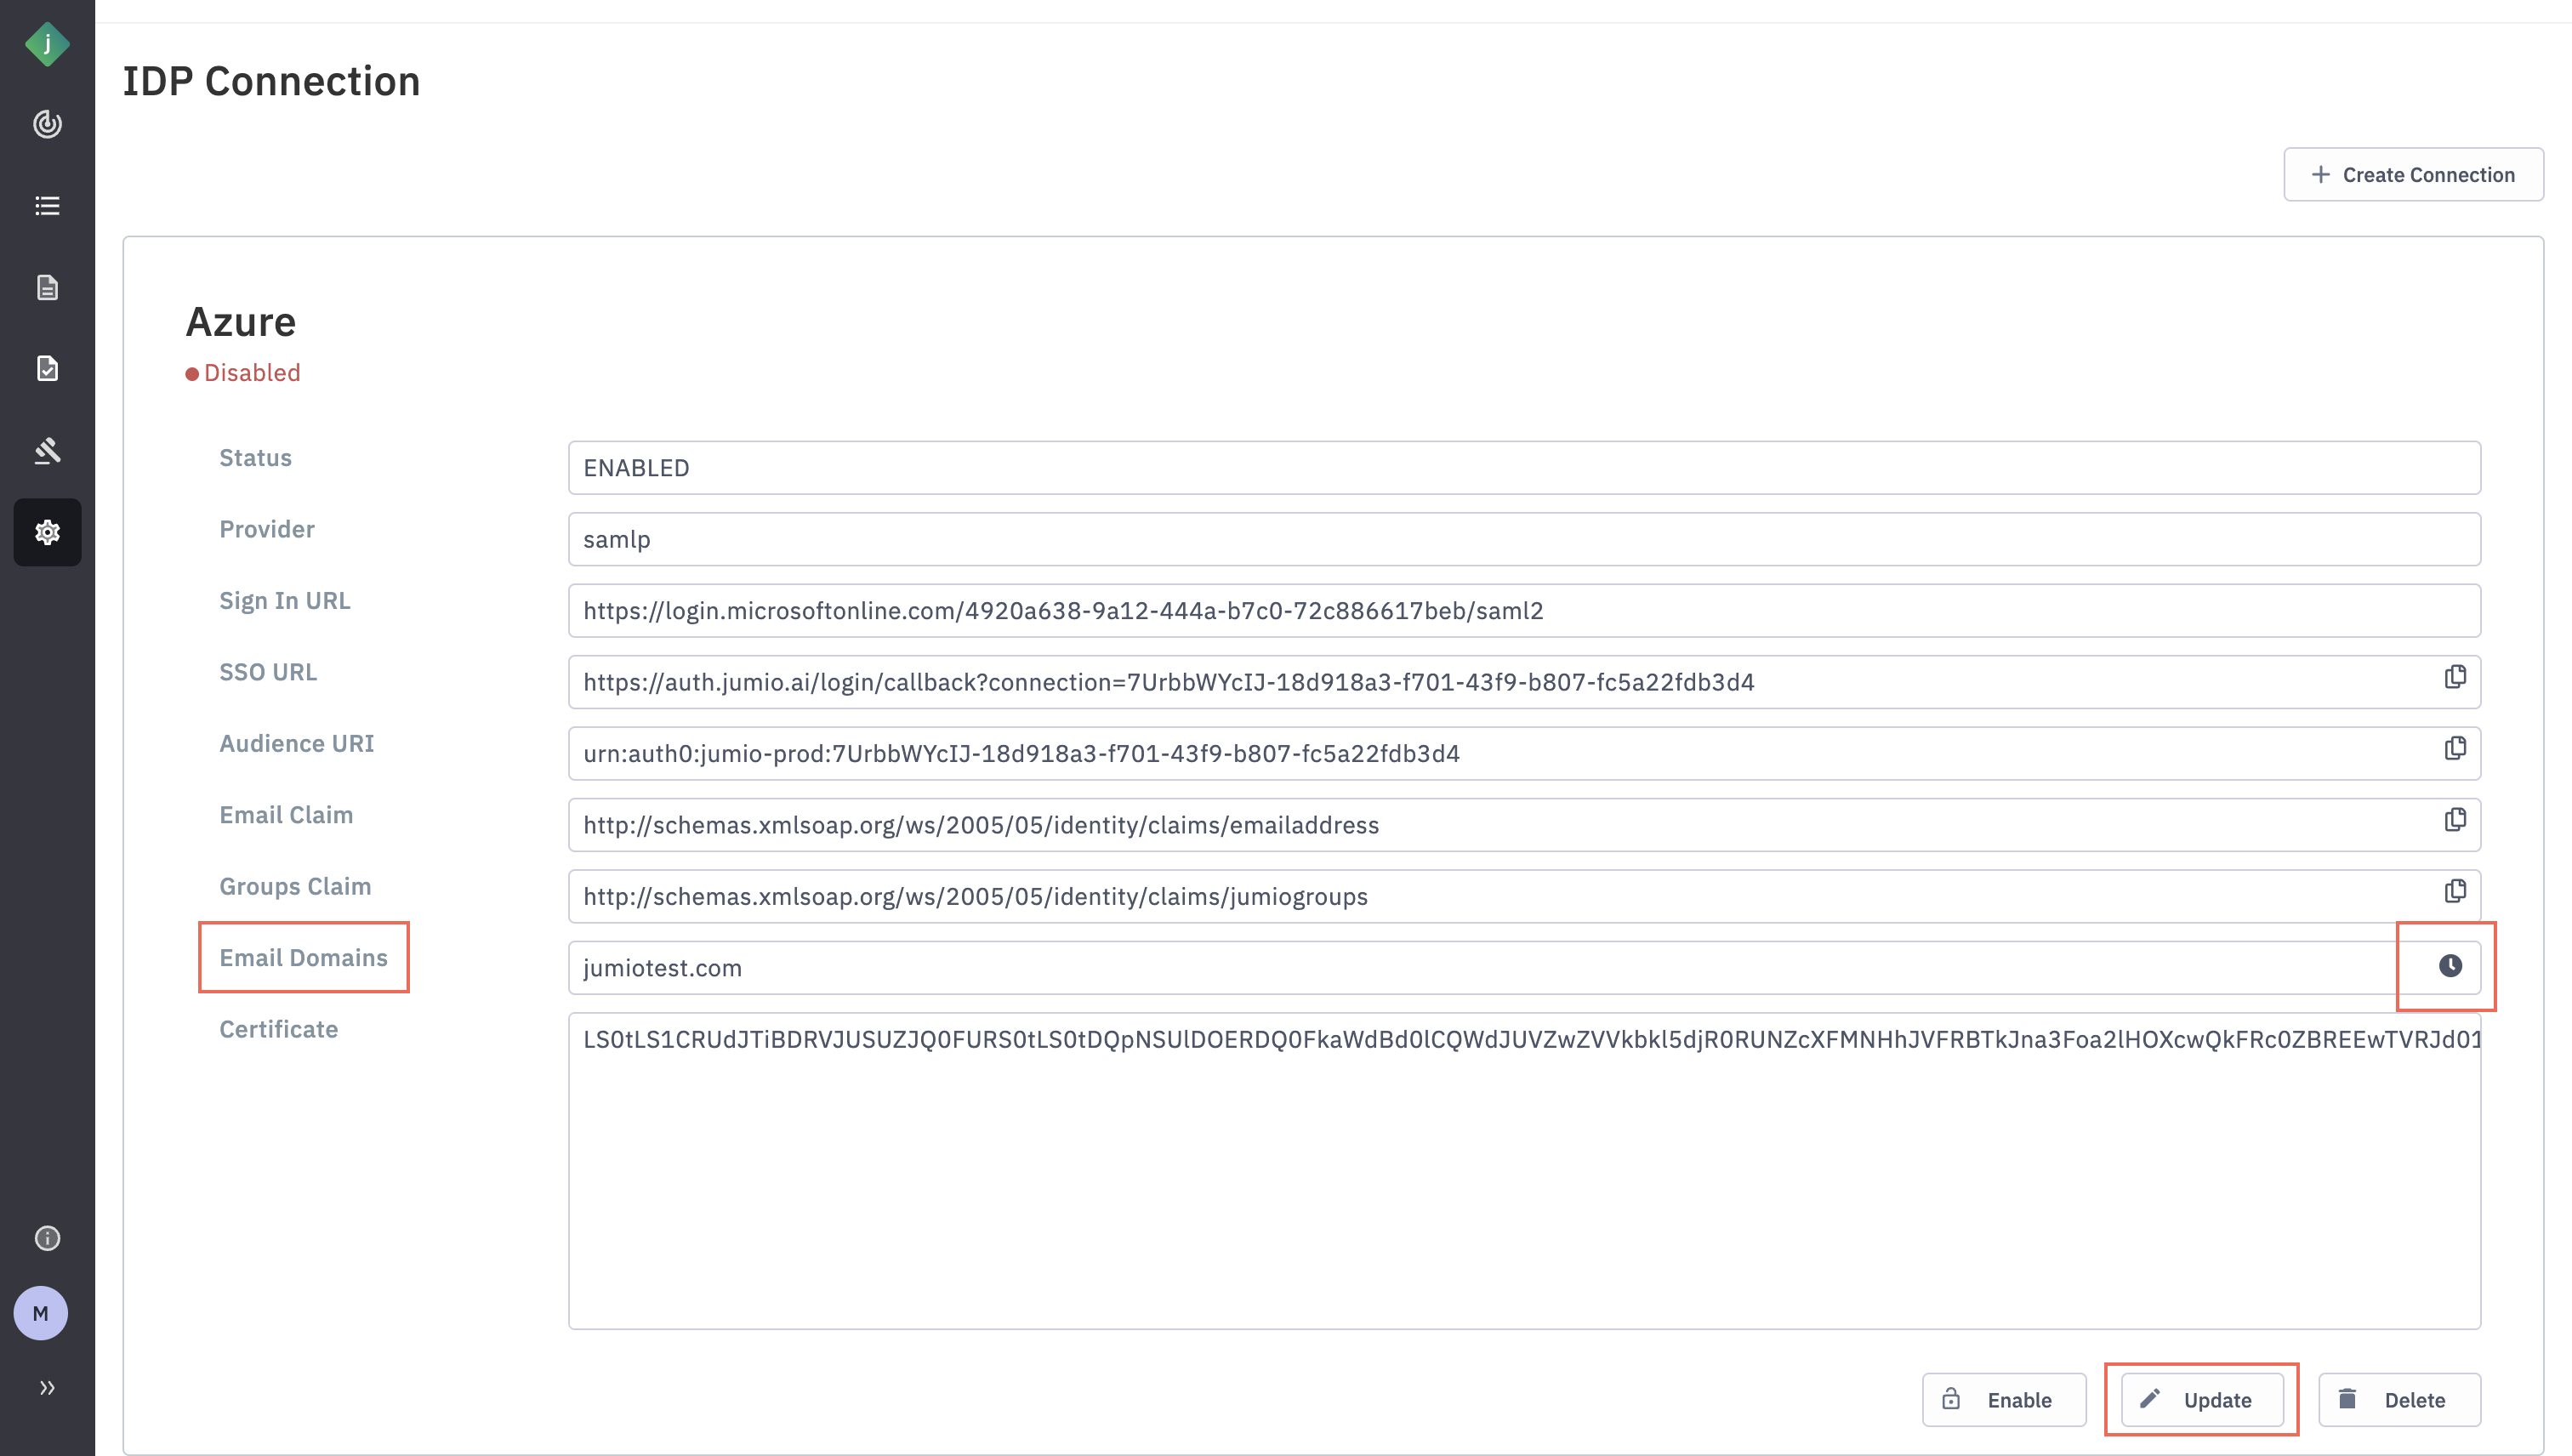
Step 15: You will see that an icon pending will be displayed against the Email Domain.
Step 16: After clicking “Update”, you will see a message next to the email domain indicating a DNS challenge.
You’ll need to add the provided string as a DNS record for the corresponding email domain. This DNS challenge is used to verify that your organization owns the specified domain.
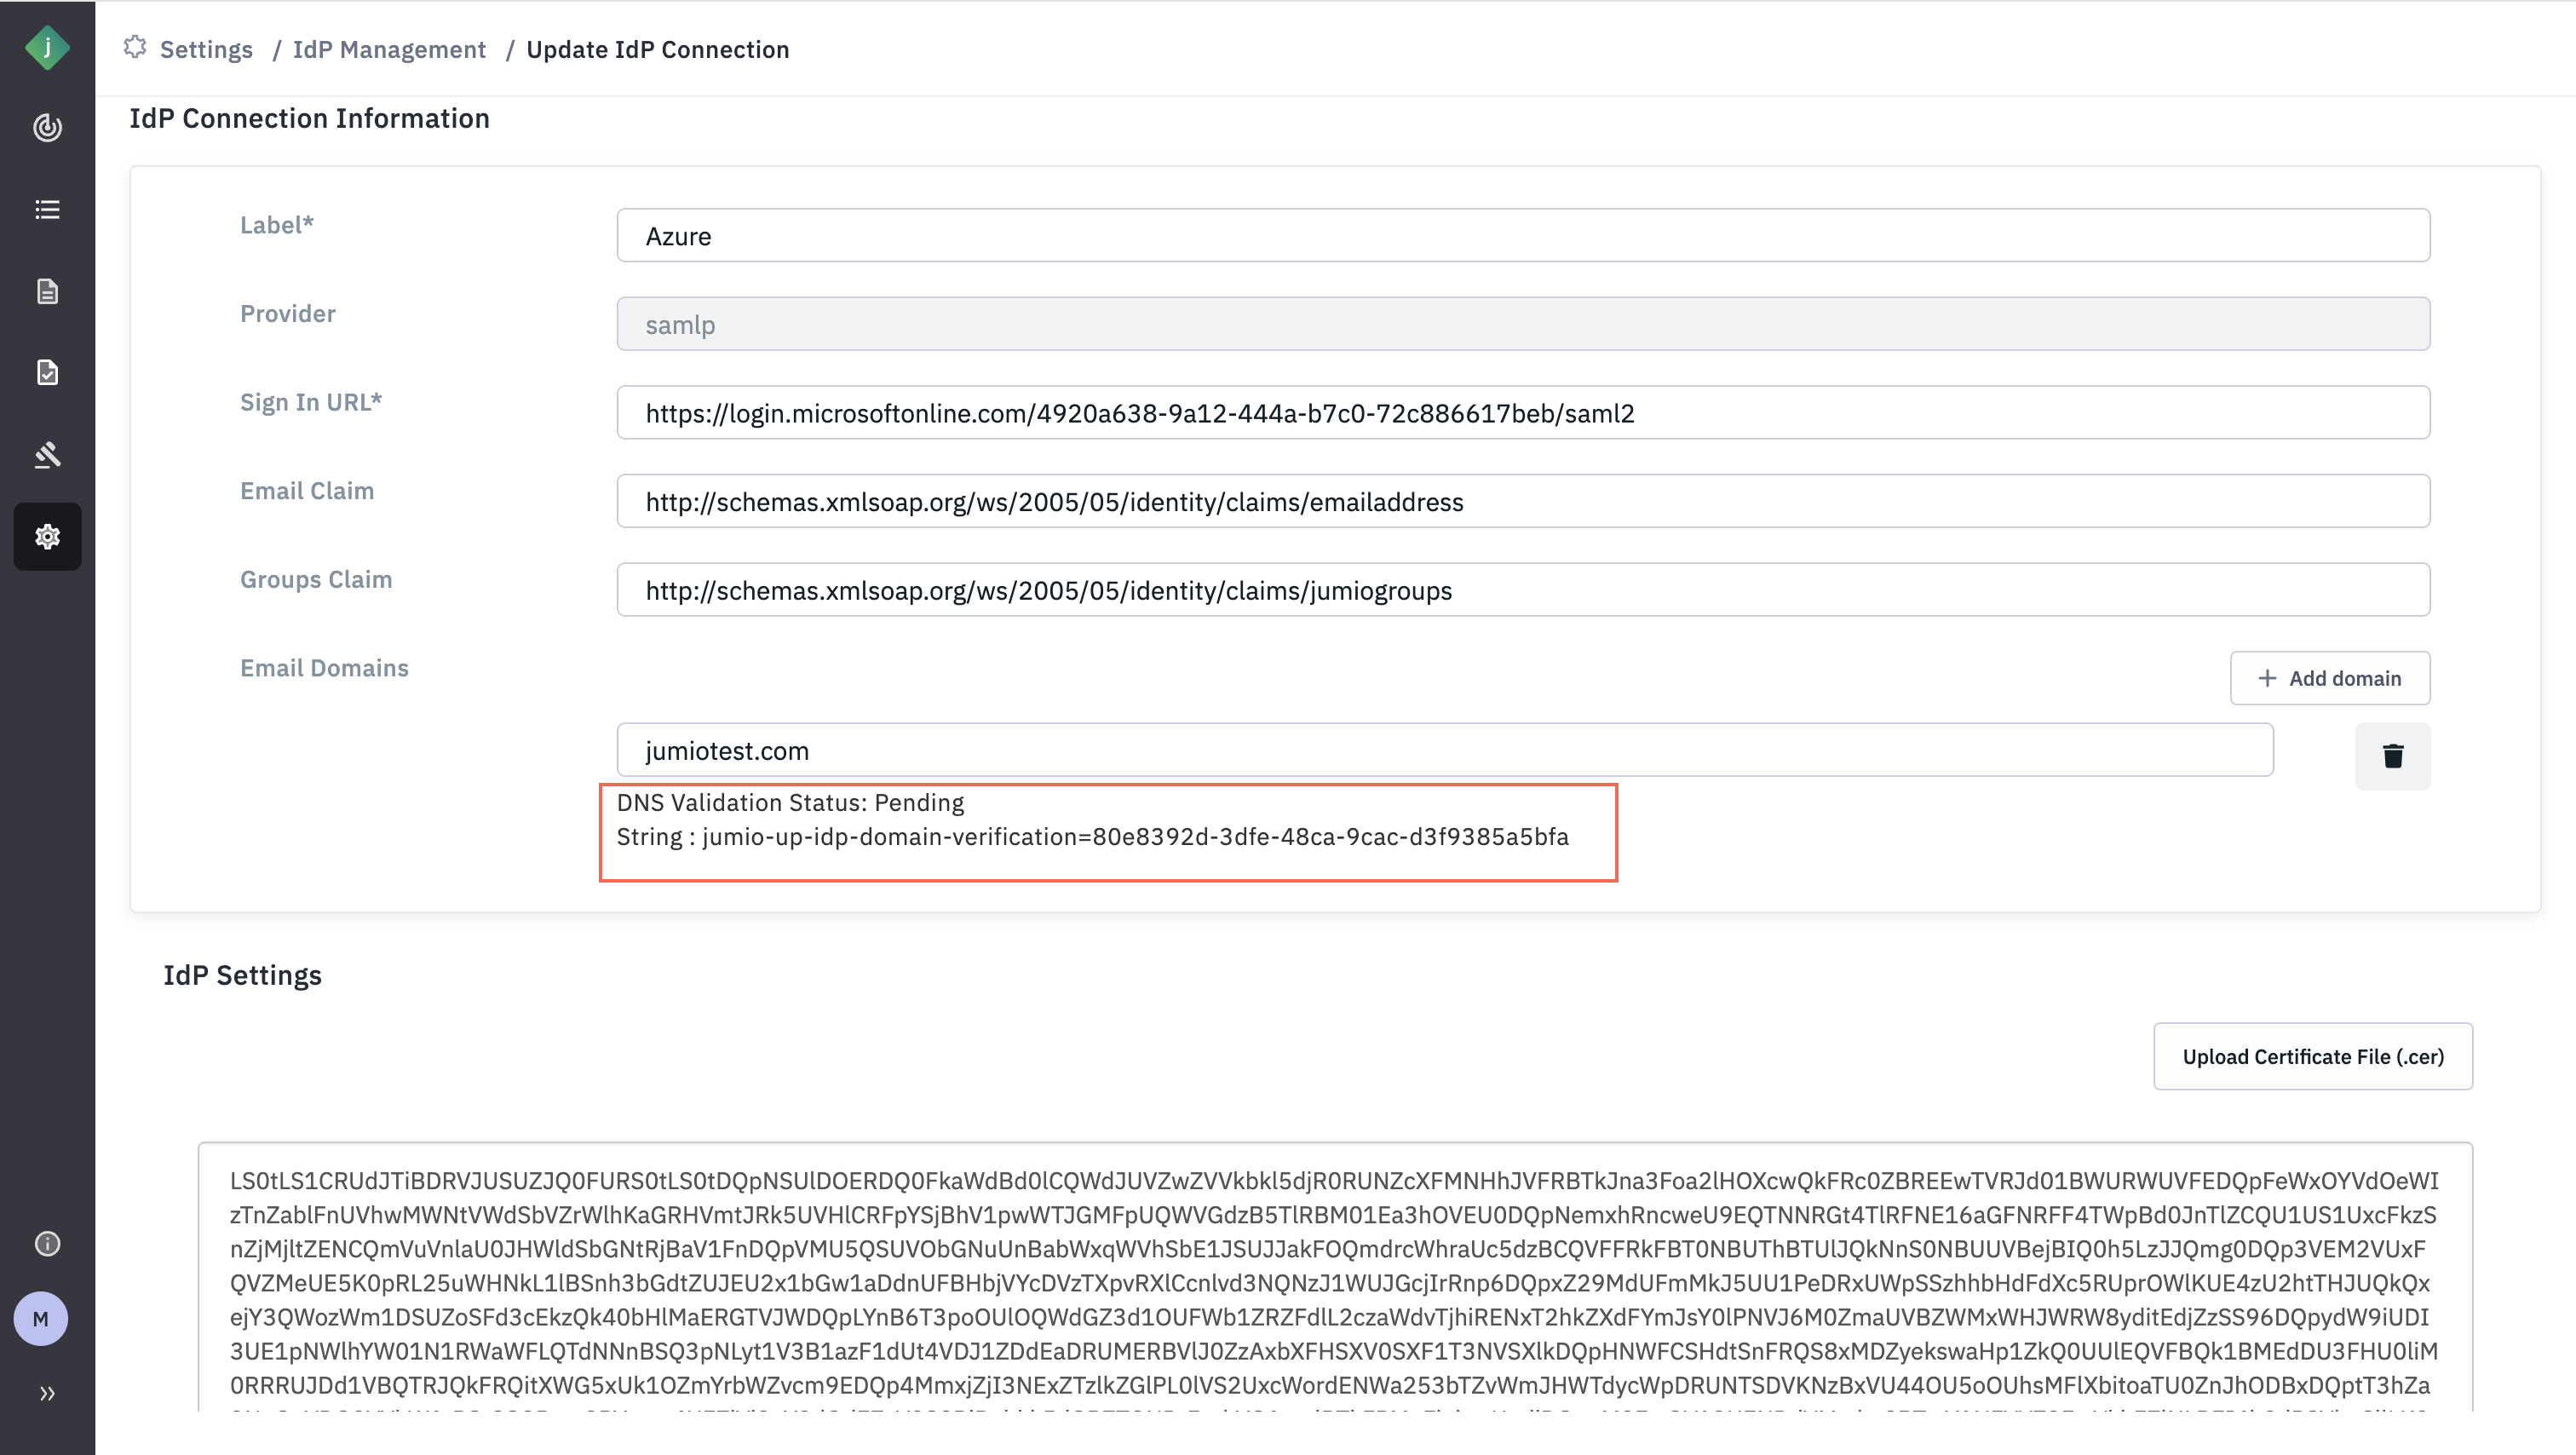
For example, based on the screenshot above, one’’ll need to add the following DNS record to Jumio email domain:jumio-up-idp-domain-verification=80e8392d-3dfe-48ca-9cac-d3f9385a5bfa
Step 17: Once the DNS record is successfully updated, the DNS challenge status will be shown as "Passed" in the Portal.
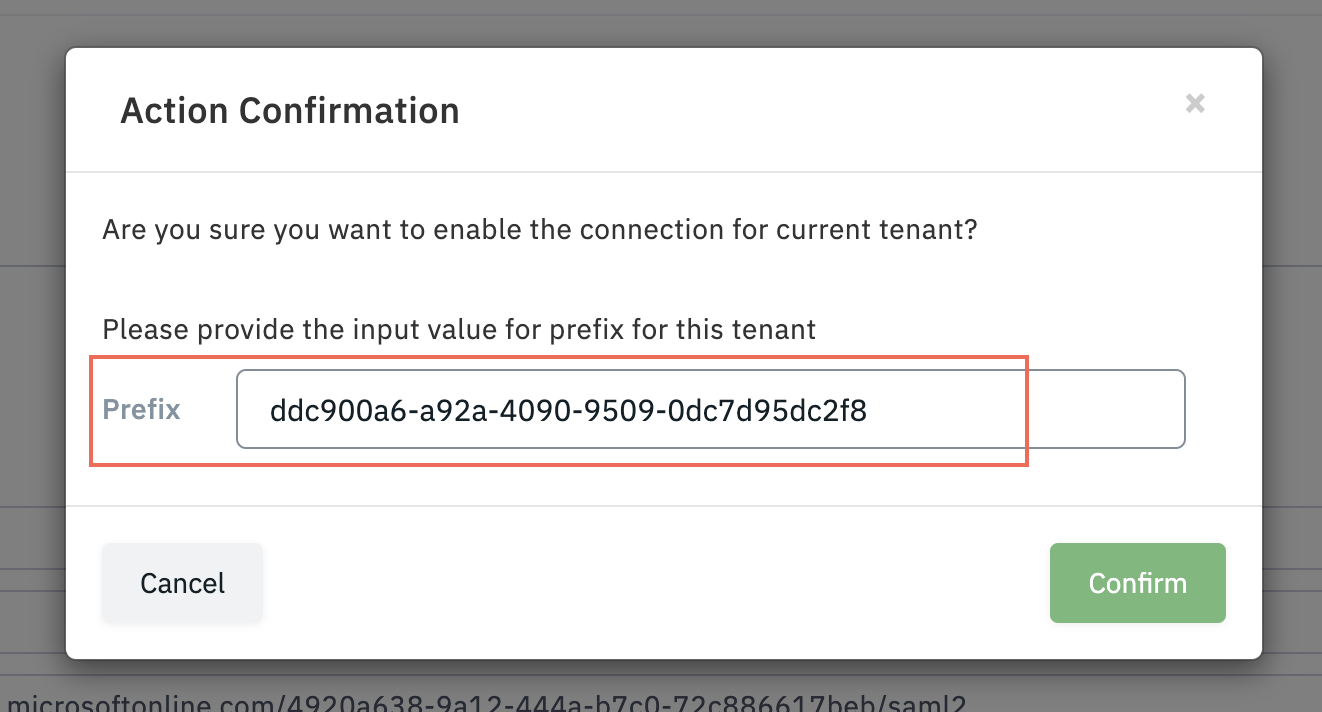
Step 18: Click “Enable”.
Please make sure to copy the ID from the pop-up, as it will be needed in next Step
Step 19: App Roles,
-
Navigate to “Azure Active Directory Admin Center” and go to All Services > App Registration > Jumio (or the name of your custom application).
-
When the Jumio (or the custom application) panel appears, go to menu “Manage > App Roles”.
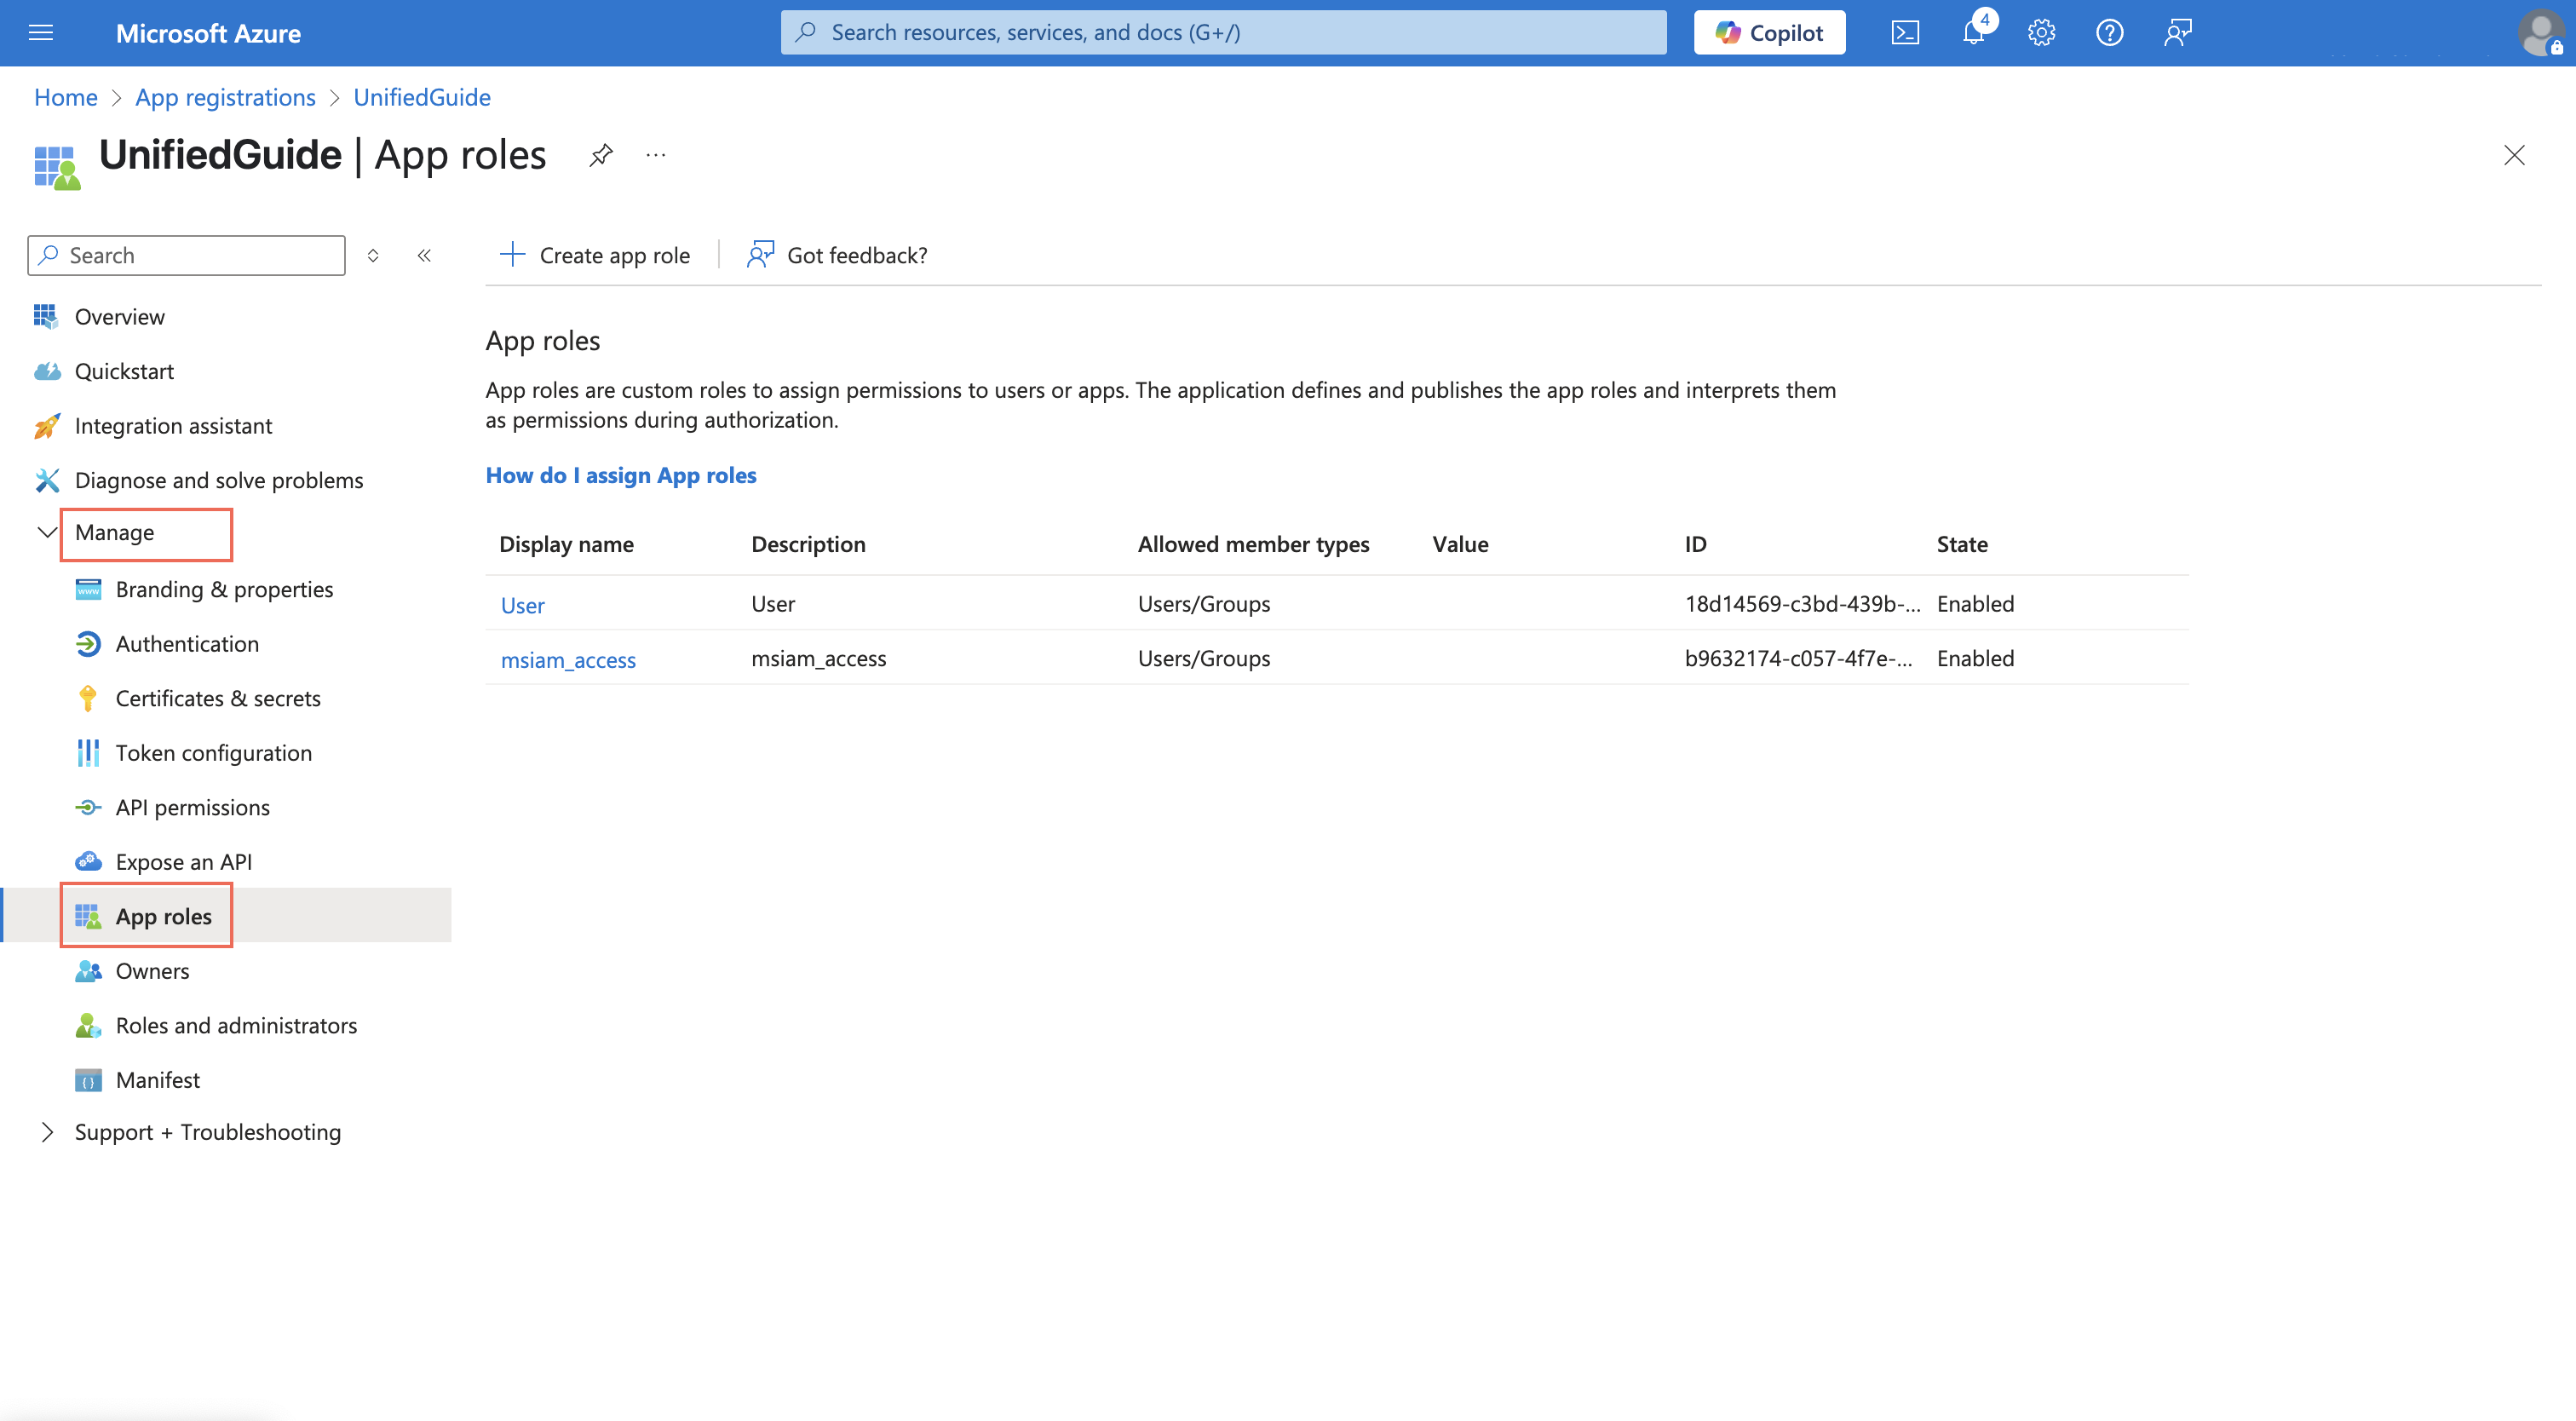
-
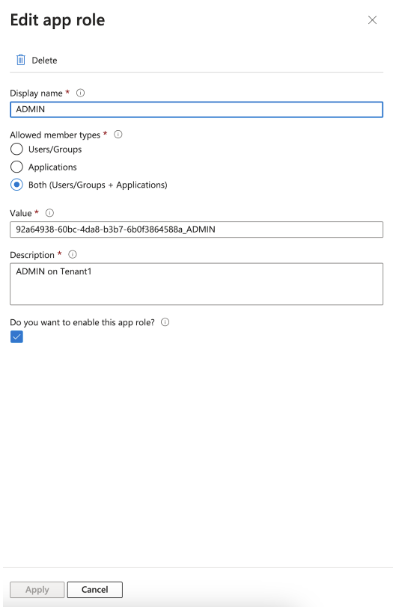
Now, you will create roles corresponding to different Jumio Groups. Click on Create App Role Navigate to application configuration tab: Sign on,

The values for the App Roles will have the below syntax : tenantID_GroupLabel
The list of group labels are as follows:
| Role Name |
|---|
| ADMIN |
| KYX_ADMIN |
| SUB_ADMIN |
| RISK_MANAGER |
| RISK_ADMIN |
| RISK_ANALYST_LIMITED |
| RISK_ANALYST |
| ACCOUNTANT |
User and Tenant/Group Assignment
Case A: User needs to be assigned to 1 tenant with group Admin
- Let’s say tenantID is
ec449984-9bfa-485a-8135-f4a28943d470 - In this case, the value for App Role will be
ec449984-9bfa-485a-8135-f4a28943d470_ADMIN
Case B: User needs to be assigned to two tenants with group Admin on first and Sub Admin on Second
- Let’s say tenant ID of tenant A is
ec449984-9bfa-485a-8135-f4a28943d470and tenant ID of tenant B isa8aa4fde-8fed-4819-87b7-6cd3ea424999 - In this case, you will need to create two App Roles with the below values and assign those roles to the user
ec449984-9bfa-485a-8135-f4a28943d470_ADMINanda8aa4fde-8fed-4819-87b7-6cd3ea424999_SUB_ADMIN
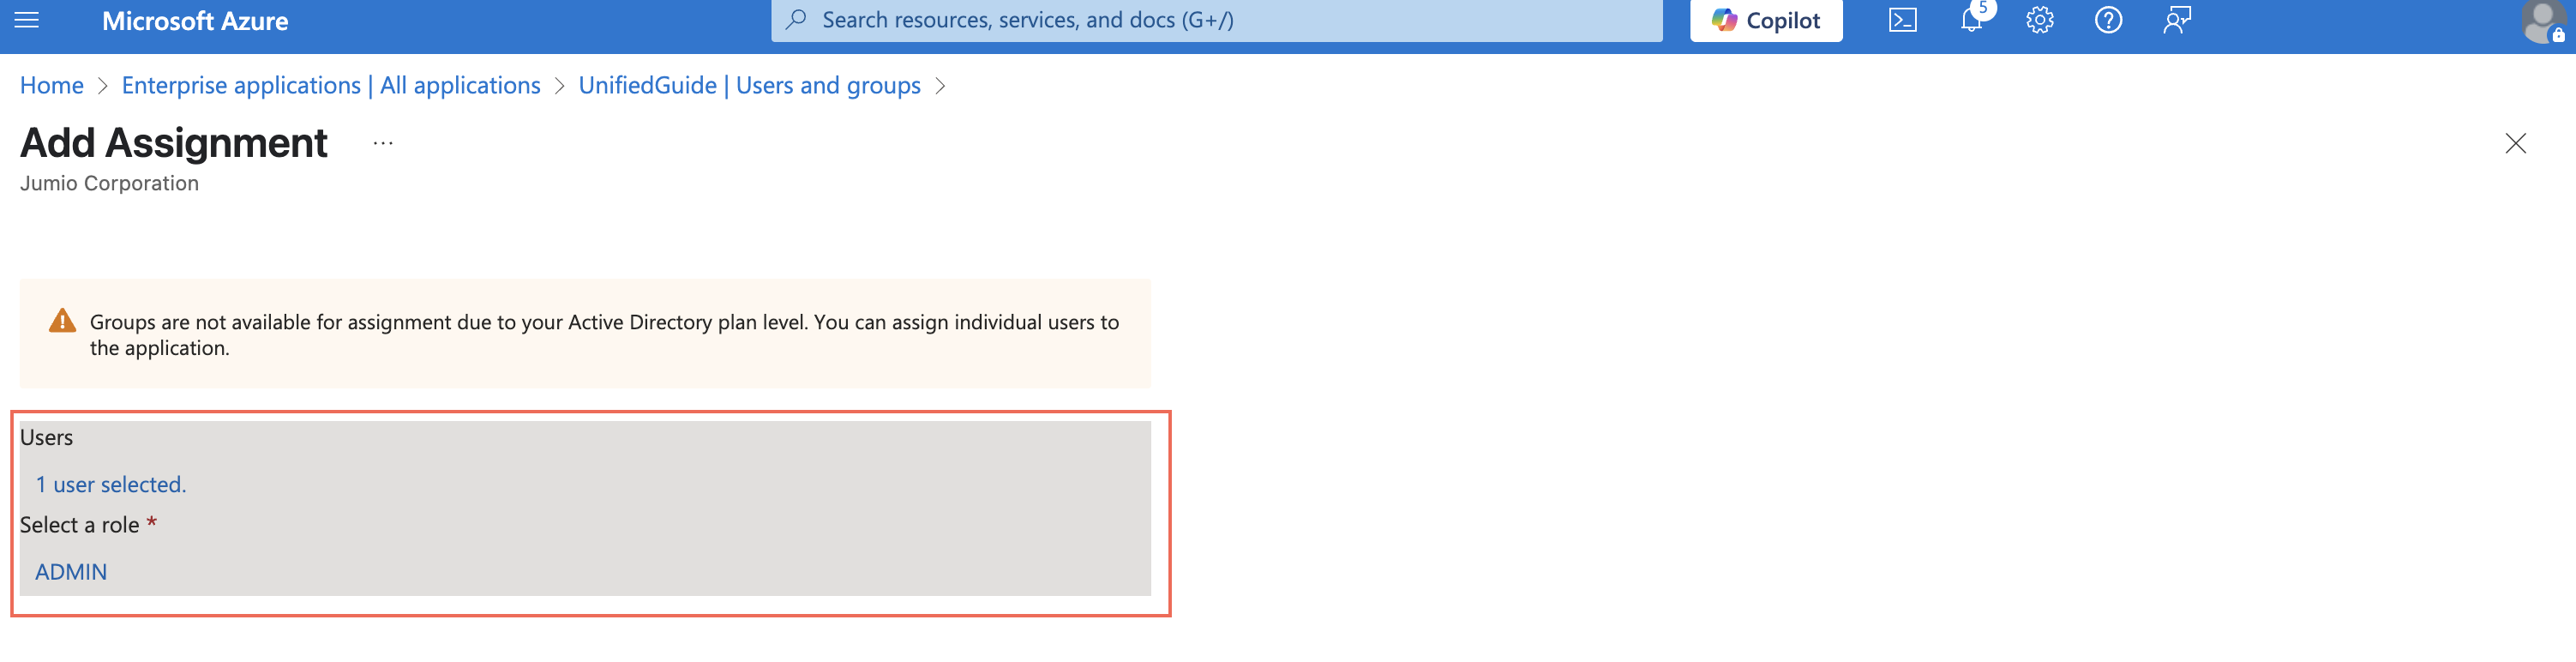
Step 20: Assign Users to the Jumio (custom application).
Navigate to “Azure Active Directory admin center” and go to Enterprise Applications > Jumio (or the name of your custom application). Click on the menu “Manage > Users and Group” and Add Assignment.
Choose user and define the Jumio Role corresponding to this user.
Step 21: Login to Jumio Portal with the email of the user whose group mapping was set in the previous step