Create and View the Transaction
Create a Transaction
Take the following steps to create a transaction manually within the Jumio portal.
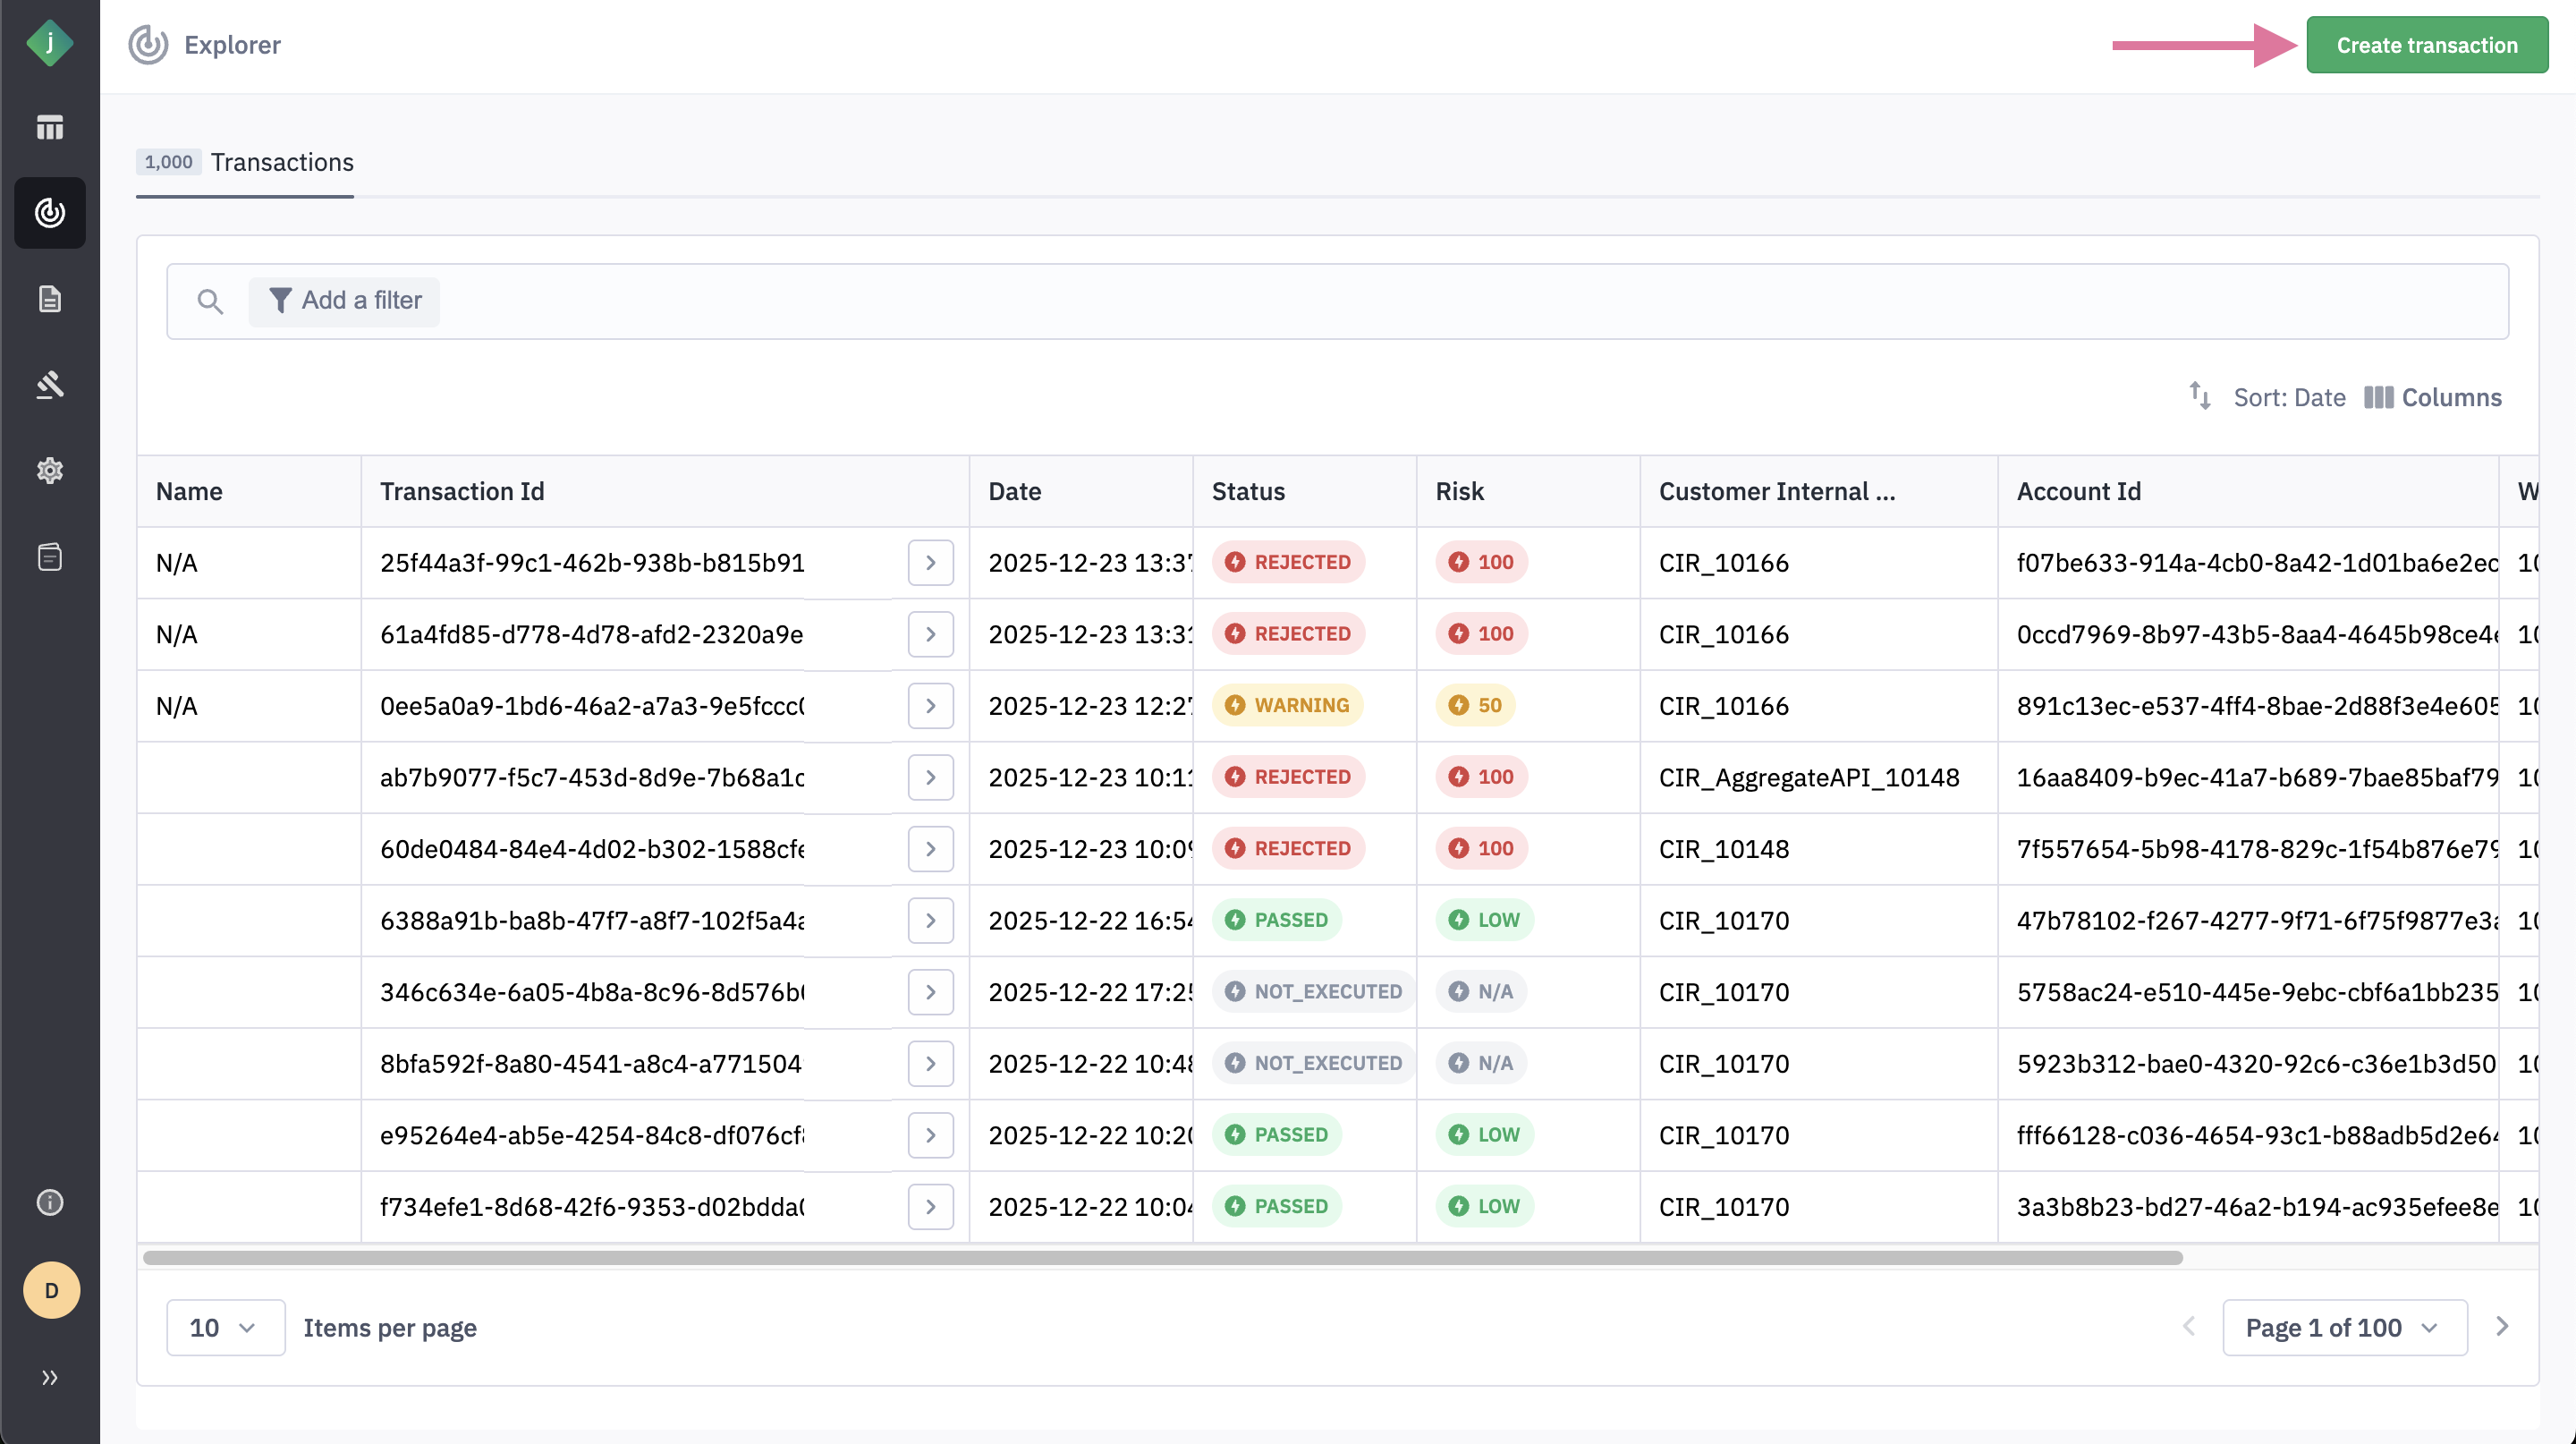
Step 1: From the Transactions tab of the Explorer, click Create Transaction.
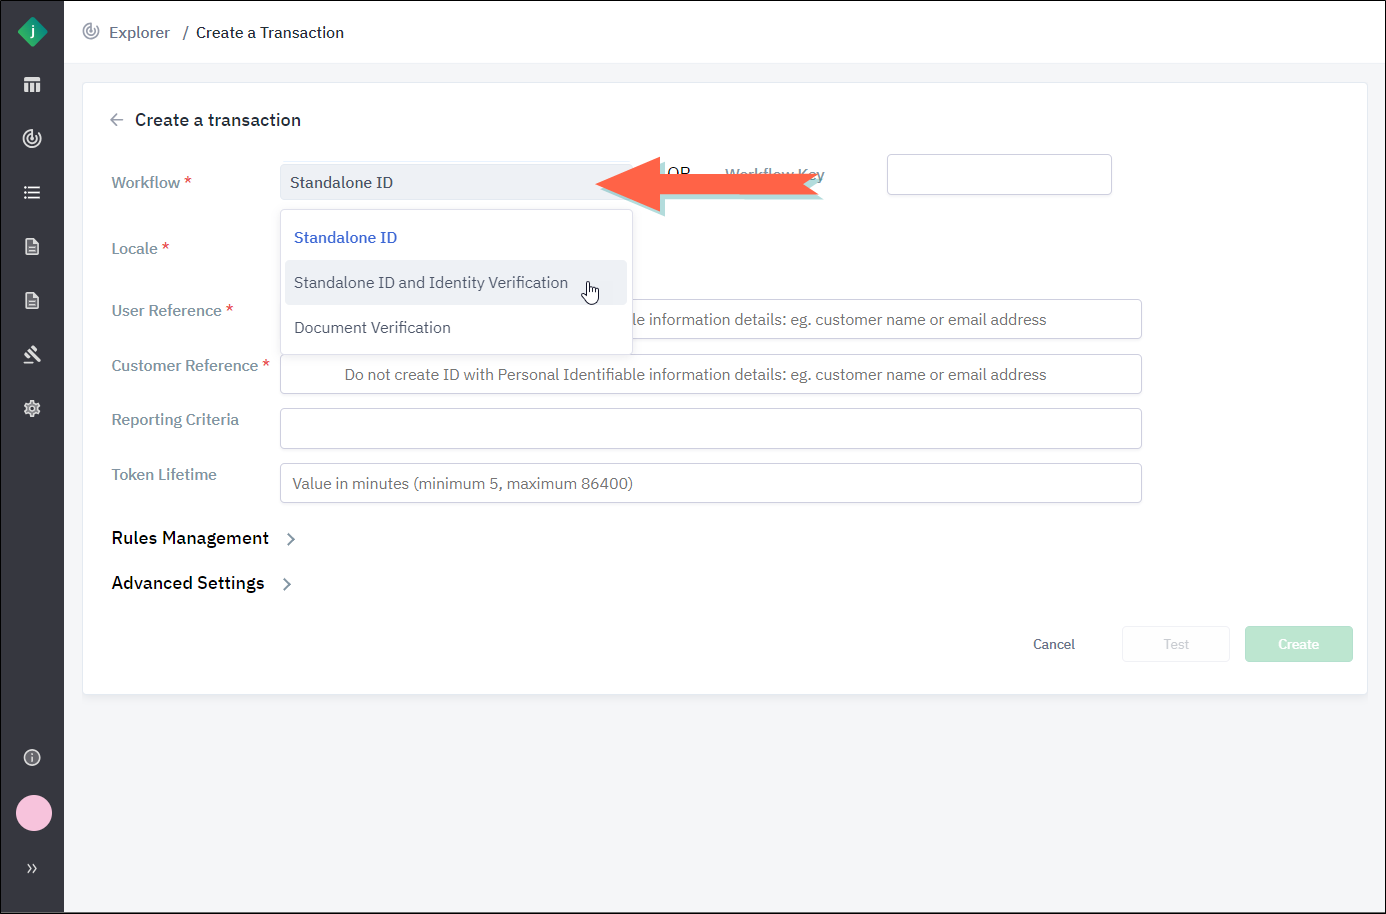
Step 2: On the Create a Transaction window, specify the workflow in either of the following ways:
If you select the Document Verification workflow, the Document Type and Document Country fields under Advanced Settings are also required.
Option 1: Select an option from the Workflow list,
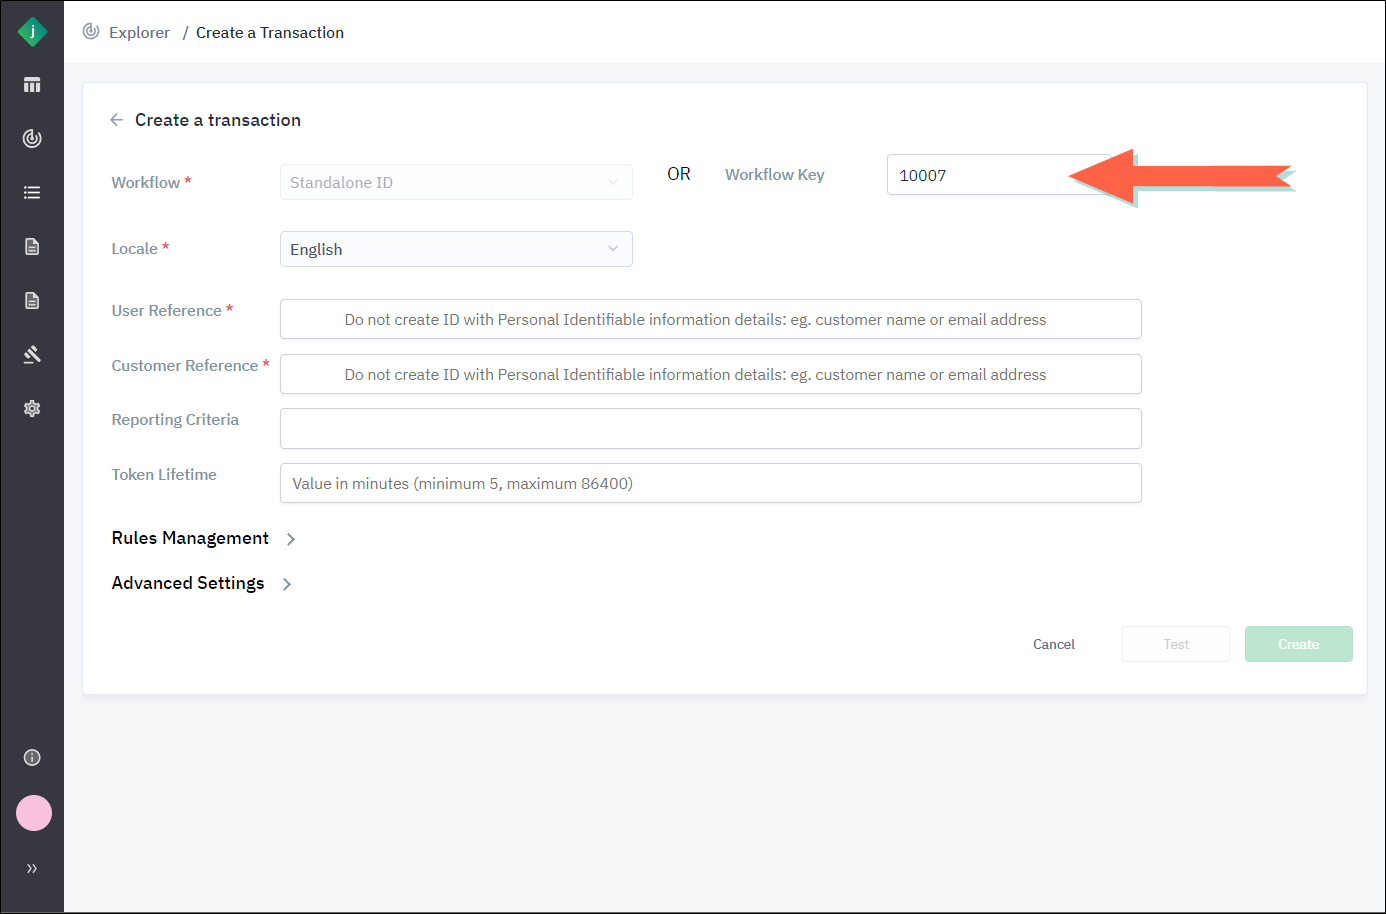
Option 2: Enter a value in the Workflow Key field.
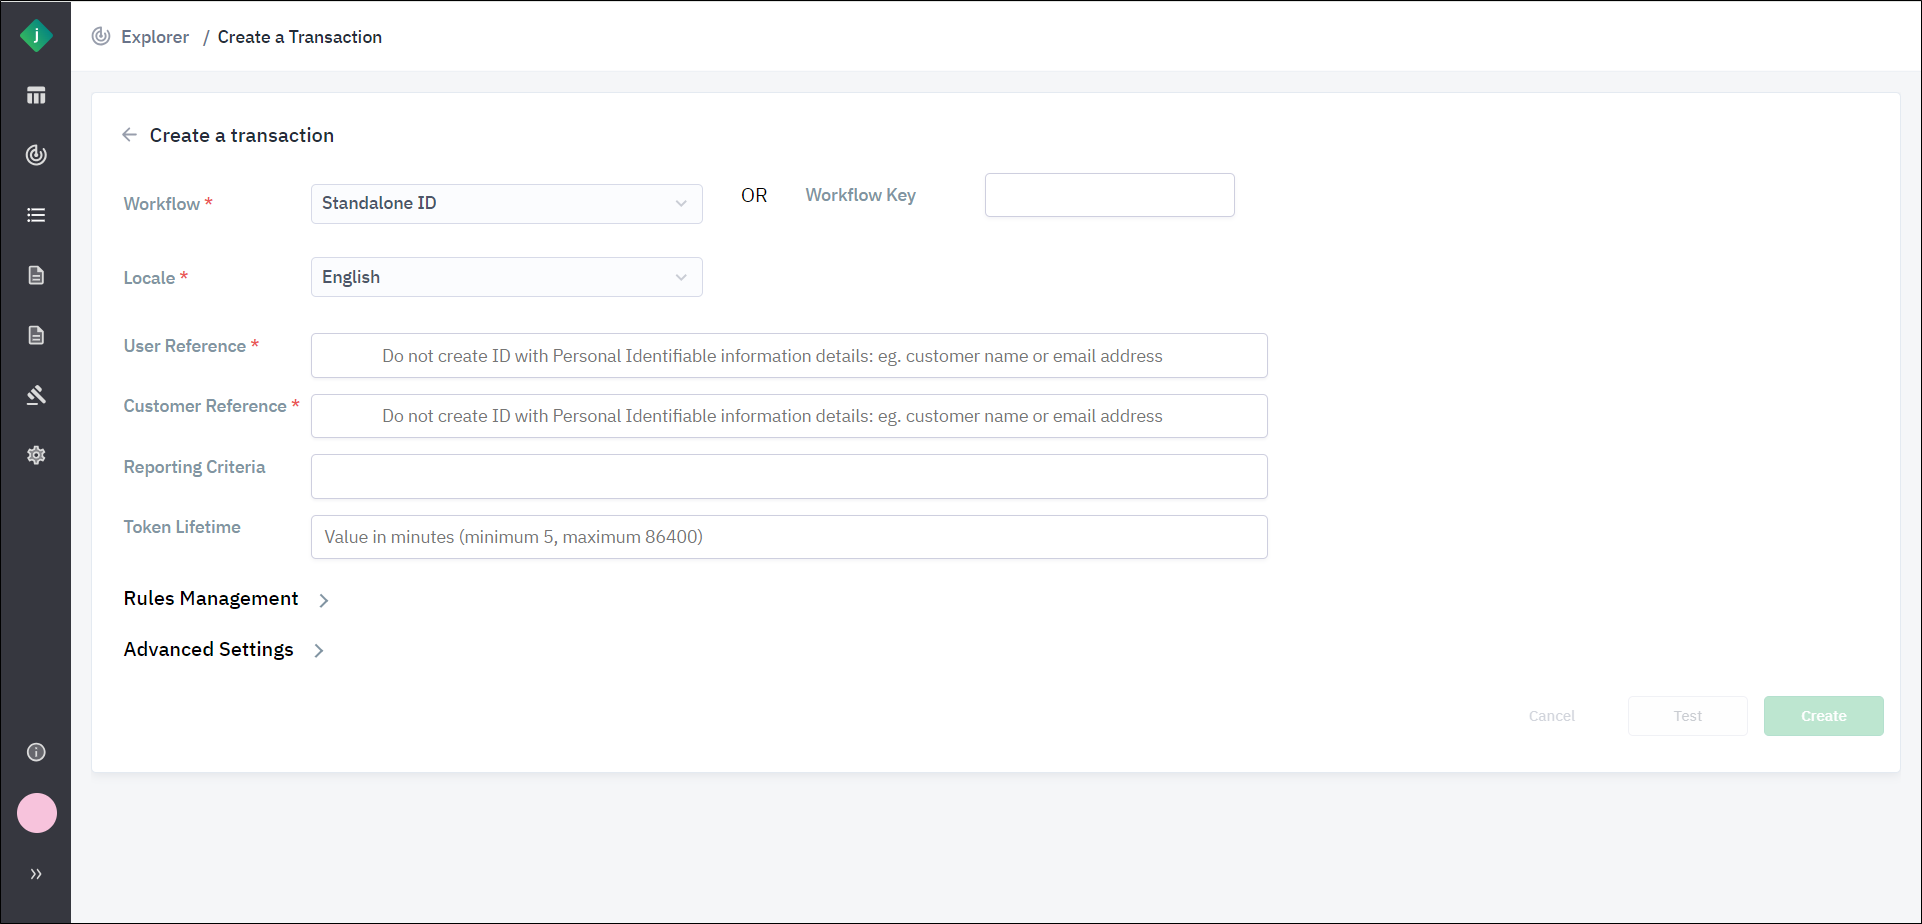
Step 3: Select a value from the Locale list and enter values in the User Reference and Customer Reference fields. These fields are required. For descriptions of these, see General Parameters.
Step 4: Complete the remaining data fields at the top of the page as desired. For descriptions of the fields, see General Parameters.
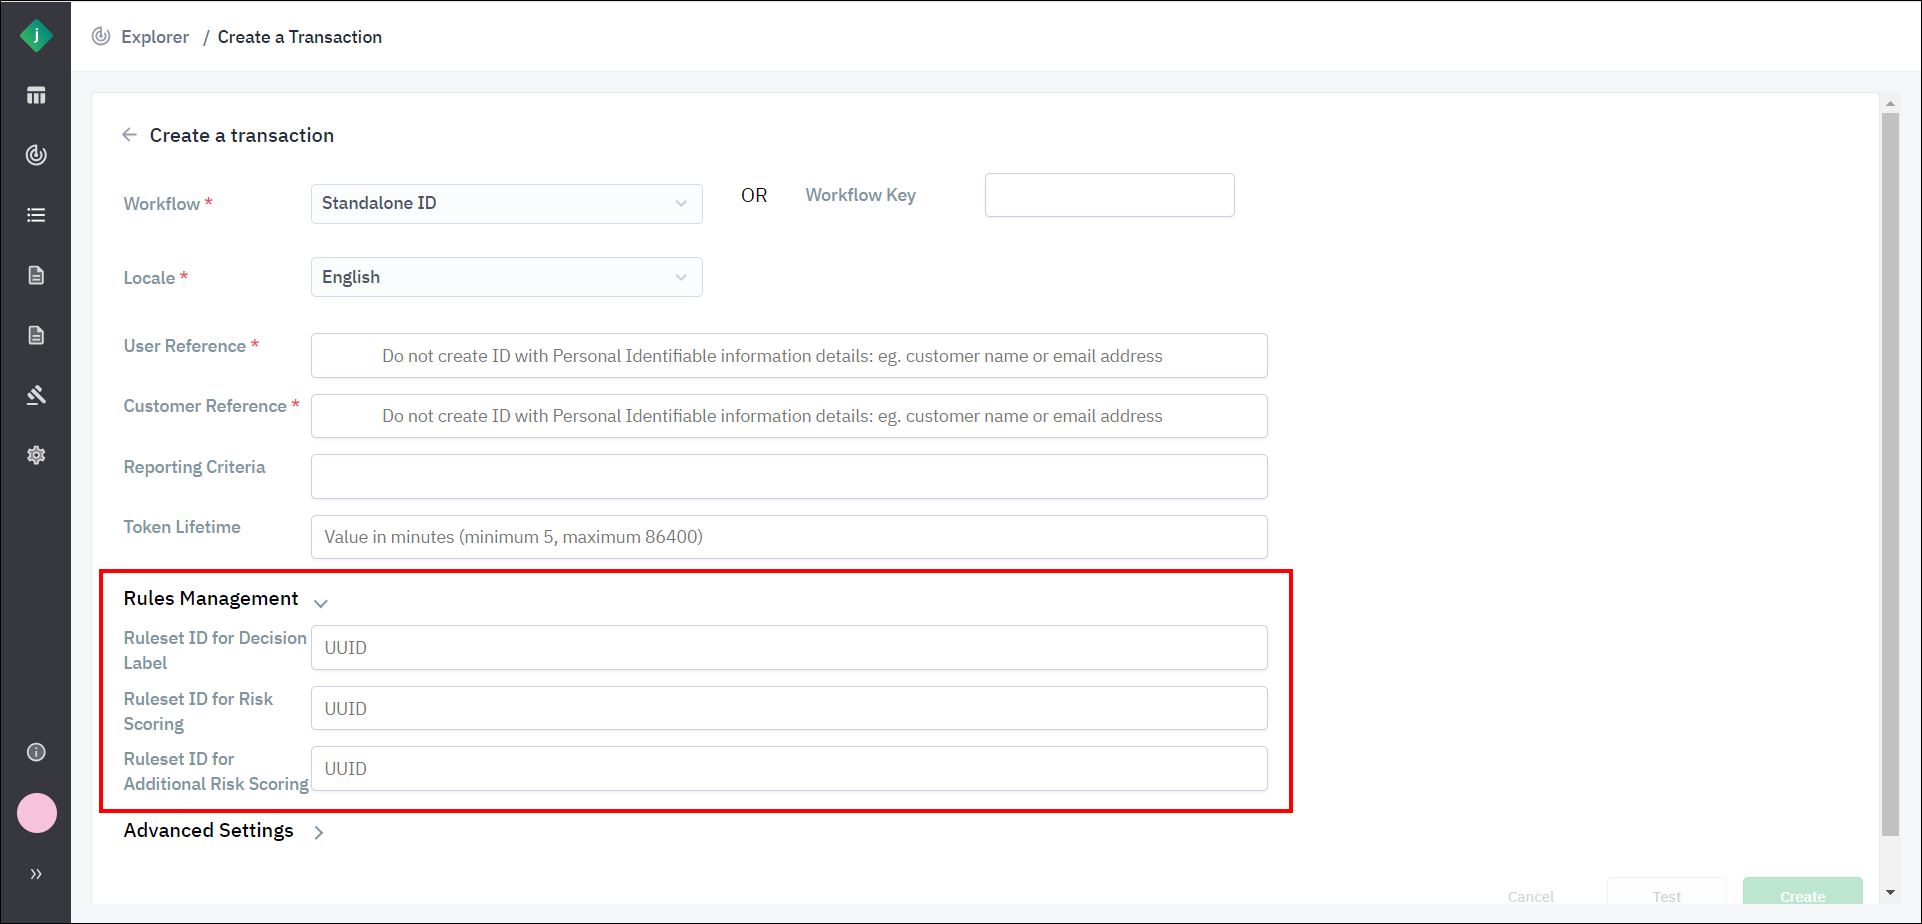
Step 5: To specify which rulesets will be used by the transaction to assign scores and decision labels, expand the Rules Management section of the page and enter the appropriate ruleset IDs. See Rules Management for descriptions of these fields.
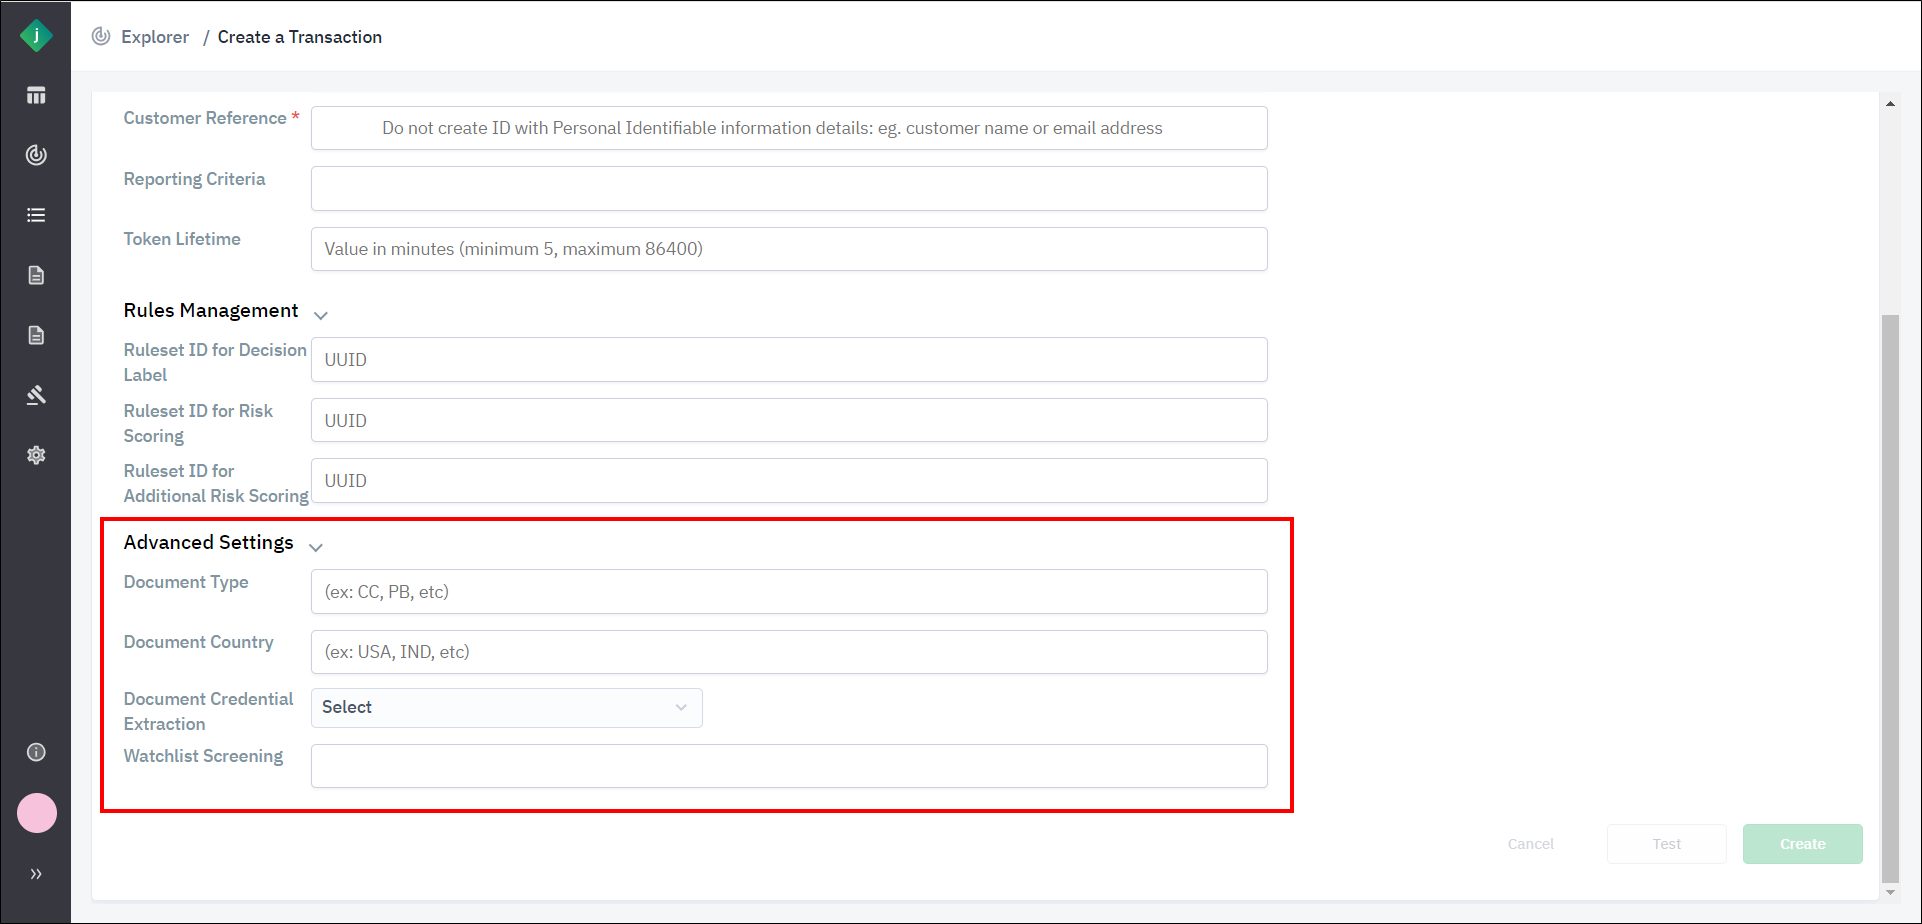
Step 6: To configure advanced settings, expand the Advanced Settings section of the page. See Advanced Settings for descriptions of these fields.
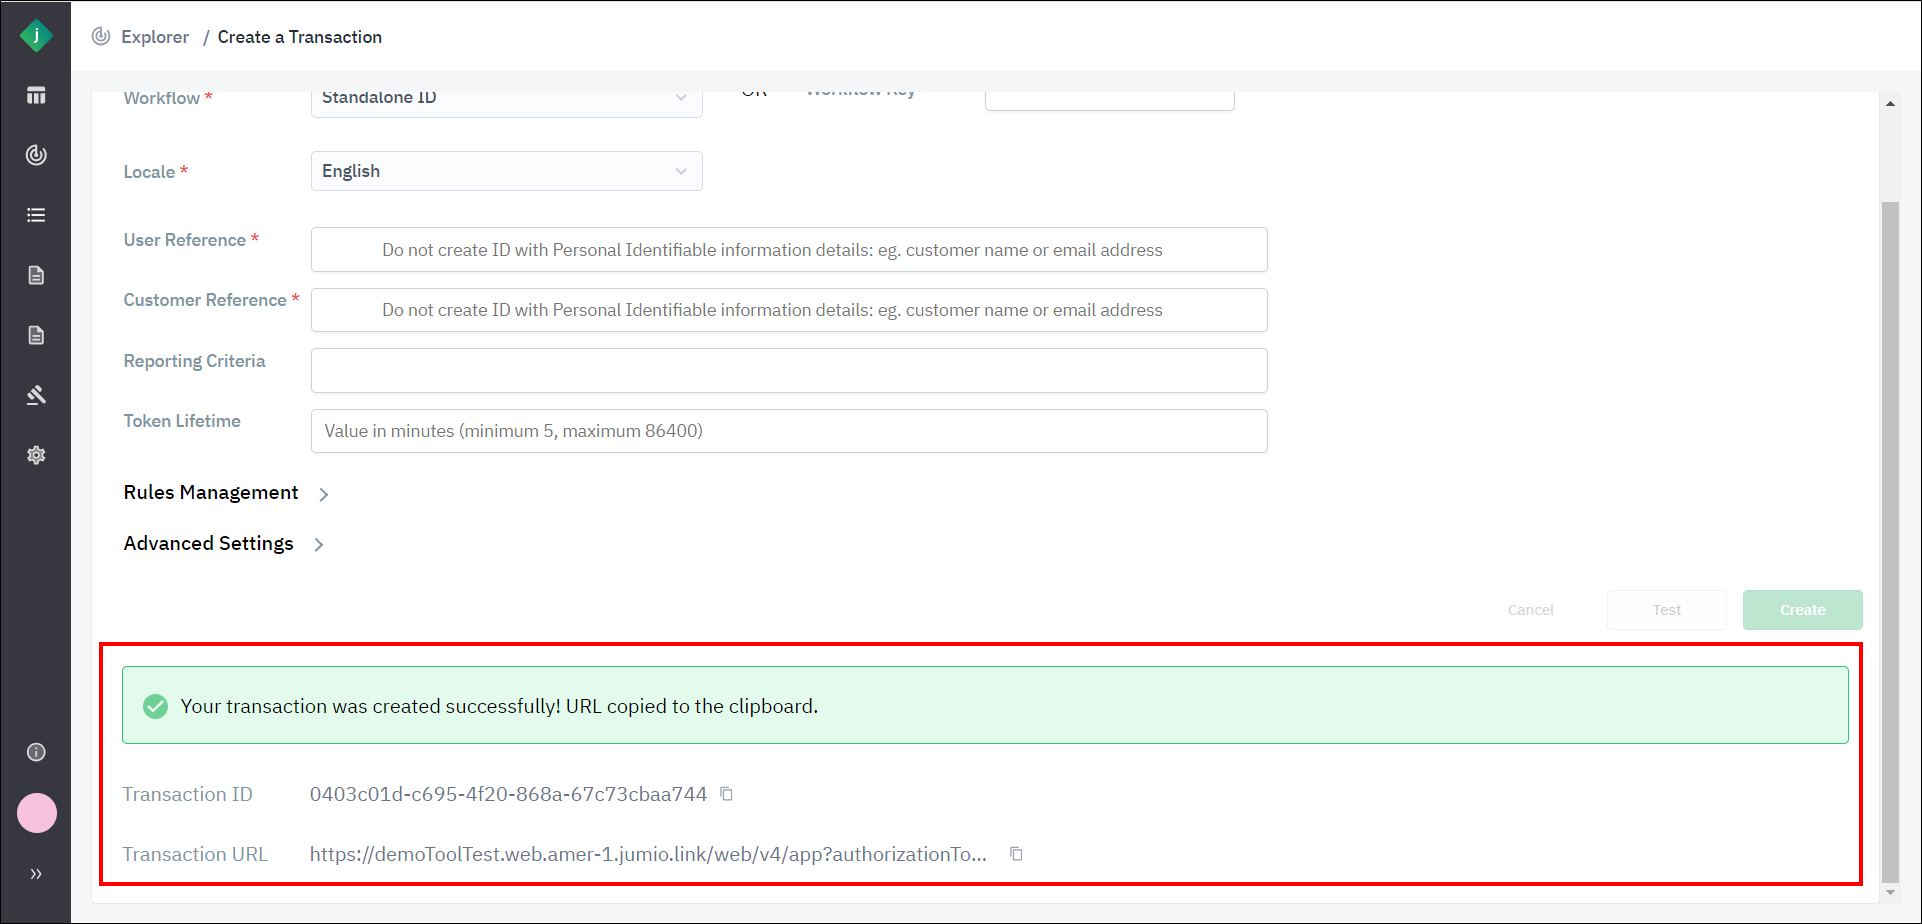
Step 7: Click Create.
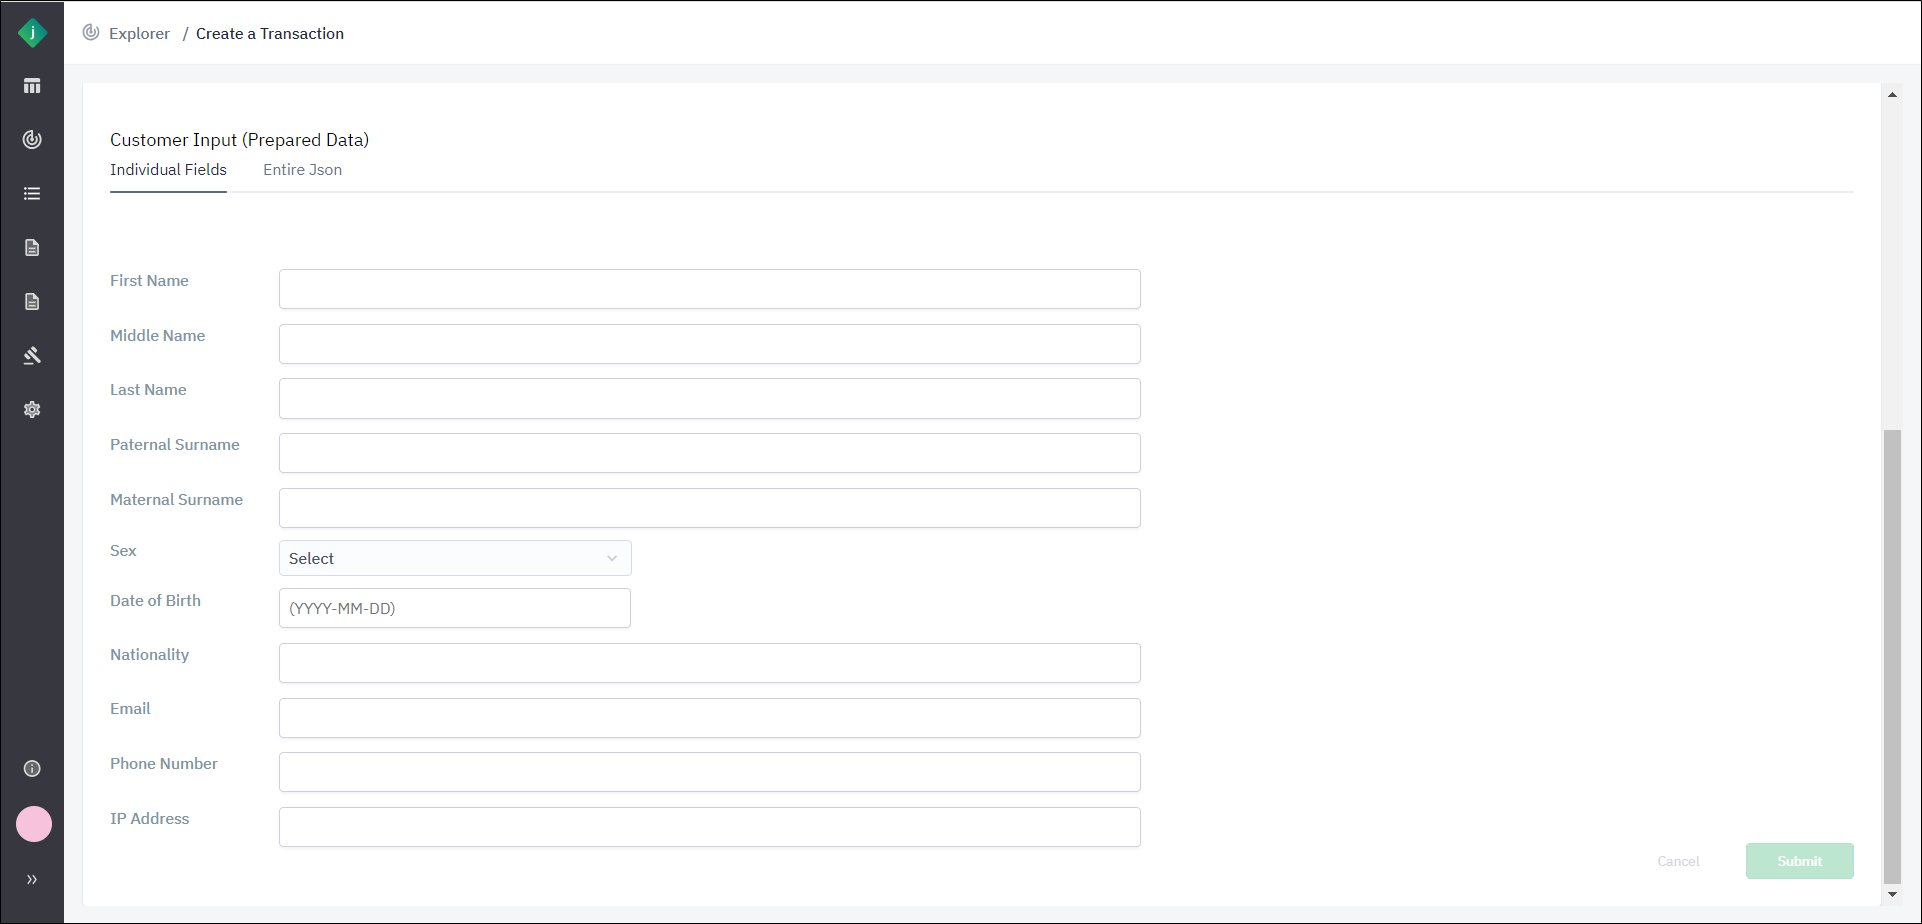
Step 8: If you are creating a workflow that allows for the submission of prepared data, the Customer Input (Prepared Data) section appears. For descriptions of these fields, see Customer Input (Prepared Data). Enter prepared data in either of the following ways:
- Enter the data in the fields provided on the Individual Fields tab and click Submit.
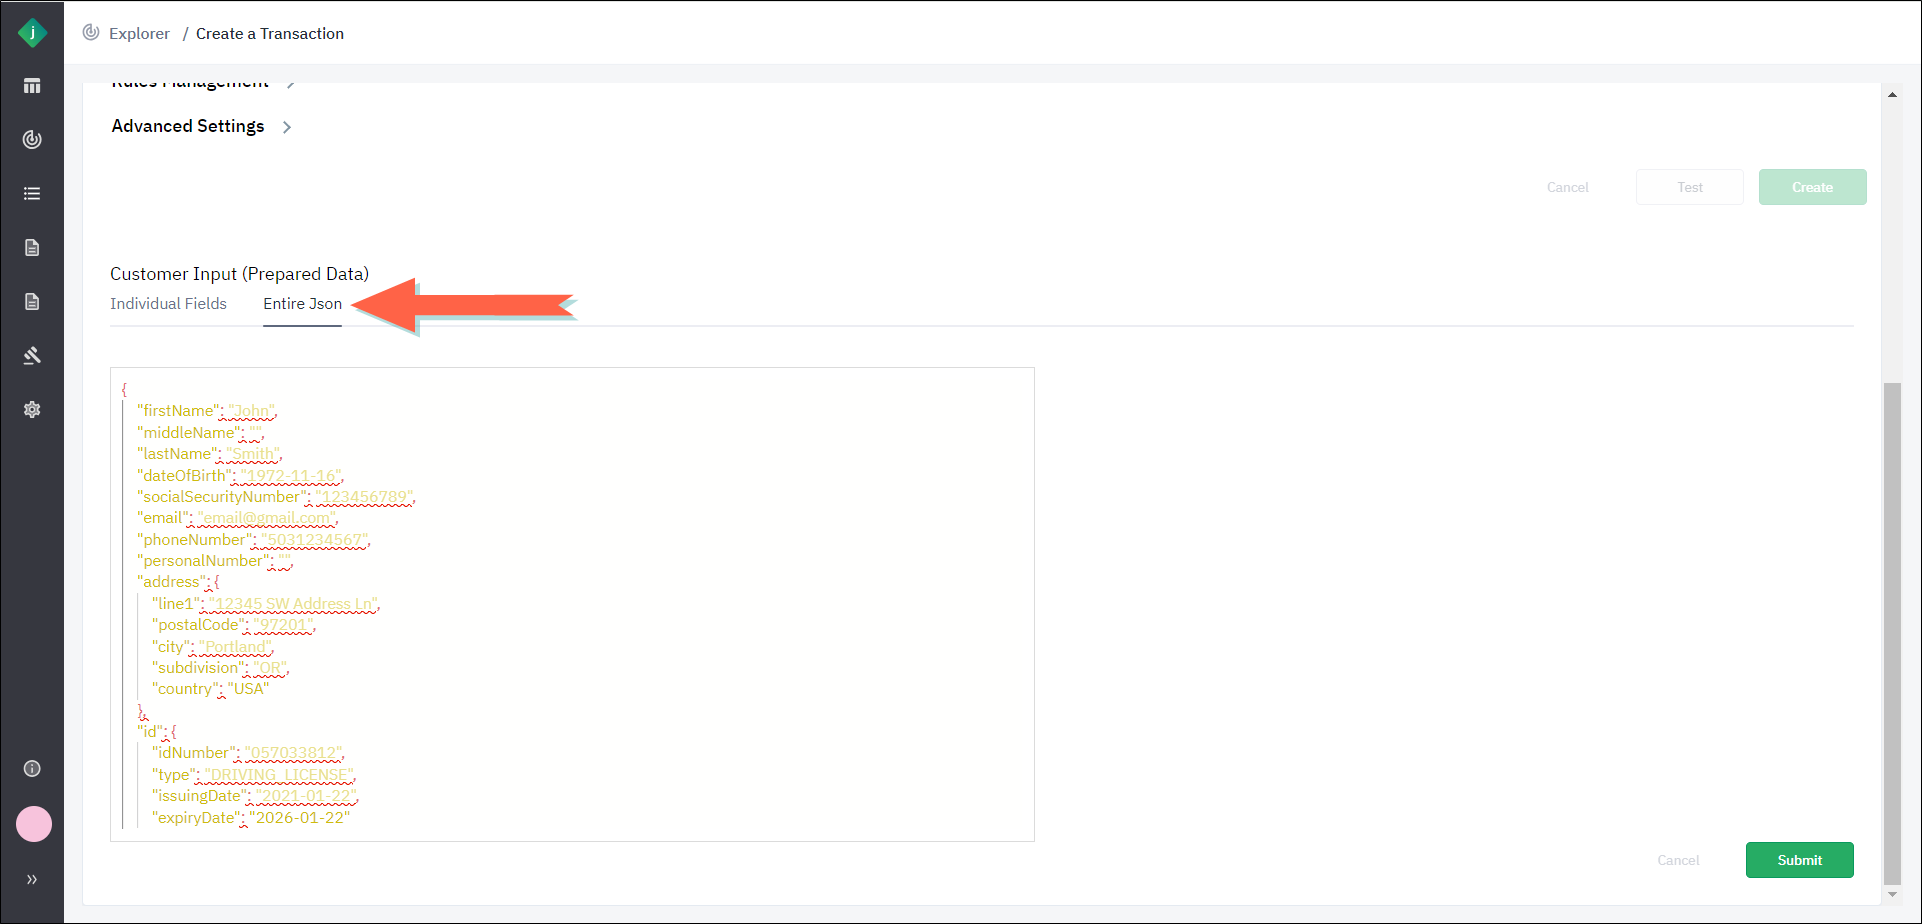
- Select the Entire JSON tab, enter the data as a JSON object, and click Submit.
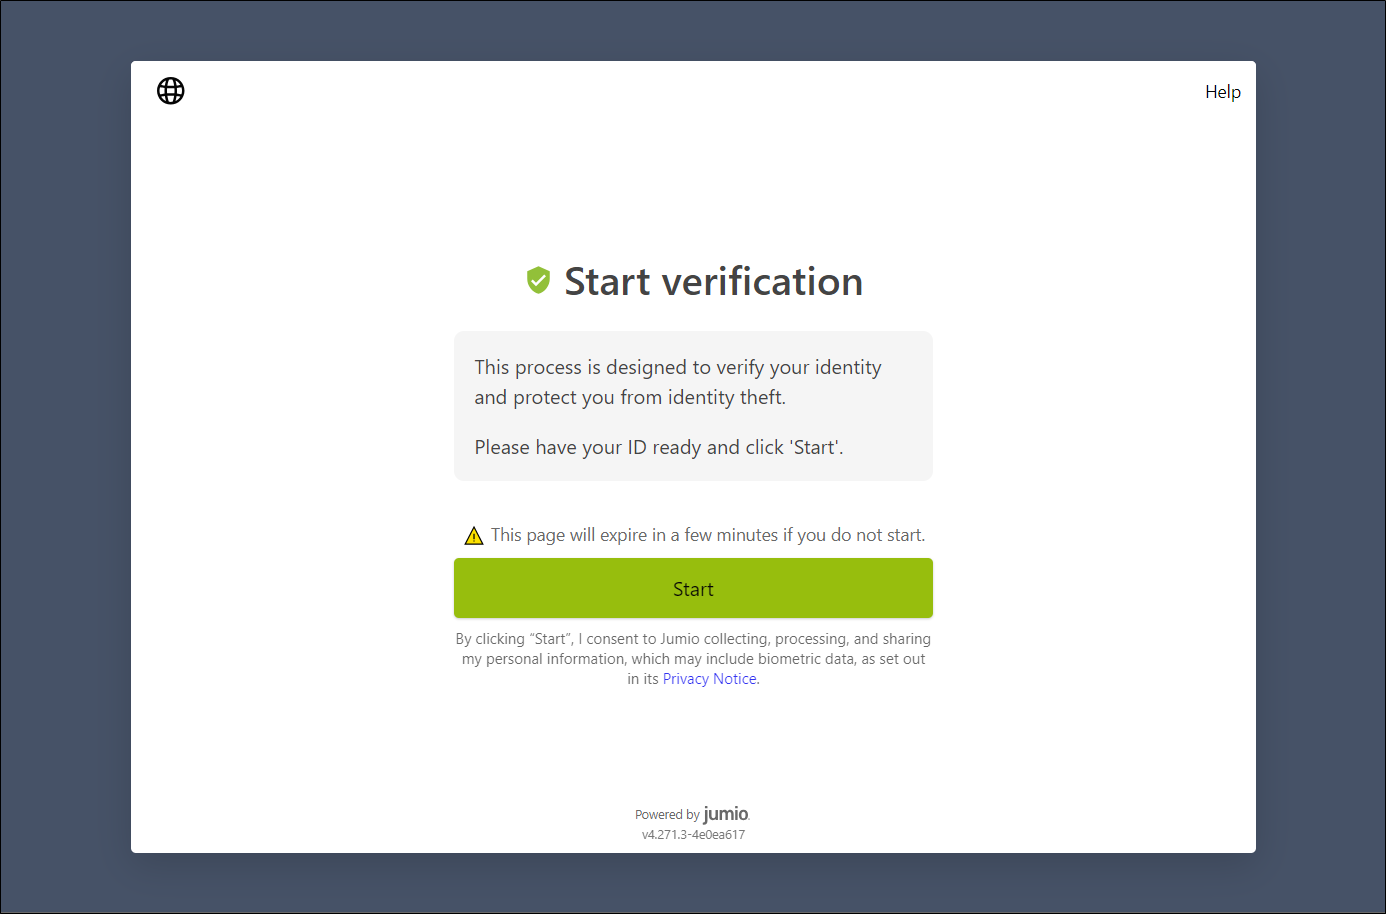
Step 9: To test the workflow in your browser, click Test. The customer journey start page will display, allowing you to test the steps that your end user will be required to take during verification.
The Test button works only if you have selected one of the three workflows shown in the Workflow list. It will not work if you have entered a workflow key instead.
Step 10: The Jumio Portal creates the transaction and displays its transaction ID. If the workflow was configured to generate a URL for the transaction, the URL will display as well and will be automatically copied to your clipboard.
Parameters of a Transaction
Following are descriptions of the parameters available when you are creating a transaction from the portal.
General Parameters
| Parameter | Description |
|---|---|
| Workflow | Select the workflow that will process the transaction. Options are as follows: - Standalone ID - Standalone ID and Identity Verification - Document Verification Alternatively, you can enter a workflow key (see below). |
| Workflow Key | You can enter a workflow key in this field instead of selecting one from the Workflow list. |
| Locale | Select the default language that will be displayed in the web client for the end user. |
| User Reference | Enter an ID you will use during searches and reporting to identify the end user who will scan their ID and selfie to perform this verification, such as a user’s internal customer ID. |
| Customer Reference | Enter an ID you will use during searches and reporting to identify this specific verification transaction. |
| Reporting Criteria | Enter any additional data you want to use to track the verifications. This data will show up in callbacks and retrievals but not in the Jumio reports. |
| Token Lifetime | Enter the time in minutes until the redirect link expires. The default value is 30 minutes. |
Rules Management
| Parameter | Description |
|---|---|
| Ruleset ID for Decision Label | Enter the UUID number of the ruleset to be used to assign decision labels to the transaction. |
| Ruleset ID for Risk Scoring | Enter the UUID number of the ruleset to be used to assign risk scores to the transaction. |
| Ruleset ID for Additional Risk Scoring | Enter the UUID number of the ruleset to be used for additional risk scoring. |
Advanced Settings
| Parameter | Description |
|---|---|
| Document Type | The type of document being verified (e.g., CC, PB, etc.). For a list of document types, see Supported Documents. |
| Document Country | The country of the document being verified. |
| Watchlist Screening | The watchlist screening search profile to be used in the request body. See Watchlist Screening for more information. |
| Document Credential Extraction | Select True or False to indicate whether or not document credentials are to be extracted. |
Customer Input (Prepared Data)
Customer Input parameters are available only when the selected workflow is configured to accept prepared data.
This section allows you to submit prepared data for use by the workflow executing the transaction. Prepared data is used to upload values for data fields required by a capability or risk signal in a workflow, but not extracted from another credential such as an ID or document.
You can enter the prepared data either as values on the Individual Fields tab or as a JSON object on the Entire JSON tab.
See Prepared Data for more information, including descriptions of individual fields and an example of a JSON object used to upload prepared data.
View Transaction Details
To open a transaction, click the following icon to the right of the transaction name: 
The transaction detail page displays the following information:
- Header information that includes the transaction ID, status, and detected date
- Summary details
- Service details
For example, the following screen capture shows a transaction with:
-
Summary details including WARNING for the overall decision, and a risk score of 70.
-
Services:
- Global Identity Check
- ID and Identity Verification
- Device Risk Verification
- Phone Verification
- Email Verification
![]()
Details for each service are presented in separate sections under the summary. The details are specific to each type of service, which may contain subsections for each capability executed by the service.
View a Transaction's Triggered Rules
-
Open the transaction
tipQuickly locate the transaction by using the search or filter functions.
-
Click the Rules Triggered link displayed in the upper-right corner of the Transaction Summary section.
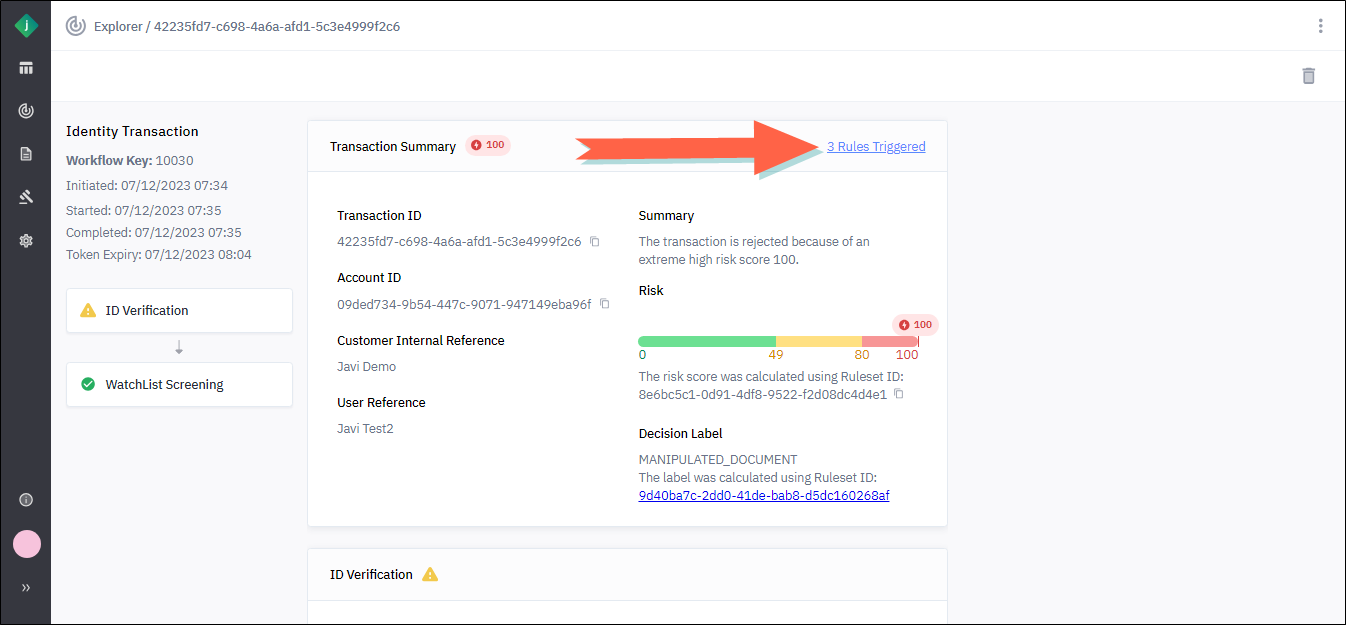
The Rules Triggered dialog displays.
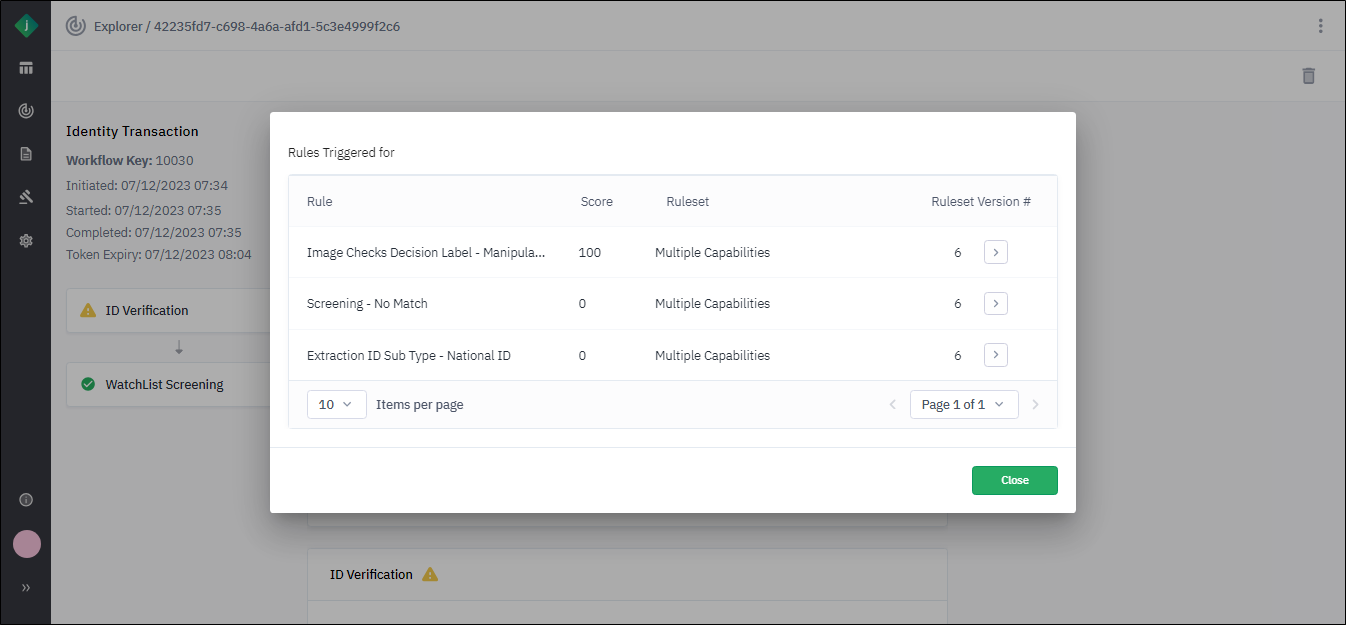
-
To open a triggered rule's ruleset, click the rule.
-
To close the dialog, click Close.
Transaction Event Log
About the Transaction Event Log
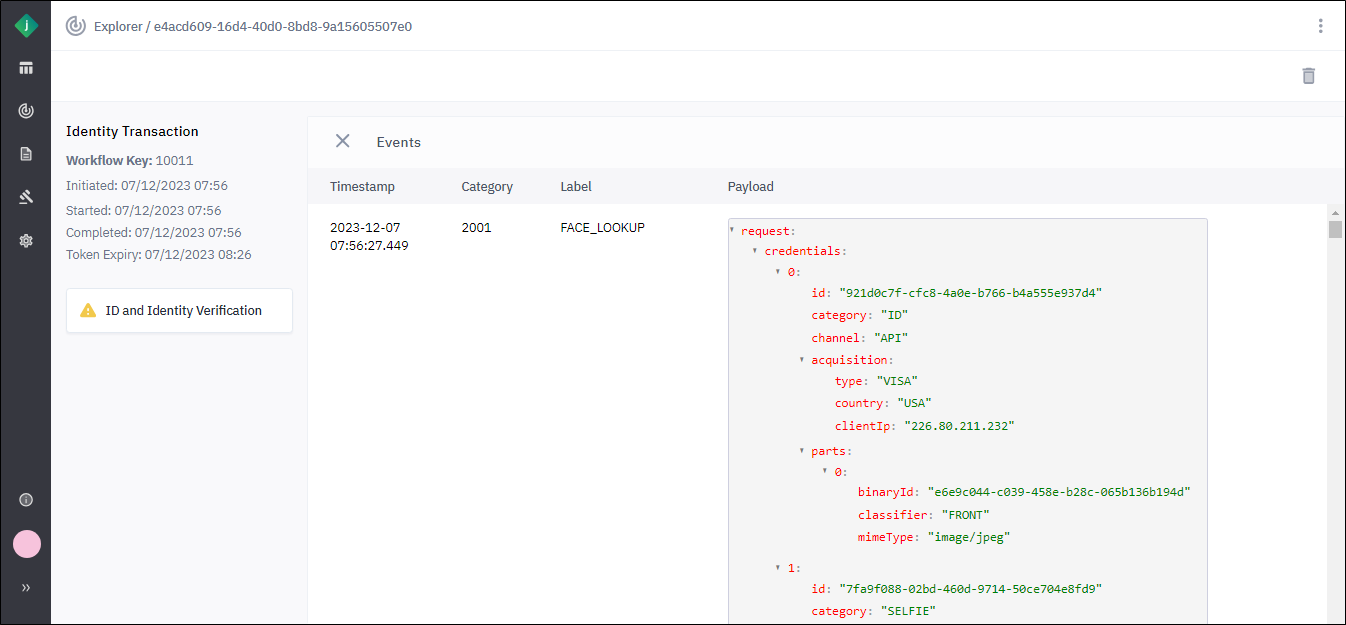
The event log shows the API calls that were made and the values that were returned during the processing of a transaction. The log provides the following information for each event:
| Description | |
|---|---|
| Timestamp | The date and time in UTC at which the event occurred. |
| Category | Category number of the event. |
| Label | The label that the Jumio service or capability applied to the event at the time of processing. |
| Payload | The payload of the JSON message that contained the event. |
View a Transaction's Event Log
You can access the [transaction event log](About the Transaction Event Log.htm) from the transaction detail page.
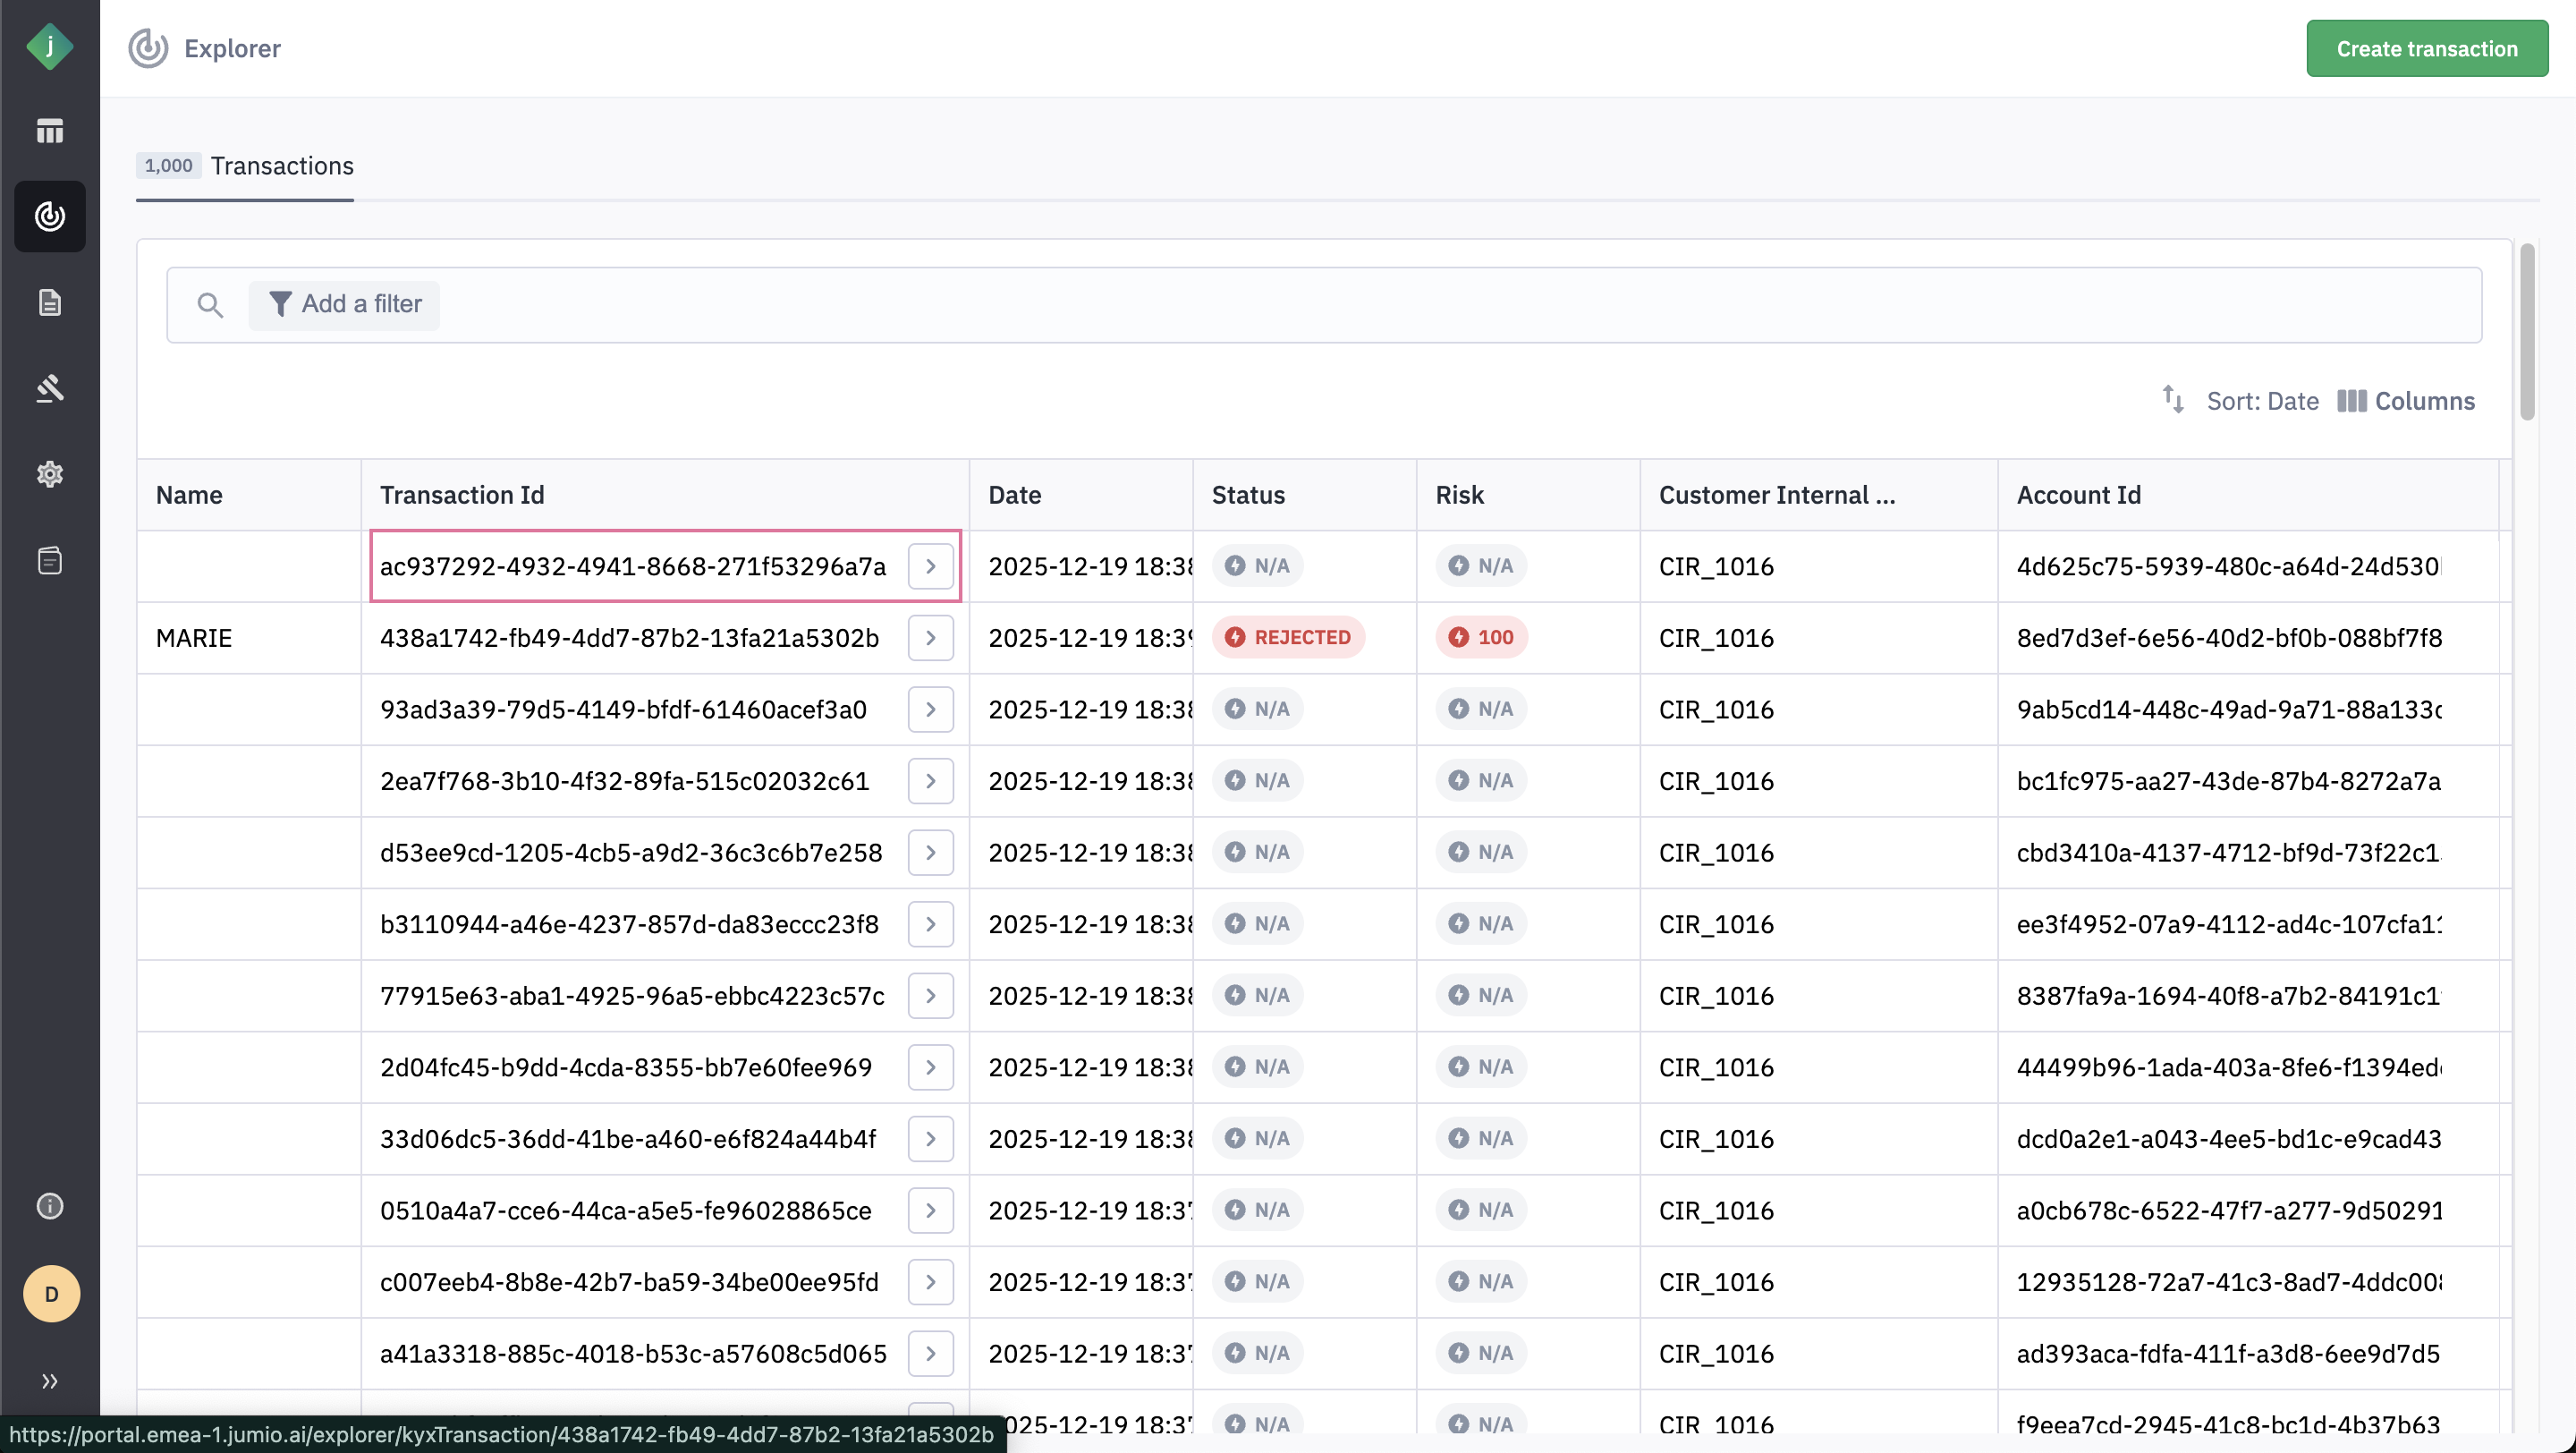
-
From the Transactions tab of the Explorer, locate the transaction whose event log you wish to view.
-
Open the transaction by clicking the below icon to the right of the Transaction ID.
-
Click the menu icon in the upper-right corner of the page and select View Event Log.
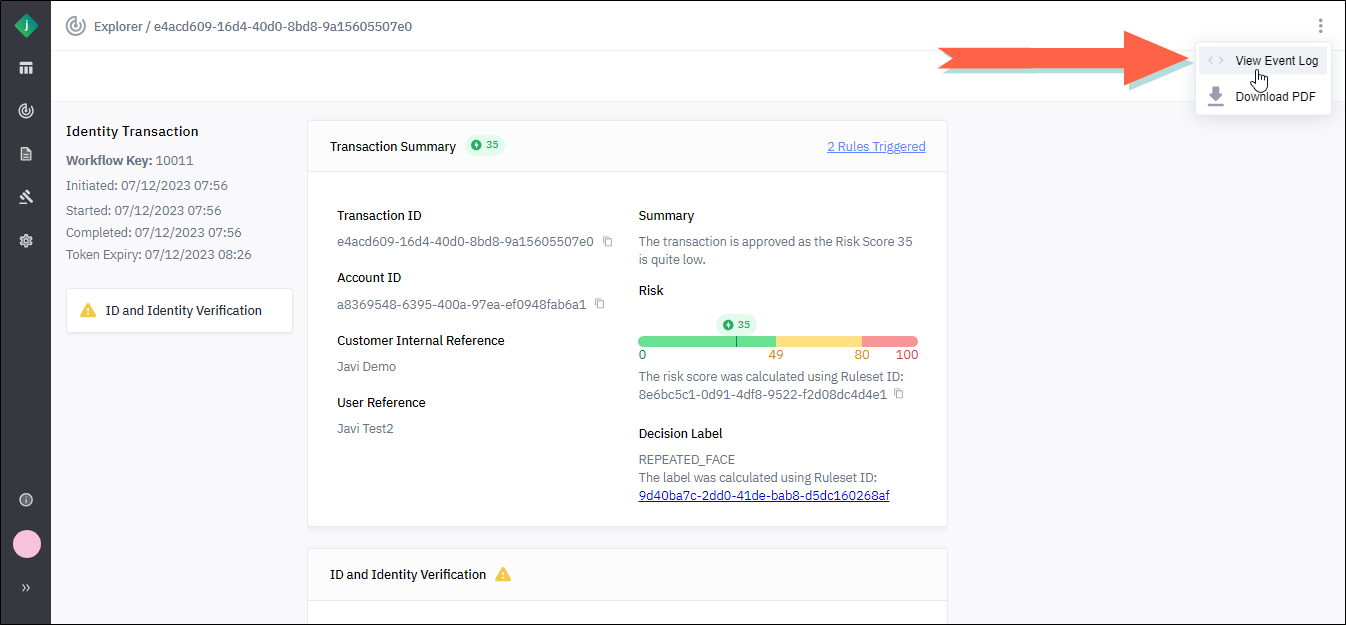
The transaction event log displays.
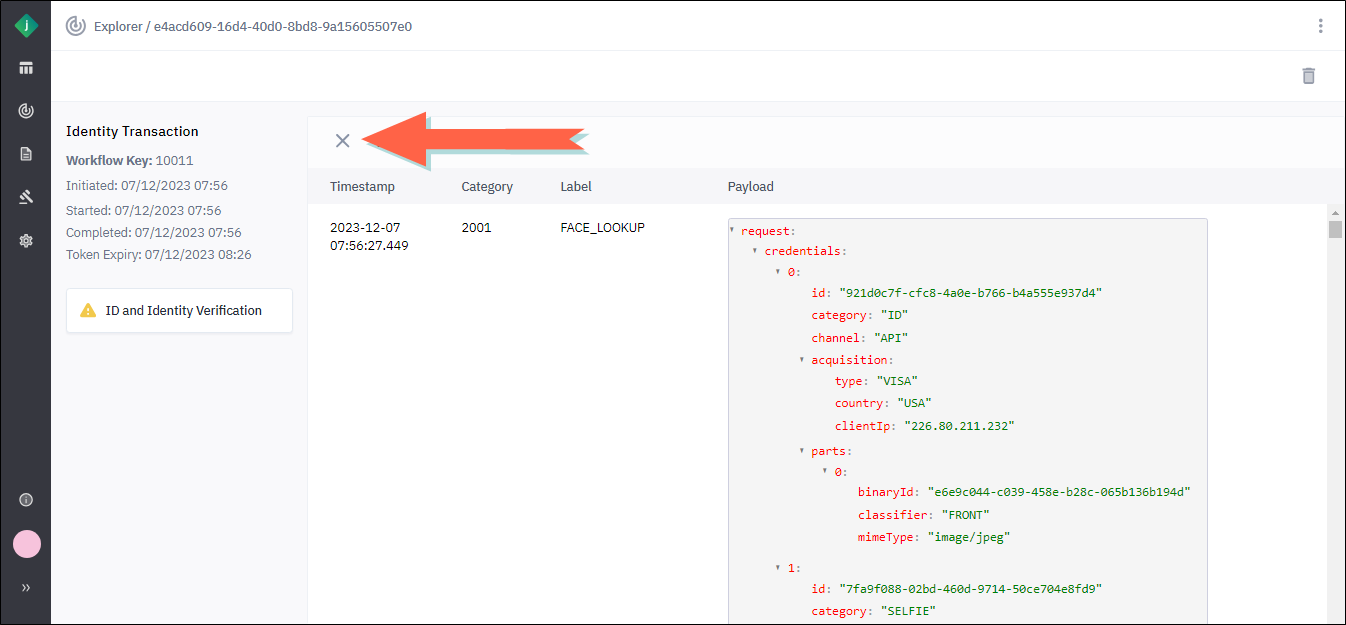
-
To close the event log, click the X at the top of the page.
Transaction Feedback
After Jumio processes a transaction, you can review the decision and provide feedback if you believe it needs clarification or correction. This allows you to flag case where:
- If you believe a decision requires clarification or correction, you can assign a feedback status to the transaction and a reason for the feedback.
Providing feedback essentially tags the transaction to highlight the difference between the Jumio-assigned status and the status your organization believes is correct.
Refer to this section to know more about providing feedback.
How Feedback Affects Future Transactions?
When feedback is provided for transactions that include an ID document, it influences future evaluations for:
- Your tenant, and
- Any other tenants within the same Jumio customer account.
Feedback applies when future transactions match the same ID, based on:
- issuingCountry
- ID type
- documentNumber
- firstName
- lastName
- dateOfBirth
Feedback Outcomes
If the feedback status was:
- NOT_FRAUD: Subsequent transactions with a valid ID with matching data will be approved (applies to the Data Checks capability).
- FRAUD: Subsequent transactions with a matching ID will be rejected, and the decision details label will be CUSTOMER_FEEDBACK.
You can assign both a feedback status and a feedback reason directly in the UI.
You can also submit feedback using Jumio Feedback API.
Reject Reasons
| V3/KYX Decision Detail Label | NEW KYX Decision Reason Label |
|---|---|
| CUSTOMER_FEEDBACK | LOOKUPS_HIGH_RISK_CUSTOMER_FEEDBACK |
| MISMATCHING_DATA_REPEATED_FACE | LOOKUPS_HIGH_RISK_FACE |
| MANIPULATED DOCUMENT | LOOKUPS_HIGH_RISK_SAME_DATA |
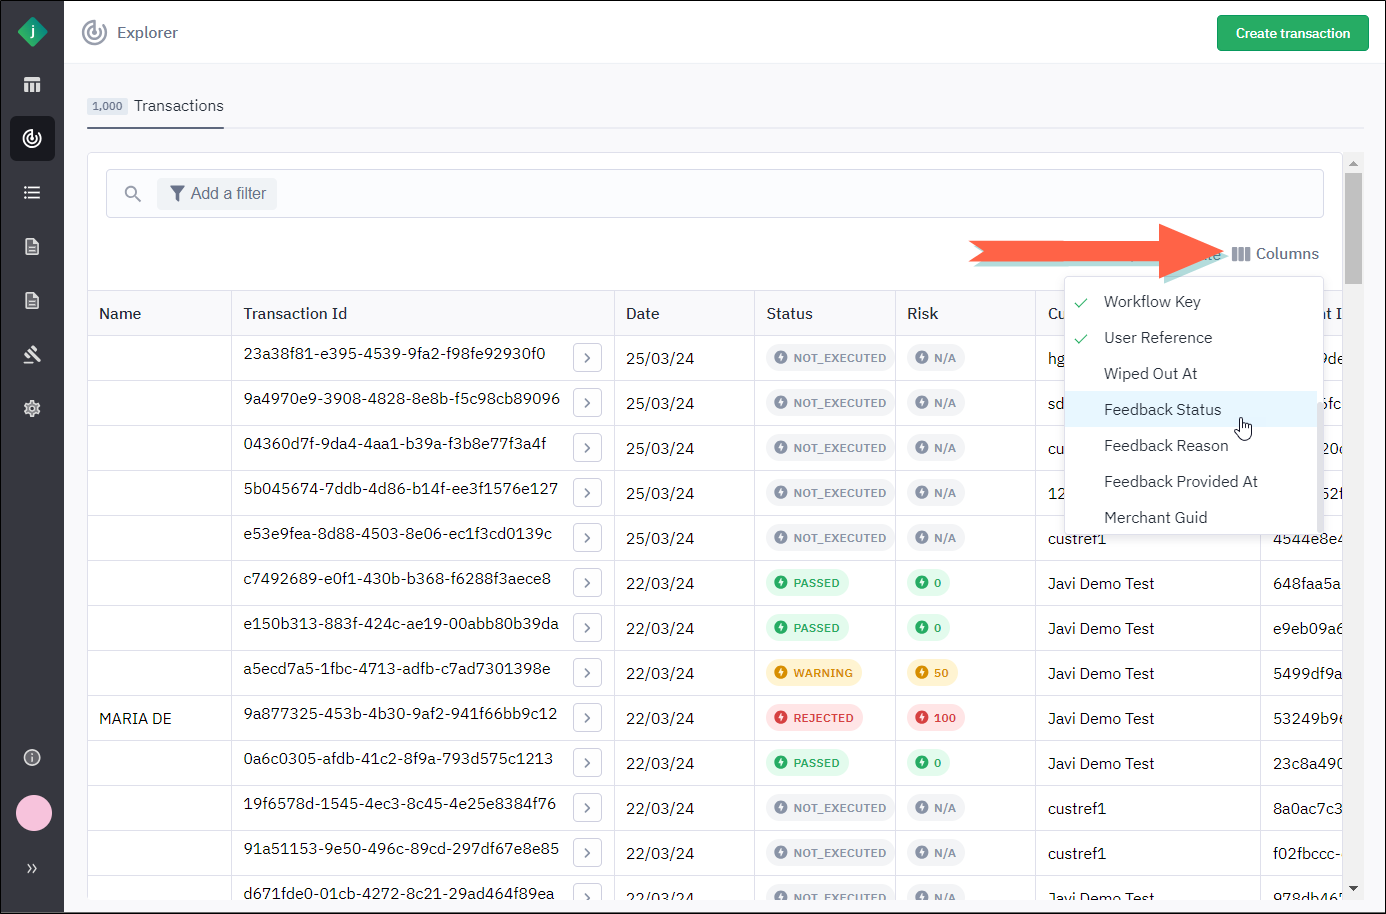
View Feedback in Explorer
For a quick view of feedback in the Explorer, the following columns are available for you to add to the list of transactions:
- Feedback Status
- Feedback Reason
- Feedback Provided At
Provide Feedback on a Transaction
Take the following steps to provide feedback on a transaction.
You may assign a feedback status to a transaction more than once, but only the most recent status will be retained.
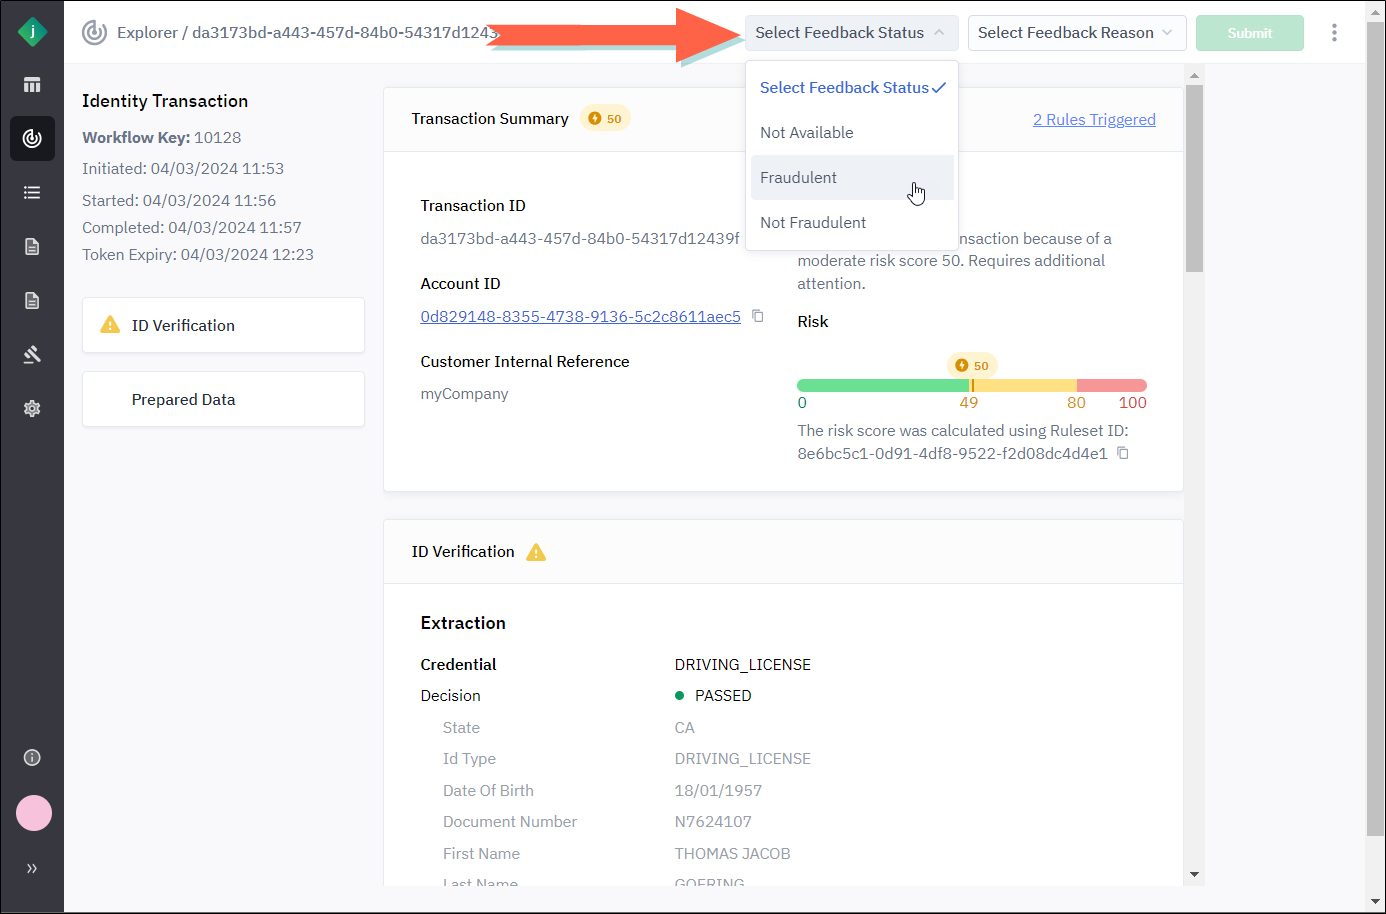
-
From the transaction detail page, click the Feedback Status list and select one of the following options:
- Not Available: Feedback is not provided. Select this option if you have already submitted a feedback status but then decided to remove it.
- Fraudulent: The transaction is an instance of fraud.
- Not Fraudulent: The transaction is not an instance of fraud.
-
Select a feedback reason. For descriptions of these options, see Feedback Reasons.
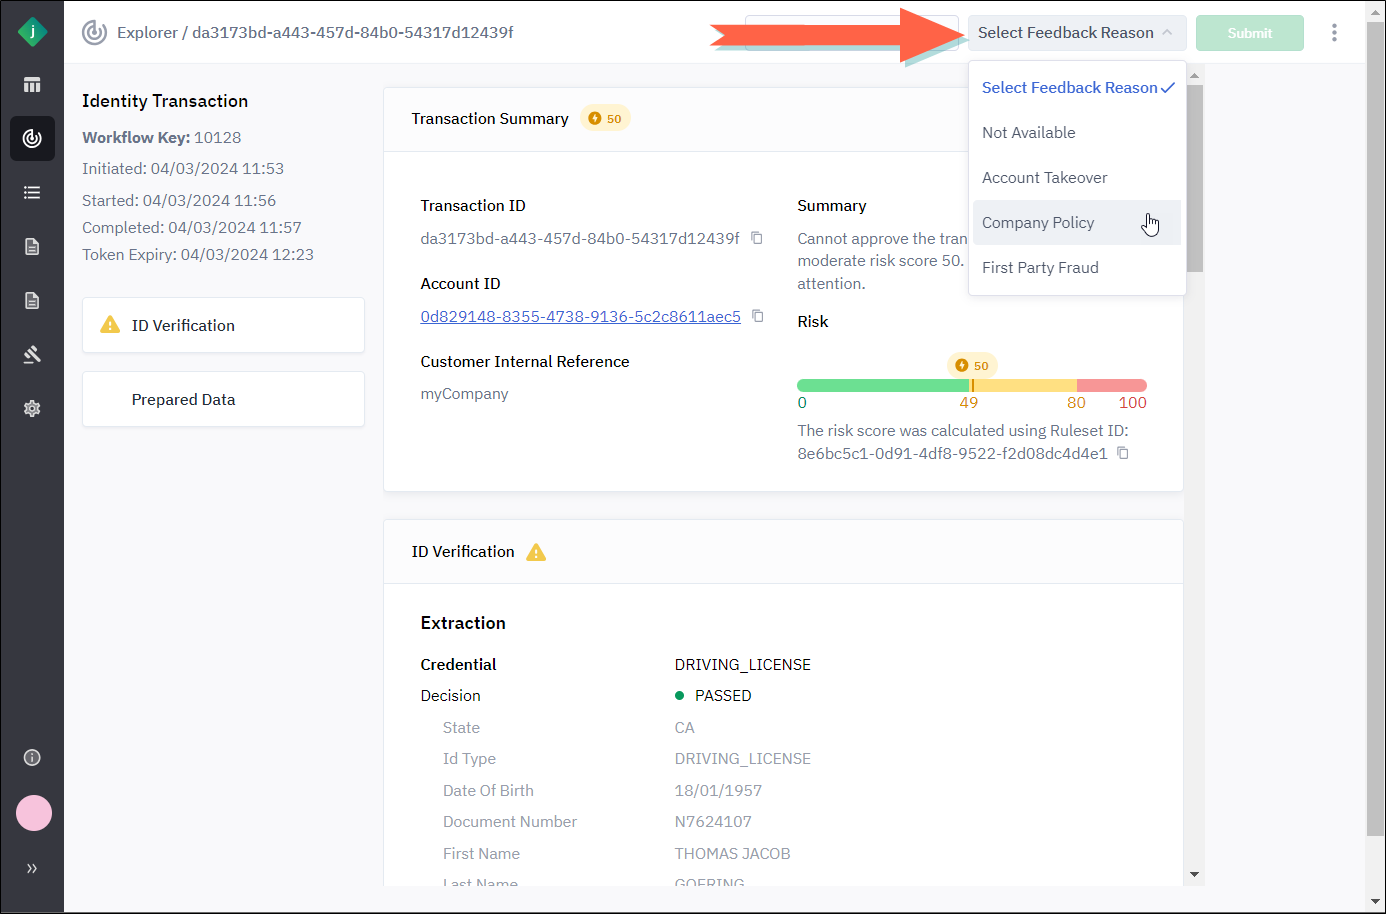
-
Click Submit.
Learn more about providing feedback here.
Feedback Reasons
Following are descriptions of the reasons available for selection when you are providing feedback on a transaction.
| Reason | Description |
|---|---|
| Not Available | No reason provided. Select this option if you have already submitted a feedback reason but wish to remove it. |
| Account Takeover | Unauthorized access to a user's account, often through hacking or stolen credentials. |
| Company Policy | Risks associated with non-compliance or violation of internal company policies and procedures. |
| First Party Fraud | Deceptive activities where a legitimate account holder intentionally engages in fraud. |
| Government Regulations | Risks arising from failure to comply with laws and regulations set by government authorities. |
| Identity Fraud | Unauthorized use of someone's personal information to commit fraudulent activities. |
| Insider Fraud | Fraudulent activities carried out by individuals within an organization, exploiting internal access. |
| Money Laundering | Concealing the origins of illegally obtained money, often involving complex financial transactions. |
| Payment Fraud | Unauthorized or fraudulent transactions involving the use of payment methods. |
| Phishing | Fraudulent attempts to obtain sensitive information, such as usernames and passwords, by posing as a trustworthy entity. |
| Synthetic ID Fraud | Creation of fictitious identities using a combination of real and fake information for fraudulent purposes. |
| Third Party Fraud | Fraudulent activities initiated by external entities not directly associated with the organization. |
Download a Transaction as a PDF
From the transaction detail page, you can download a PDF version of the transaction.
-
From the Transactions tab of the Explorer, locate the transaction you wish to download.
-
Open the transaction by clicking the following icon to the right of the Transaction ID:
-
Click the menu icon in the upper-right corner of the page and select Download.

The portal saves a PDF version of the transaction to your Downloads folder.