Work with the Transactions Table
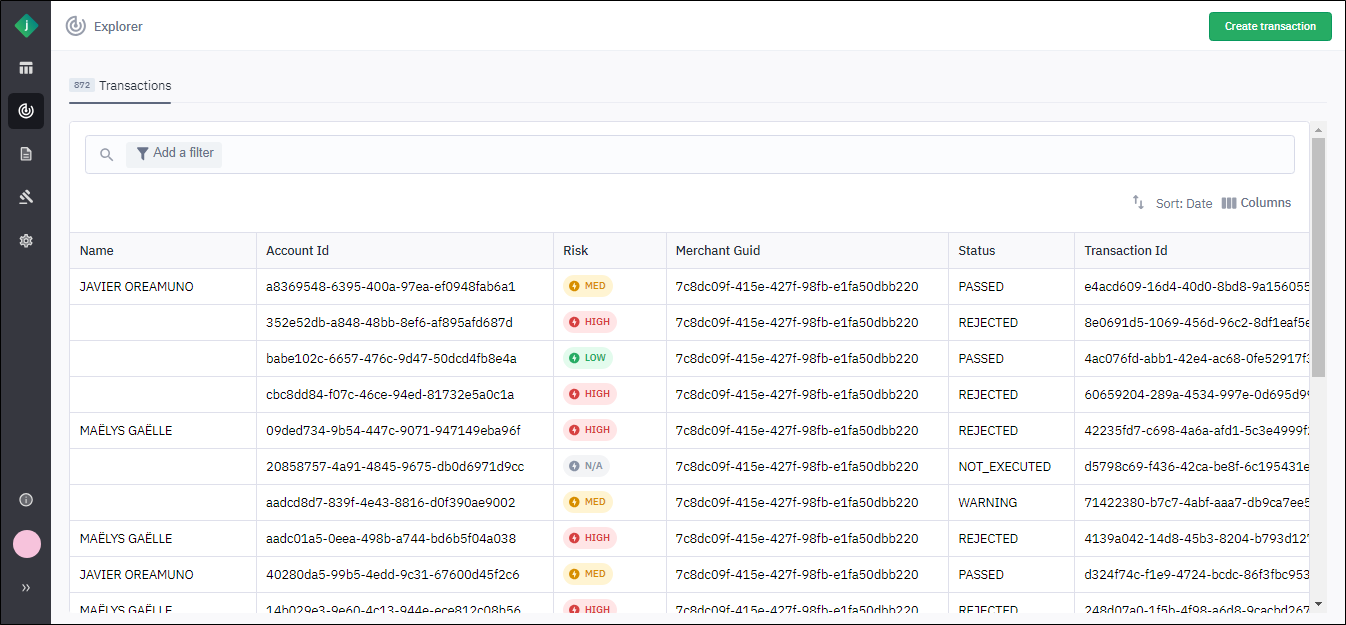
Columns Available in the Explorer
The following data fields are available to display as columns in the Transactions table of the Explorer. You can [show or hide these columns as desired](Show or Hide Columns in the Explorer.htm).
| Column | Description |
|---|---|
| Name | Name of the end user involved in the transaction. |
| Transaction ID | Unique identifier for the transaction. |
| Date | Timestamp for the transaction. |
| Status | Decision type assigned to the transaction to indicate the overall level of fraud risk. |
| Risk | Risk score assigned to the transaction by the workflow. |
| Customer Internal Reference | Identifier used during searches and reporting to identify this specific transaction. |
| Account ID | Unique identifier that is used to associate a set of credentials and transactions with a customer. |
| Workflow Key | Unique identifier for the Jumio workflow that processed the transaction. |
| User Reference | Identifier used during searches and reporting to identify the end user who scanned their ID and selfie to perform the verification, such as a user’s internal customer ID. |
| Wiped Out At | Timestamp for when the personally identifiable information (PII) was deleted for the transaction. |
| Feedback Status | Feedback status assigned to the transaction by a user in the Jumio Portal. |
| Feedback Reason | Feedback reason selected by a user of the Jumio Portal. |
| Feedback Provided At | Time stamp for assignment of feedback. |
| Merchant GUID | Unique identifier for the tenant under which the transaction was processed. |
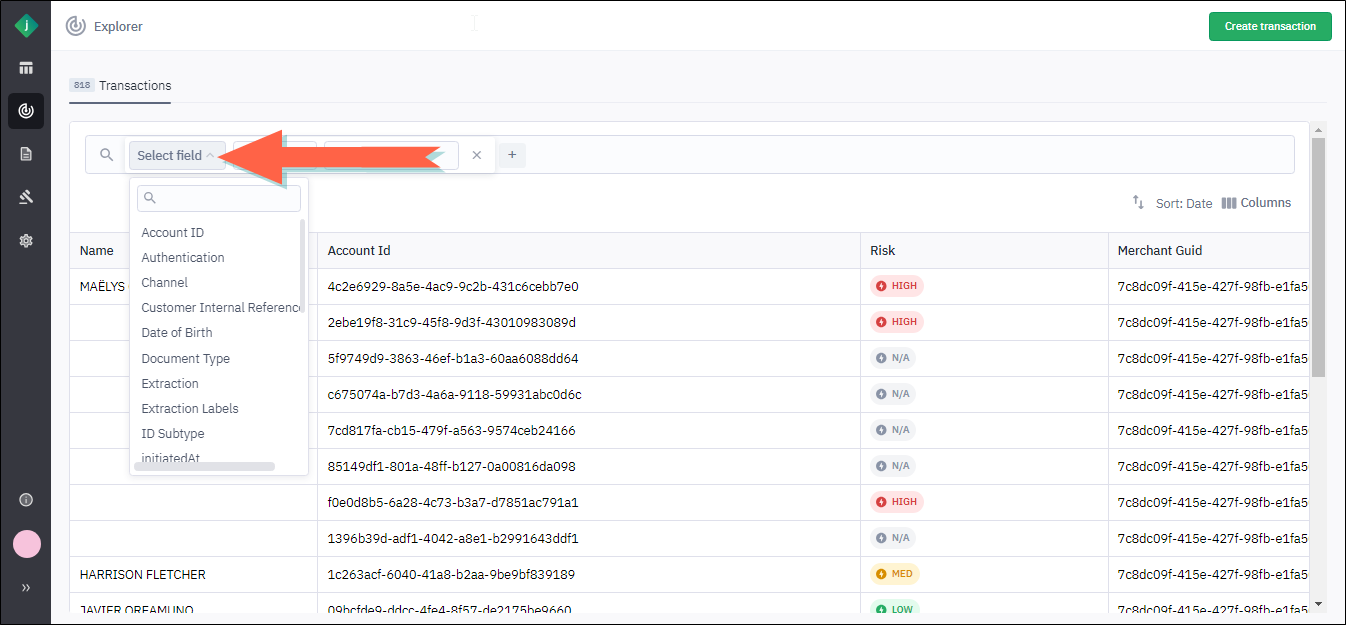
Filtering Data in the Explorer
Apply a Data Filter in the Explorer
-
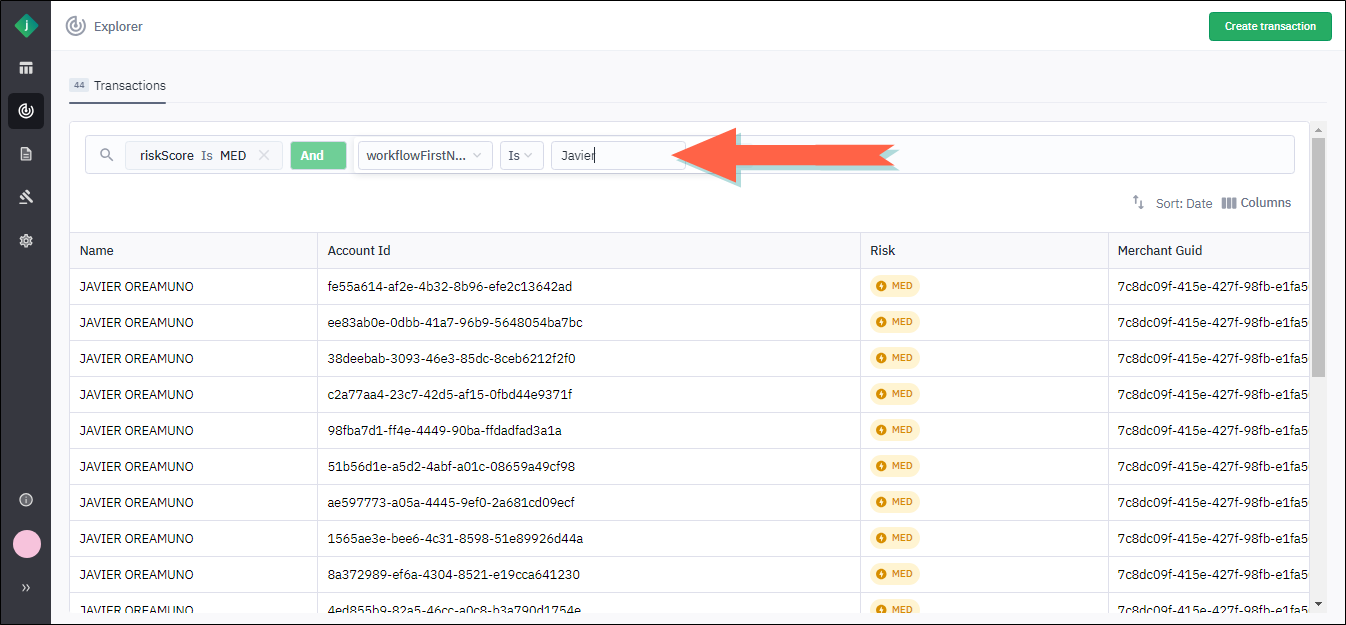
Add a new filter expression by taking one of the following steps:
-
Click Add a filter.

-
Click the ellipsis icon in a column header and select Filter.

-
-
Select a field. You can skip this step if you added the filter expression from a column header in step 1, as the field will already be selected based on the chosen column.
-
If necessary, select an operator.
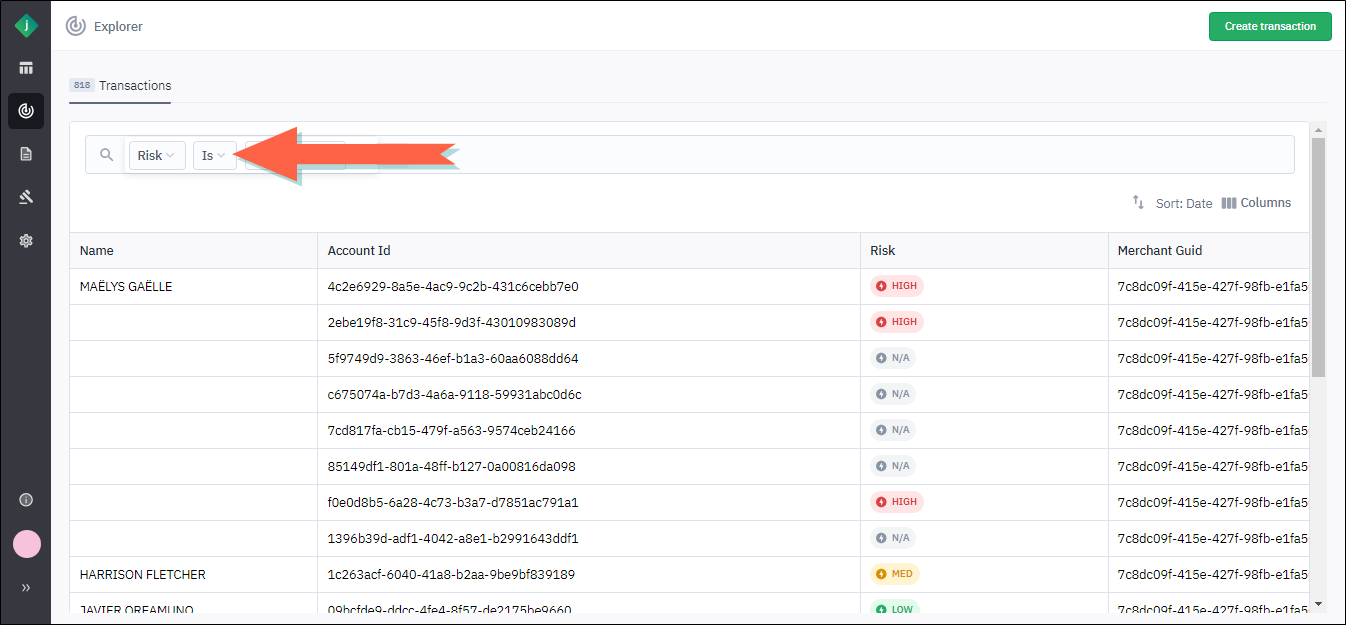
ℹ️ Tip: In most cases the appropriate operator will be selected automatically. -
Enter or select a value.
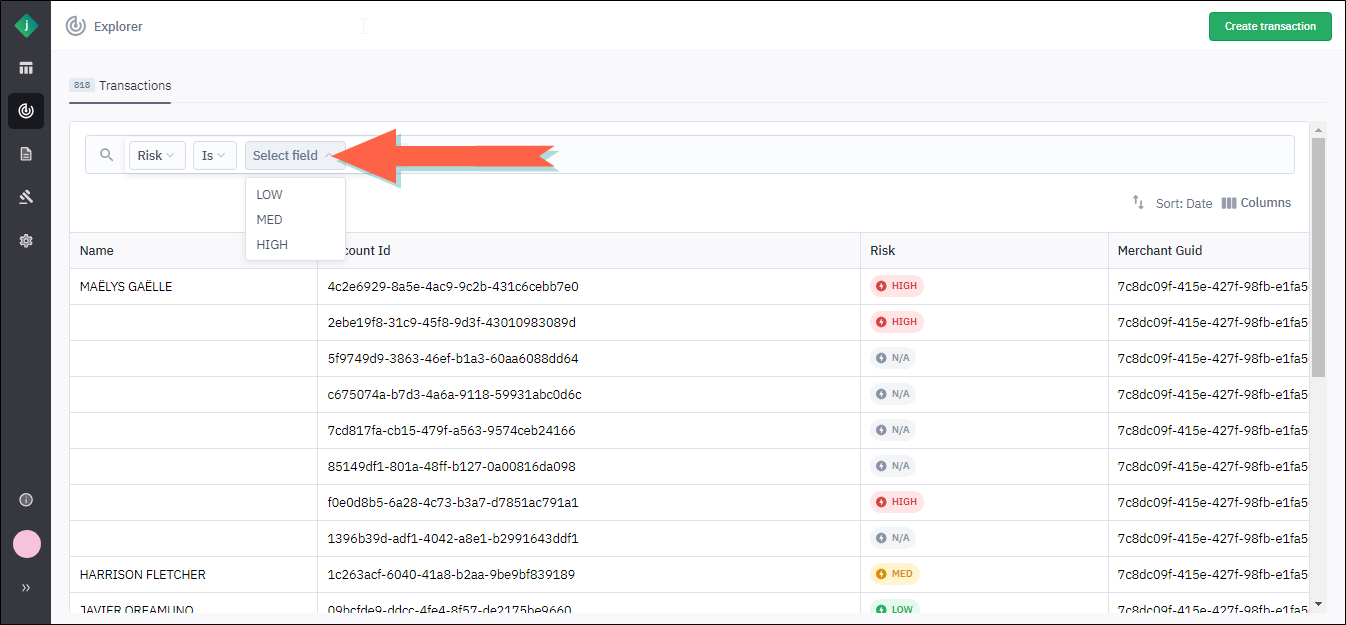
The page refreshes to show the transactions that meet the filter criteria.
-
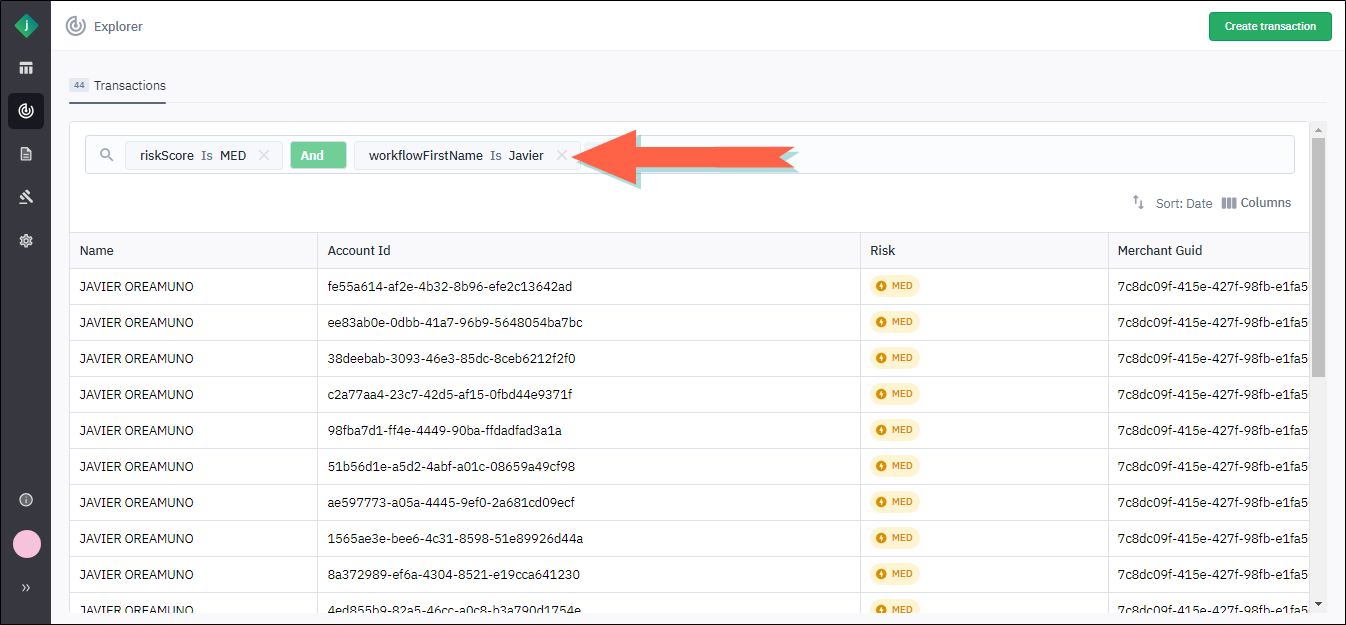
To add another expression, take the following steps:
-
Click +.

The application adds a second expression which is ANDed to the first.
-
Select a field and operator and enter a value.
-
Repeat steps a and b to add additional expressions.
ℹ️ Tip: To remove an expression, click the X to the right of it. -
Remove a Filter
To remove a filter, click the X to the right of the filter expression. This will delete the expression and refresh the page to show the data without the filter applied.
Sort the Data in the Explorer
-
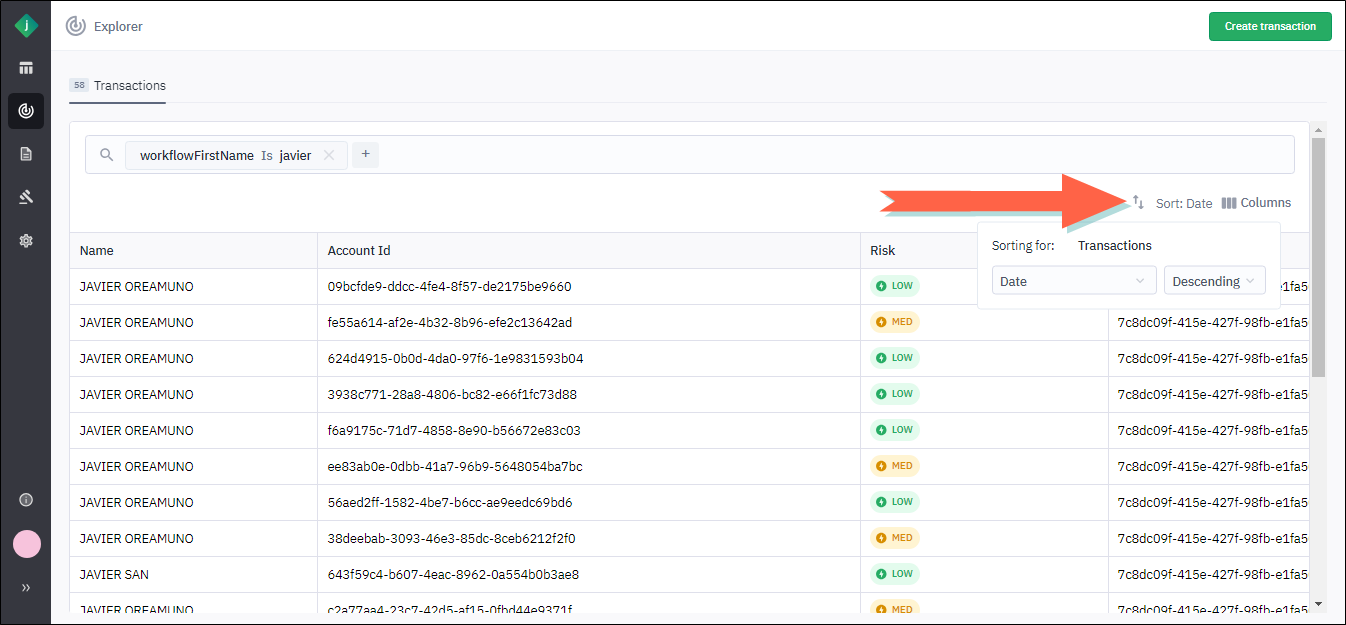
From the transactions table, click the Sort button.
Two list boxes display.
-
From the first list, select the sort column.
-
From the second list, select the sort order, either Ascending or Descending.
-
To close the list, click the Sort button again.
Show or Hide Columns in the Explorer
You can choose which columns appear in the transactions table. For a list of all available columns, see Columns Available in the Explorer.
- From the transactions table, click the Columns button.
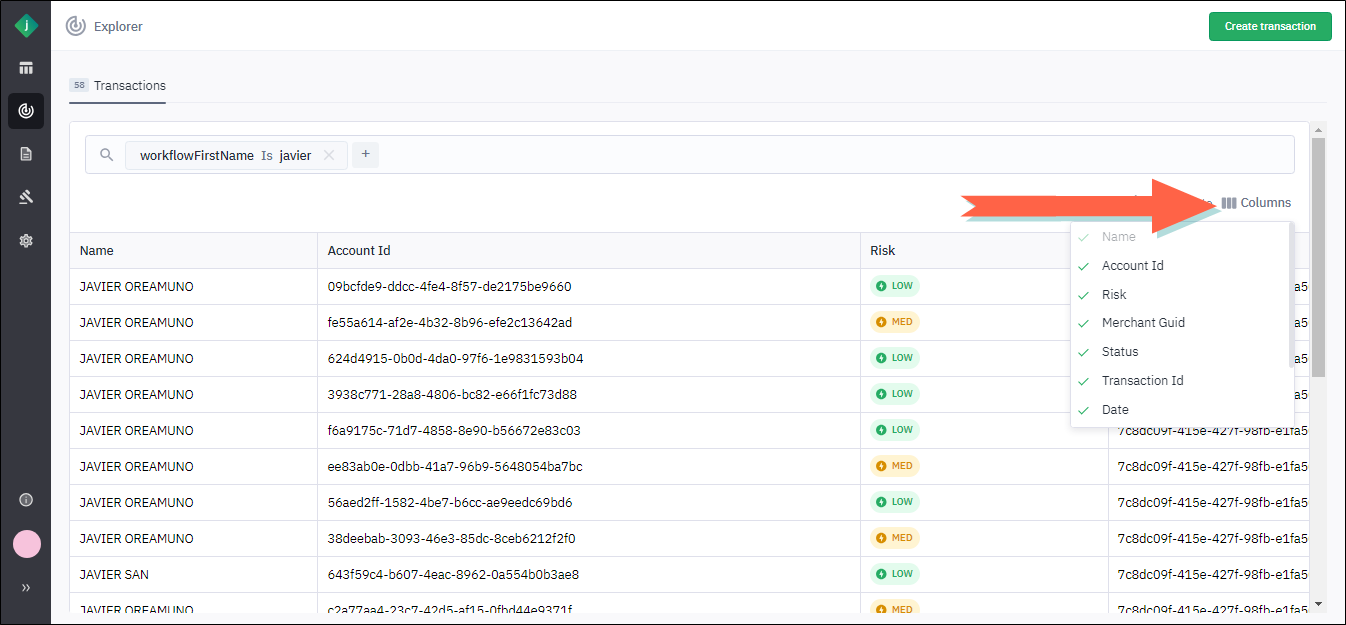
Available columns display in a list. Columns that currently appear in the table are indicated by a green check mark.
-
Show or hide columns as follows:
-
To add a column to the table, click it. A green check mark will appear next to it.
-
To hide a column, remove its check mark by clicking it.
ℹ️ :::tip You cannot hide the Name column.:::
-
Resize Columns in the Explorer
In some cases you may want to resize the columns in the Explorer to make it easier to view the data that is most important to you.
-
From the transactions table, hover the pointer over the right edge of a column header until the pointer turns into a double-headed arrow.
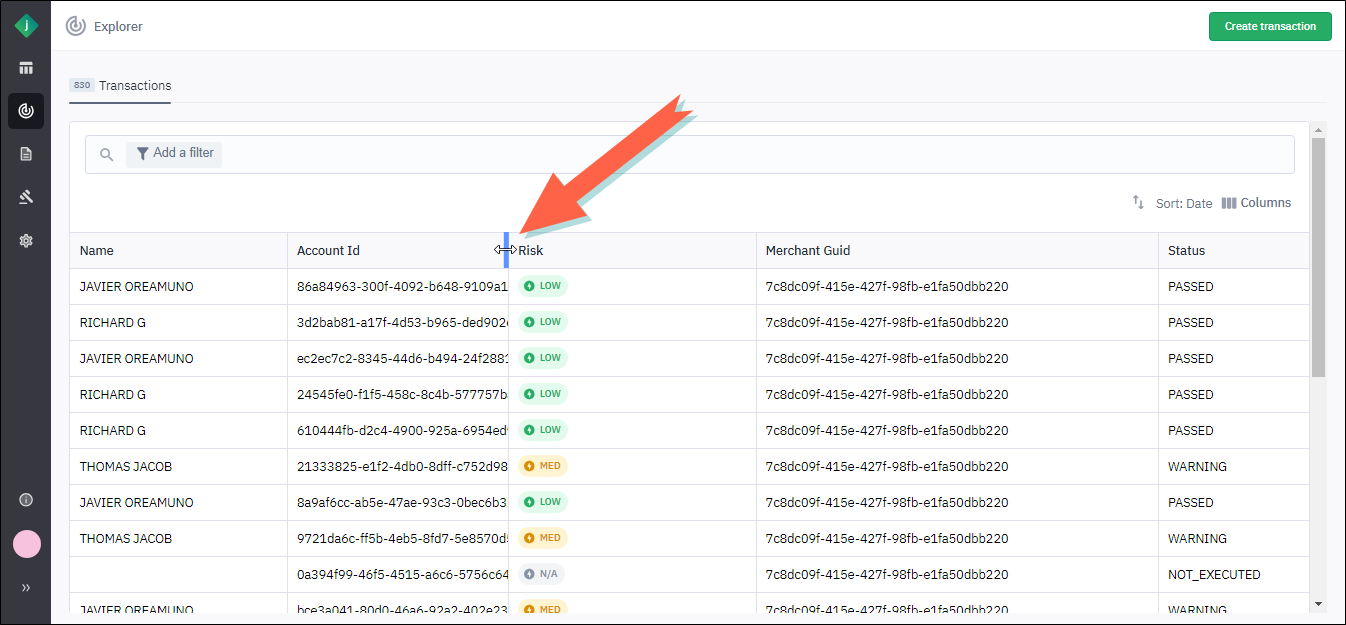
-
Click and drag the pointer to the left to make the column more narrow or to the right to make it wider. For example, in the following screen capture, we have widened the Account ID column to reveal its full contents.
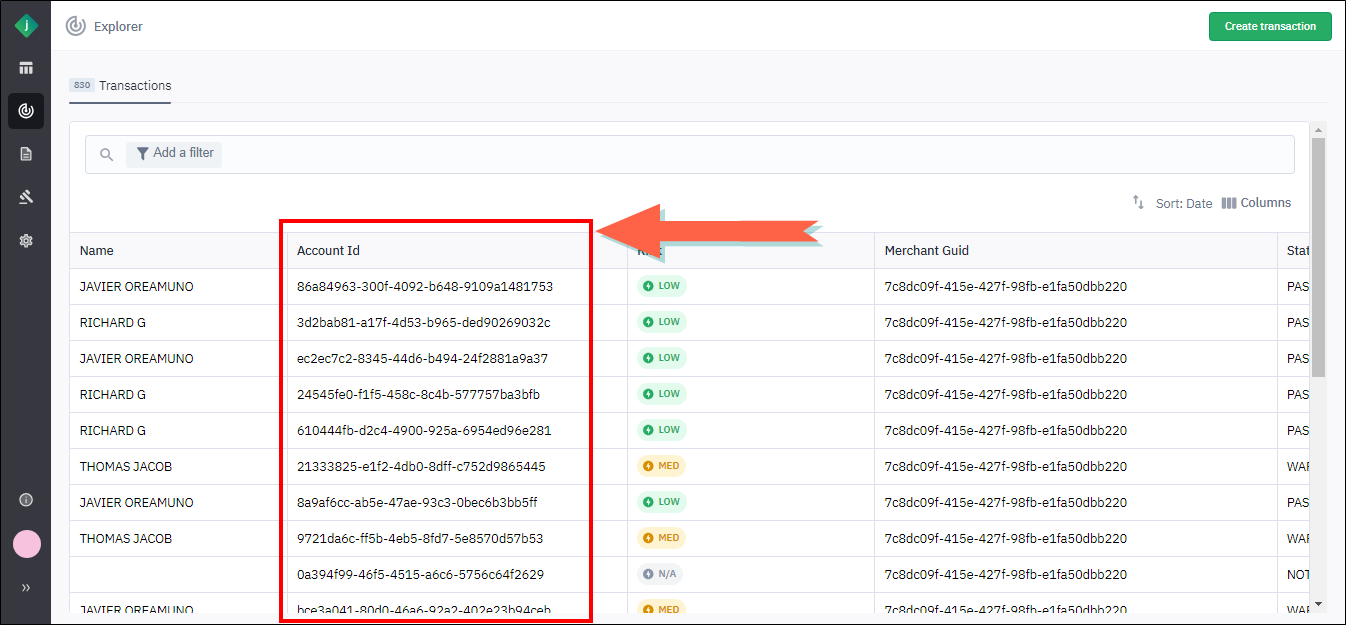
-
Repeat steps 1 and 2 to resize other columns as needed.
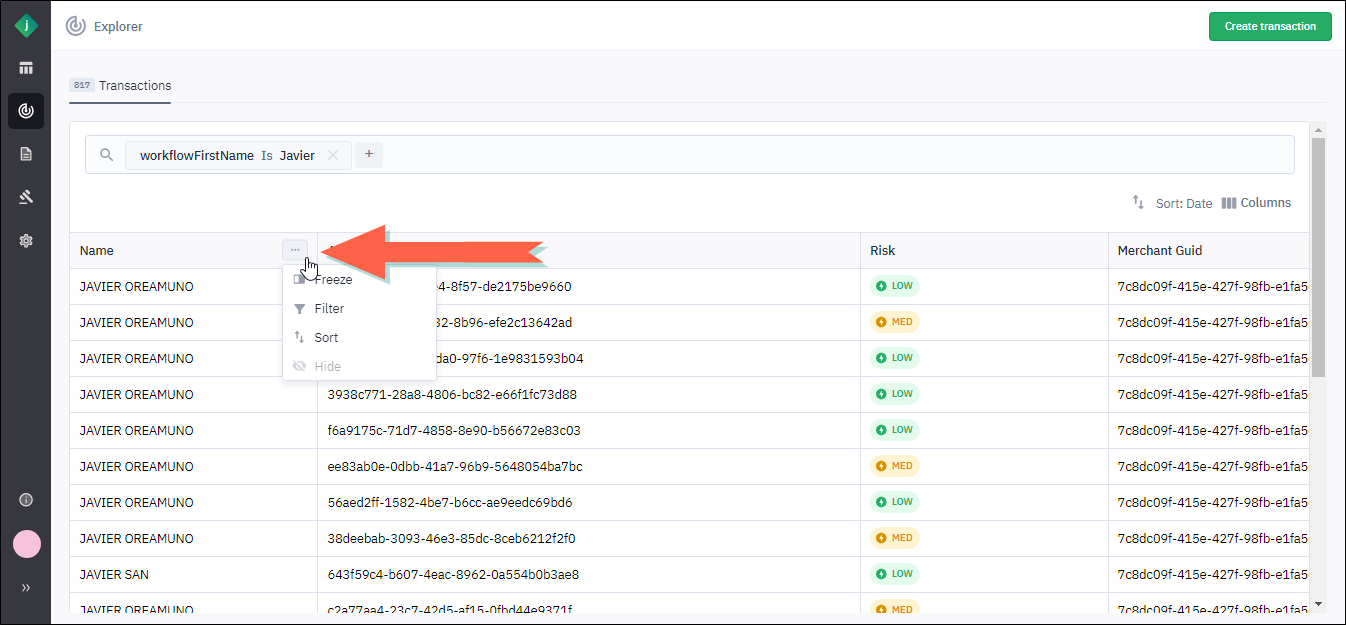
Freeze or Unfreeze the Name Column
You can freeze the Name column in the Explorer so that it remains visible when you scroll left or right.
-
From the transactions table, click the ellipsis icon to the right of the Name column header and select the Freeze toggle.
-
To unfreeze the column, select the Freeze toggle again.