Overview - Advanced Reporting
This document provides a detailed specification of the Enhanced Reporting feature, recently launched on the Jumio Portal for customers in the APAC region.
The Enhanced Reporting system is a complete overhaul of our reporting infrastructure, designed to solve the core challenges of manual redundancy, lack of automation, and non-adaptive interfaces. This revamped system provides a more efficient, automated, and customizable experience for managing transaction data.
Key Challenges and Solution
The new system addresses three primary pain points identified in legacy reporting:
- Manual Redundancy: Users no longer need to repeatedly recreate the same reports or manually select fields and filters for every execution.
- Lack of Automation: The revamp introduces scheduled report generation and delivery, removing the need for manual intervention.
- Non-Adaptive Interface: Unlike the legacy system that showed all available fields regardless of relevance, the new interface adapts to customer-specific settings.
Core Features
The Enhanced Reporting suite includes several powerful new tools:
- Beta Launch in APAC: Exclusively available to customers in the APAC region as of February 3rd.
- Report Templates: Allows users to save, manage, and reuse specific configurations to ensure consistency.
- Scheduled Reports: Users can set reports to run at predefined frequencies.
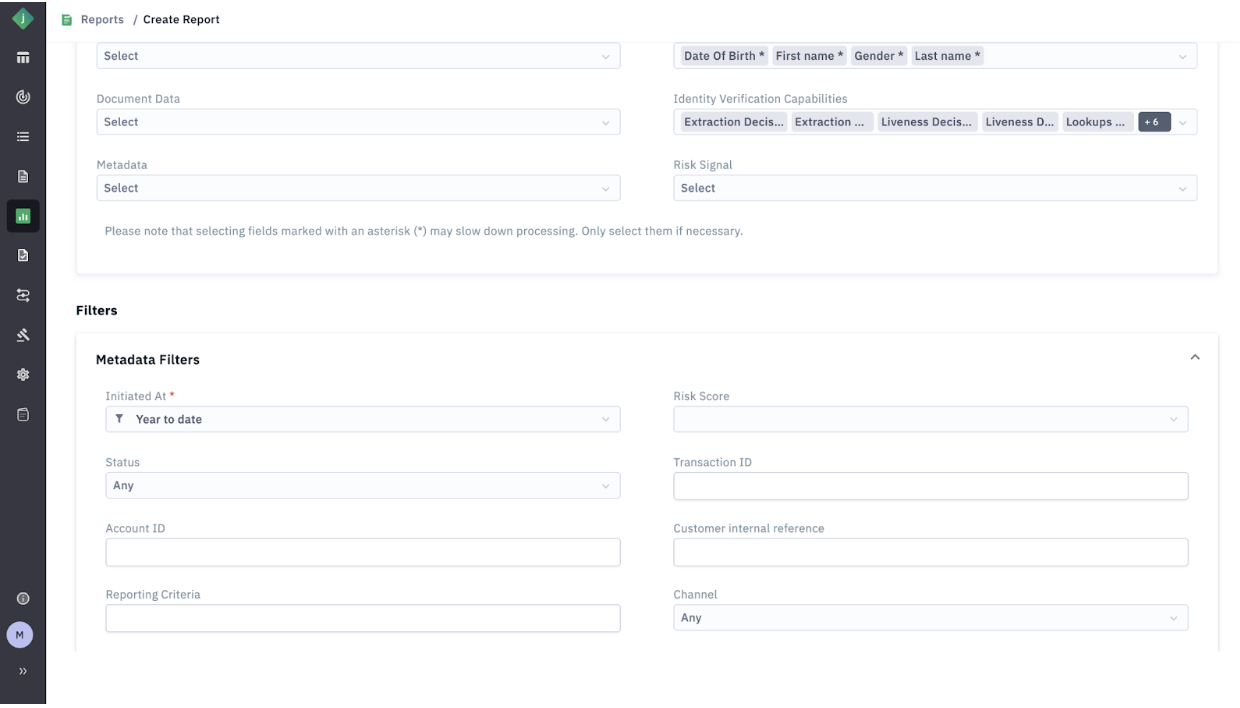
- Contextual Filters: Filters for third-party checks only appear if that specific integration is enabled for your tenant.
- PII Data Control: A new role-level permission allows administrators to enable or disable the viewing and downloading of Personally Identifiable Information (PII).
Getting Started
To access the new features, log in to your portal and look for the new "Reporting" option added to the Left Navigation Menu.
The new Reporting menu features three sub-sections: Reports, Scheduled Reports, and Templates.
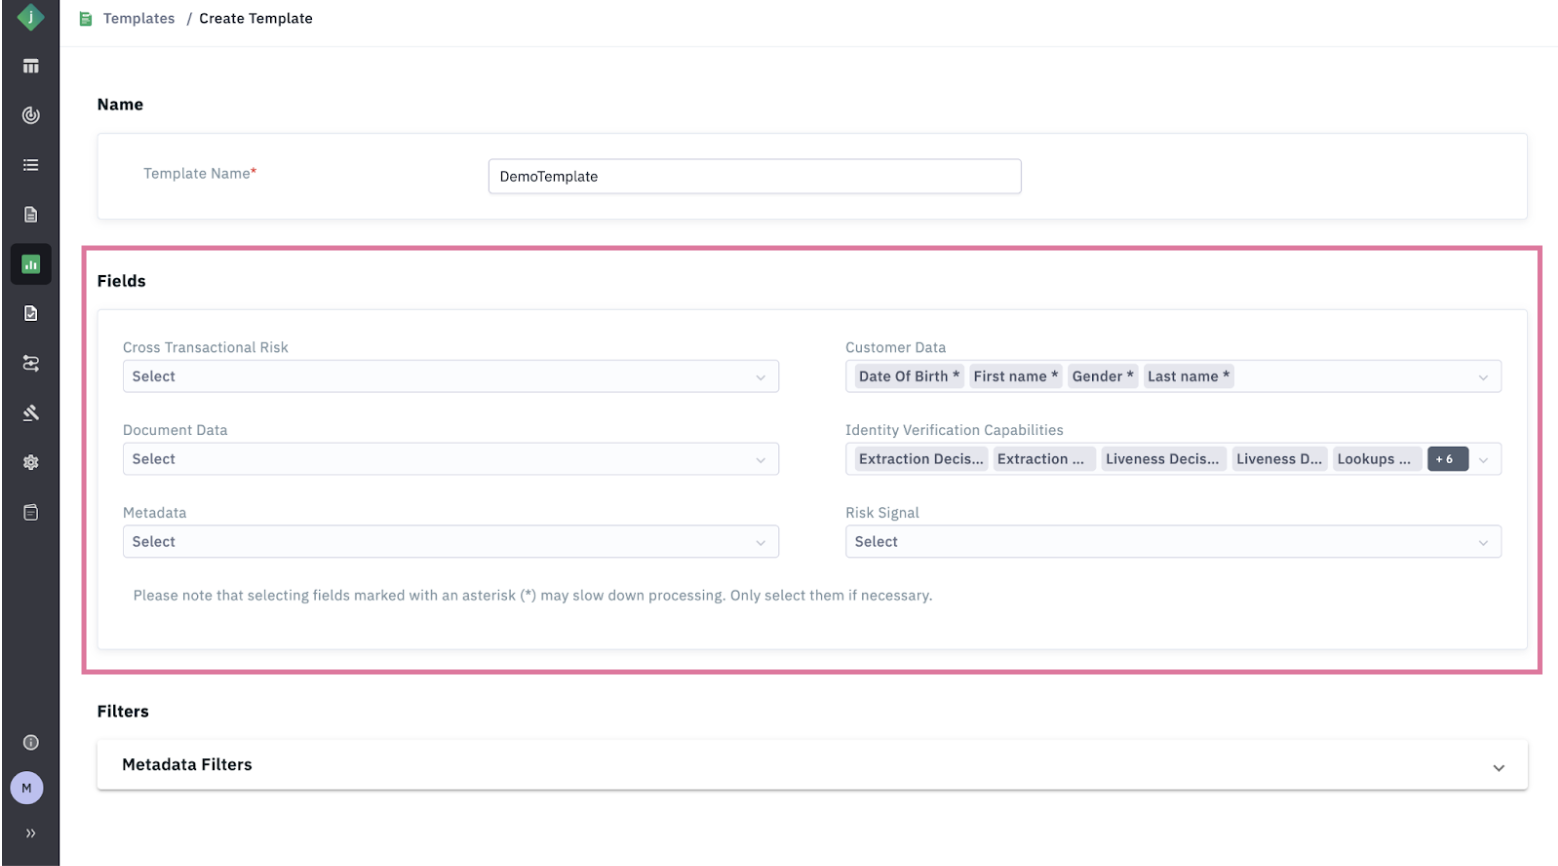
Creating and Managing Templates
Templates are designed to save time by capturing your preferred report settings.
Step 1: Navigate to the Templates section.
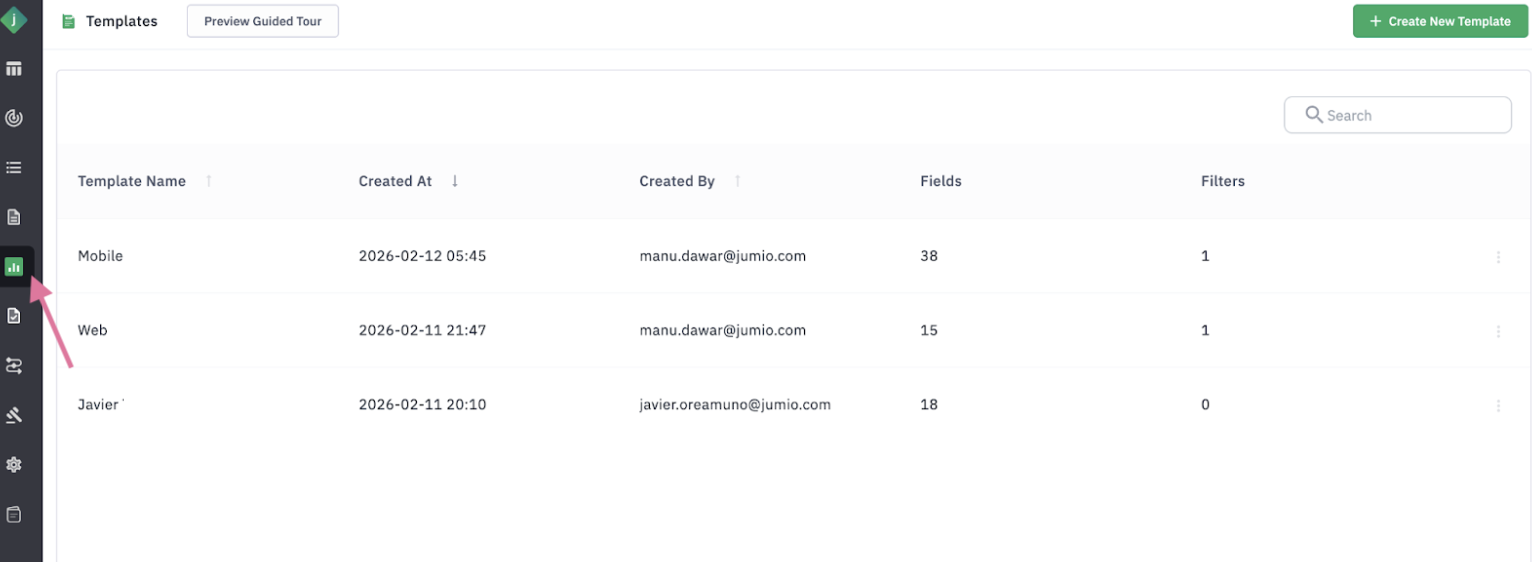
Step 2: Click “Create New Template”.
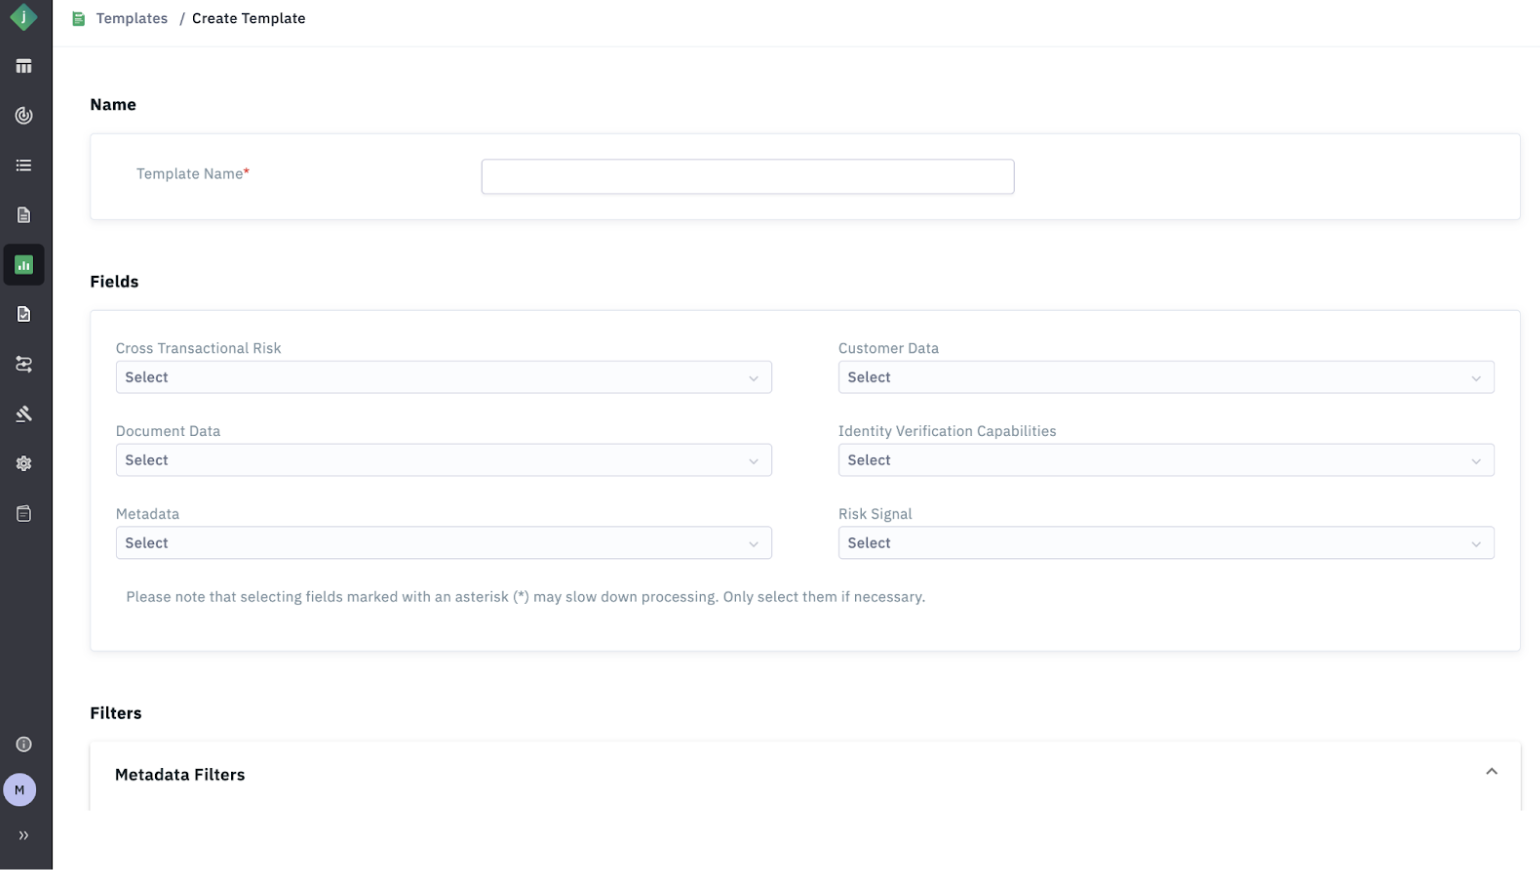
Step 3: Provide a template name.
Step 4: Select your desired fields and filters.
Step 5: Save the configuration for future use.
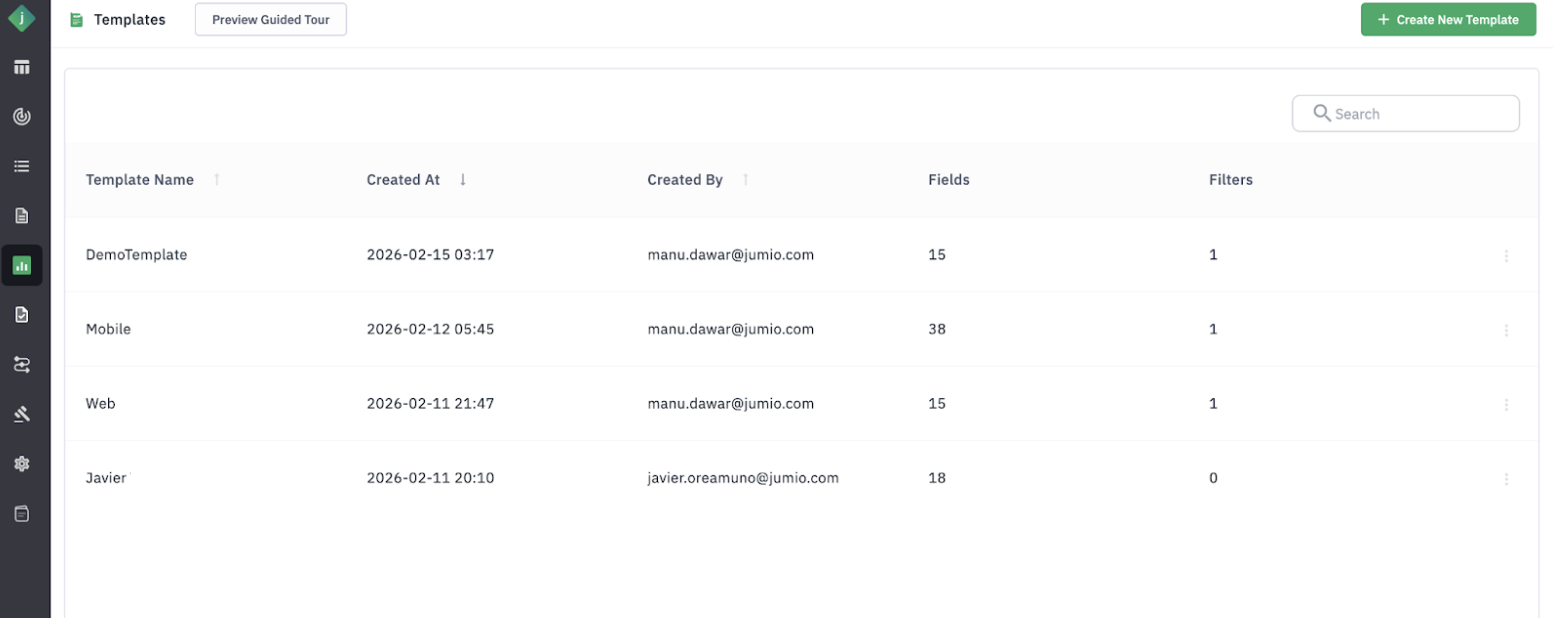
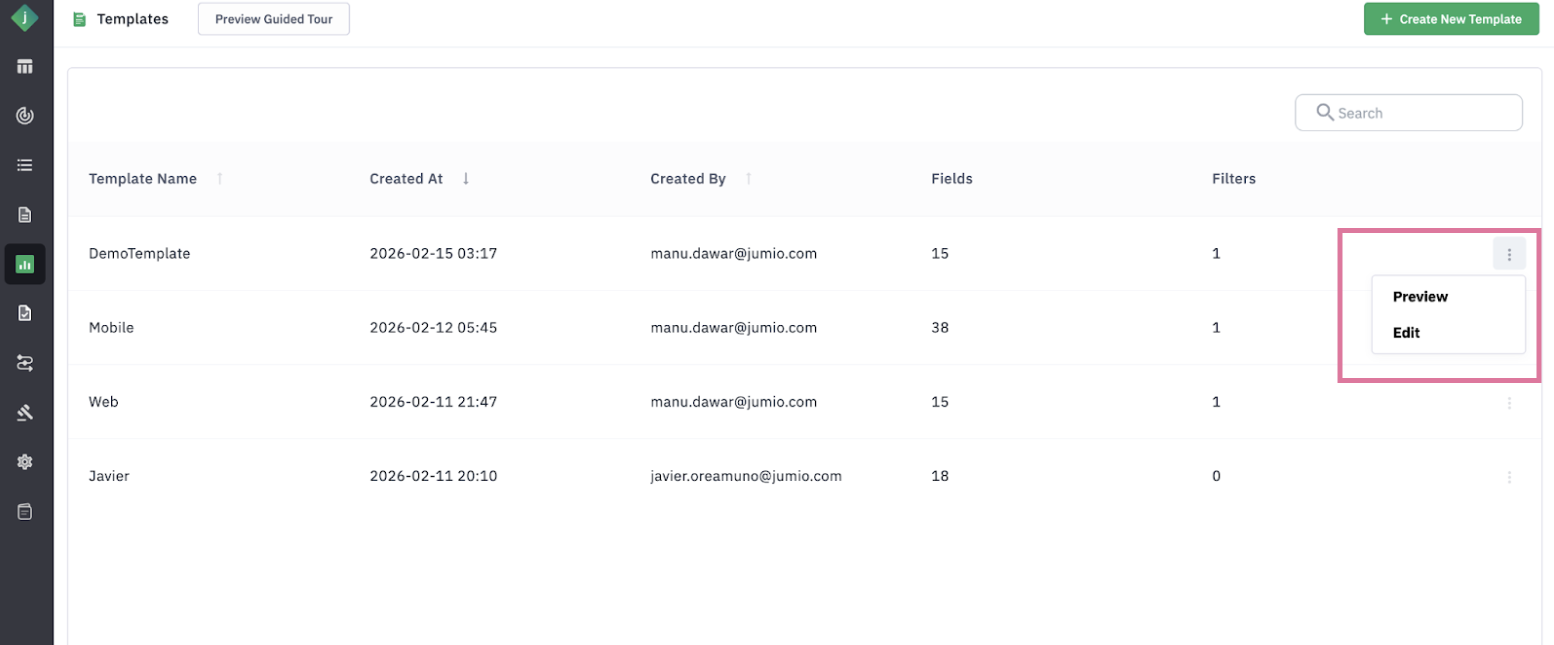
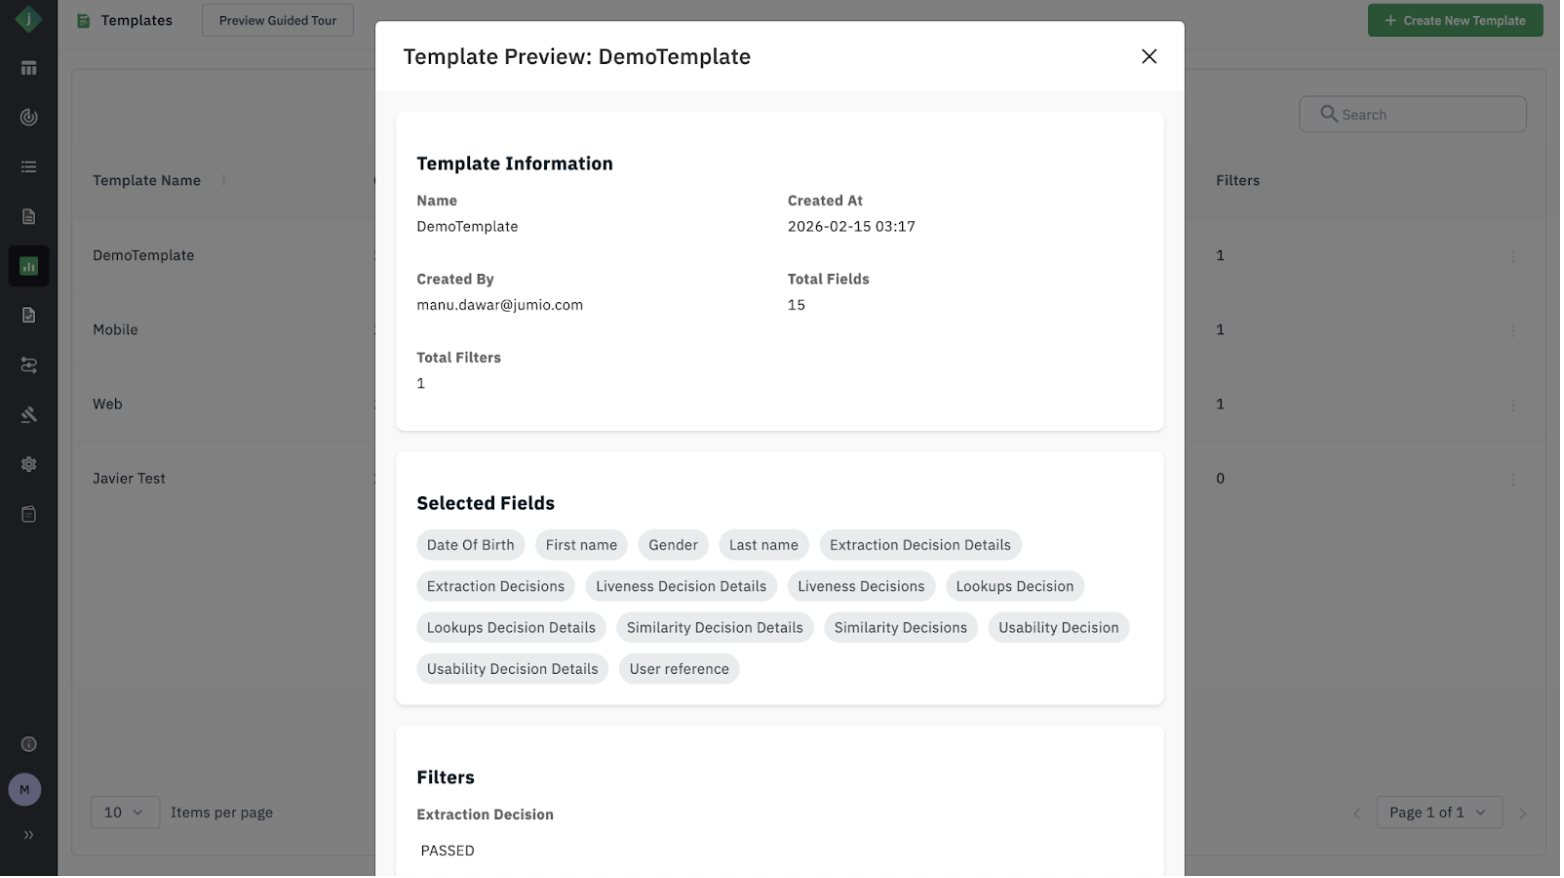
Step 6: Preview existing templates to view the list of fields and filters.
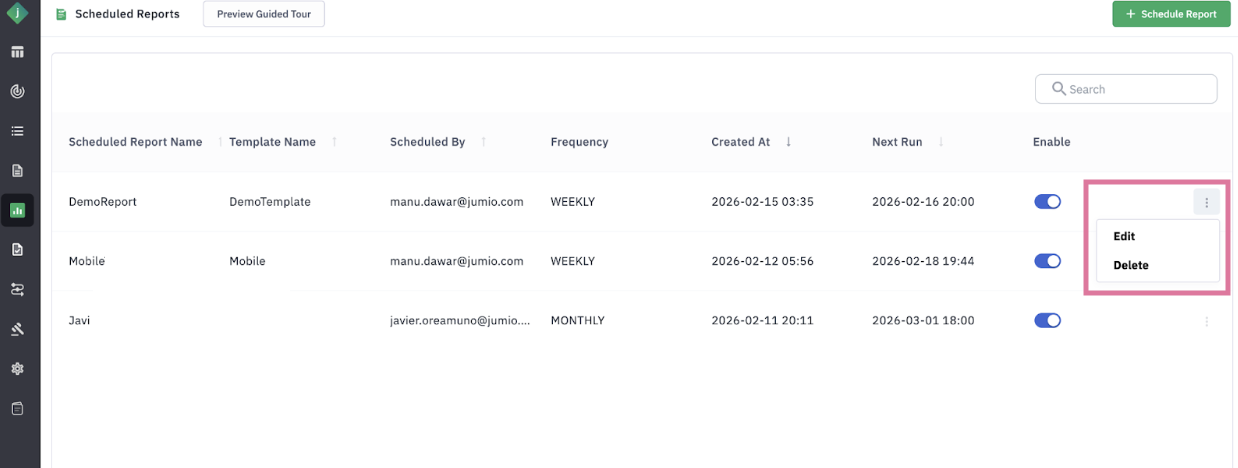
Scheduling a Report
To eliminate manual creation for recurring needs:
Step 1: Open the Scheduled Reports page.
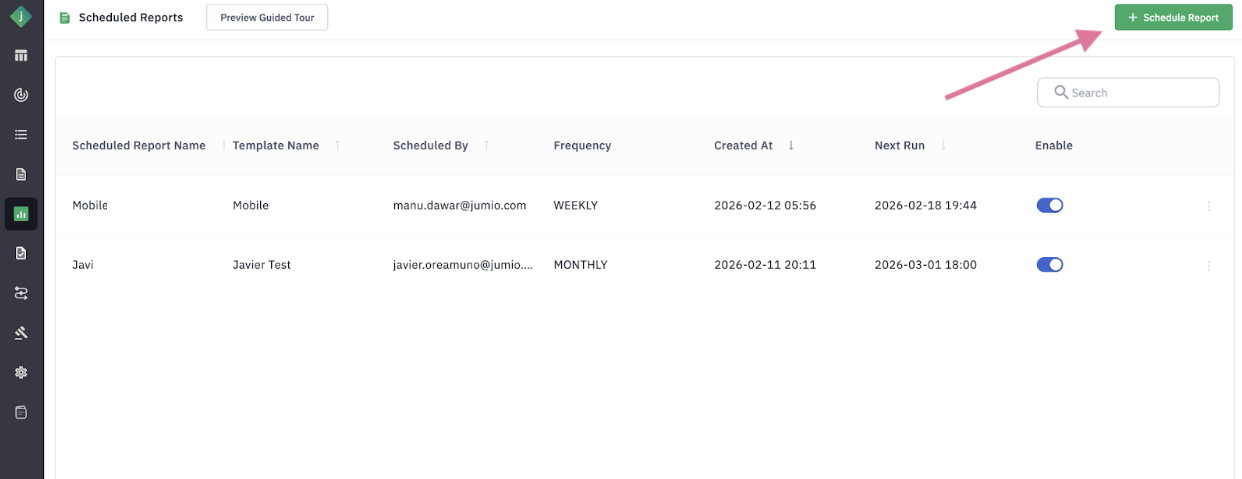
Step 2: Click “Schedule Report.”
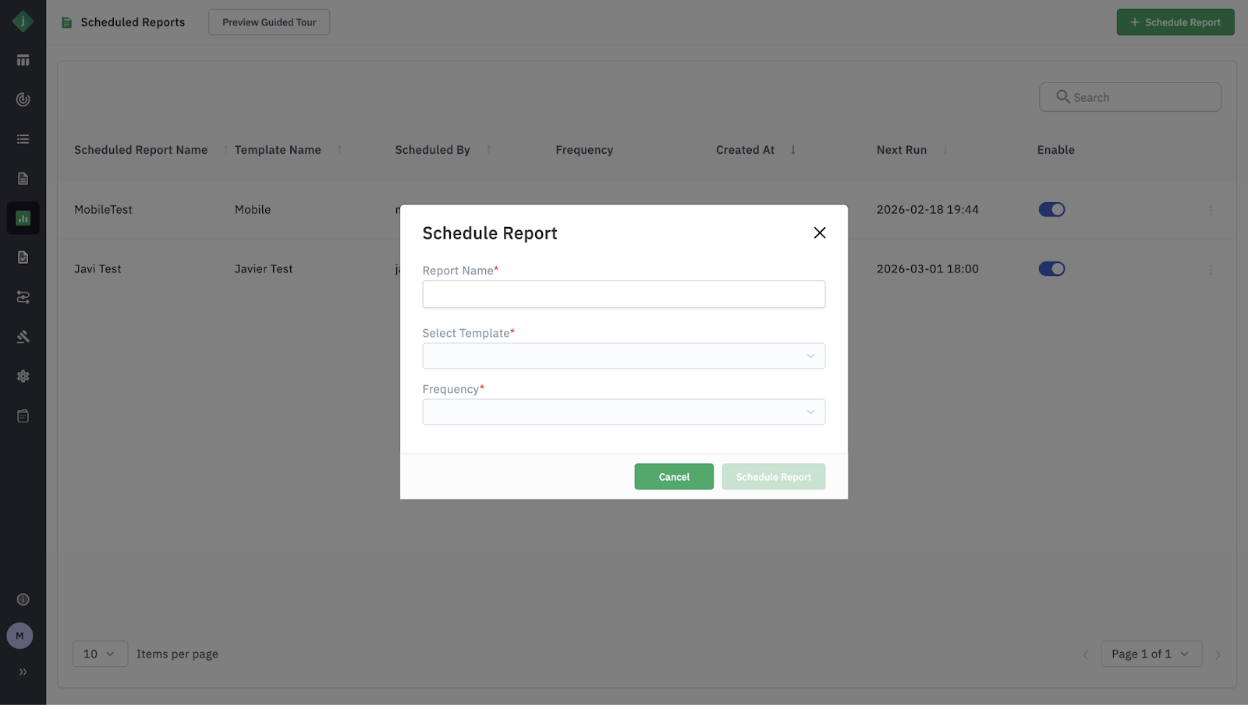
Step 3: Enter the report name.
Step 4: Select a saved Template.
Step 5: Set the Frequency for automatic generation.
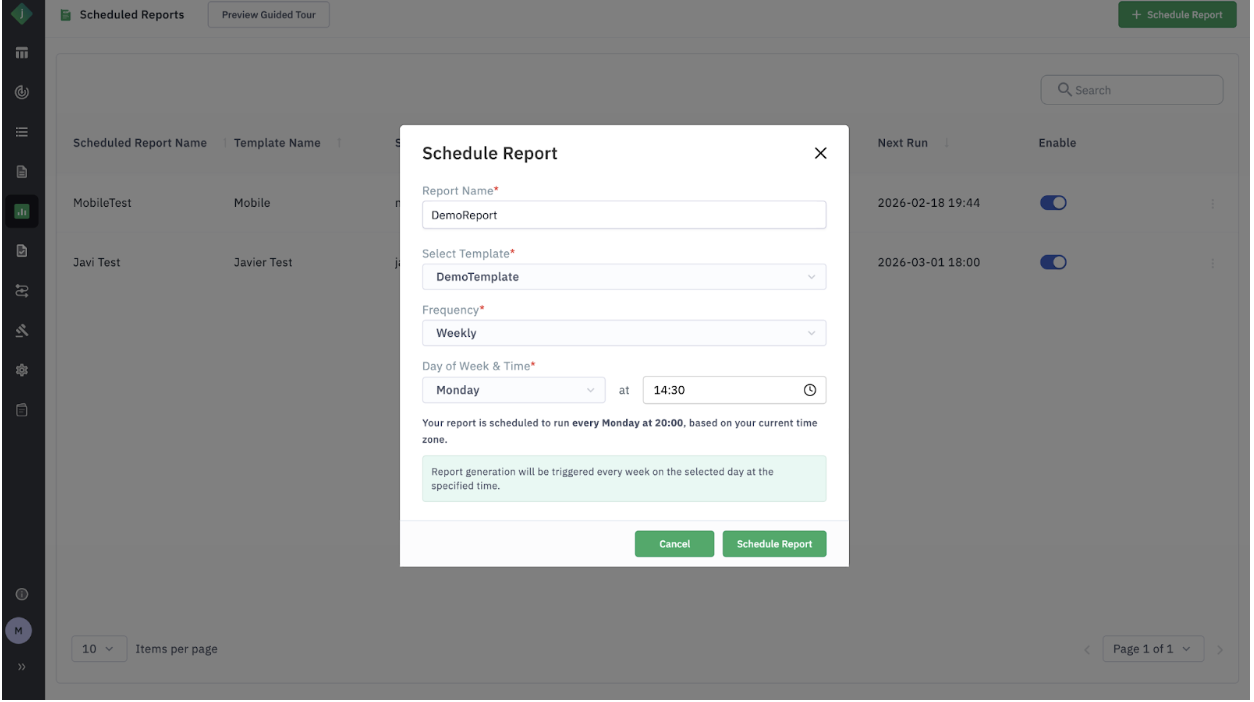
Step 6: You can manage your scheduled reports using the Edit, Delete, and Enable/Disable options found within the page.
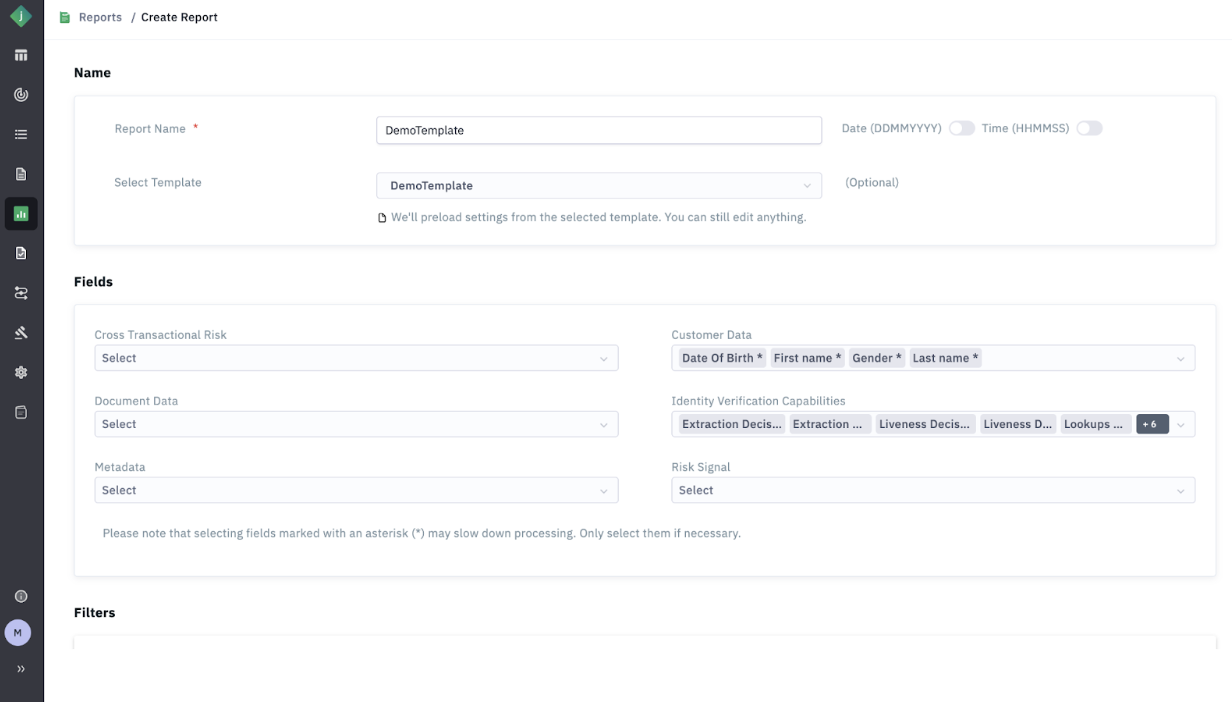
Create Report
To create a new report:
Step 1: Navigate to the Reports page from the left navigation menu.
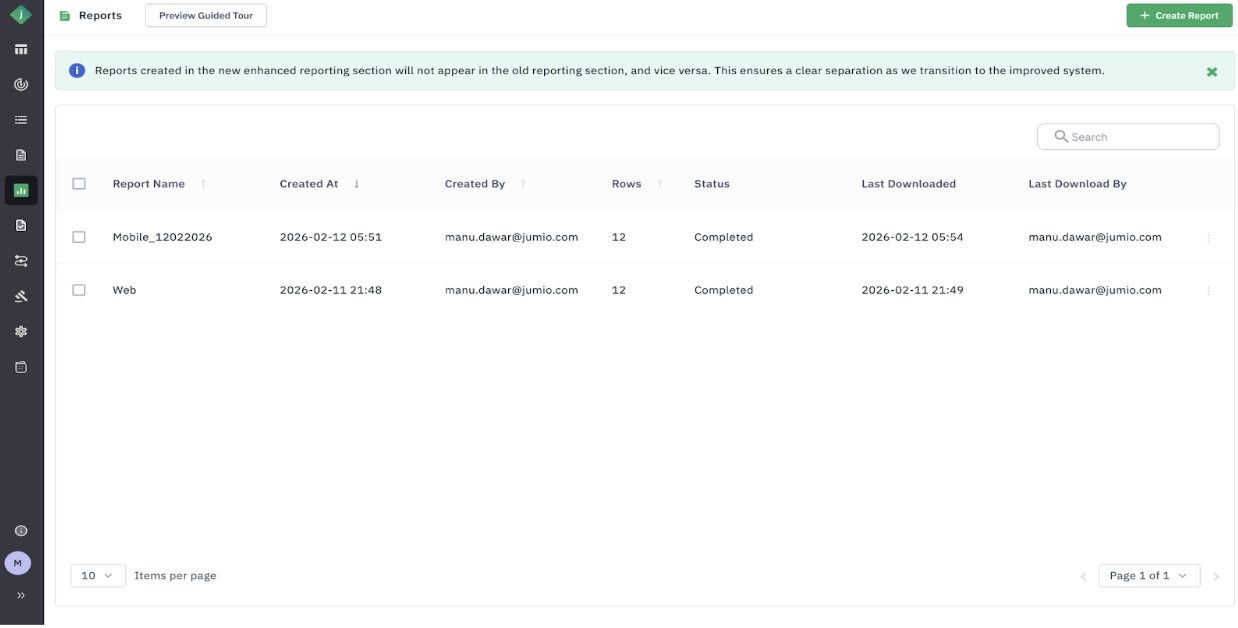
Step 2: Click the Create Report button.

Step 3: Enter a descriptive Report Name.
Step 4: Select a Template (optional): Choosing an existing template will automatically populate the predefined fields and filters.
Step 5: Define your desired Date Range.
Step 6: Click Create Report to generate the file.
You can simultaneously save your settings for future use by selecting the Create Template and Report option.
Performance Benchmarks
The new system offers a 75% improvement in report generation speed:
| Metric | Legacy Reporting | Enhanced Reporting |
|---|---|---|
| Time to create report (~10m txns) | ~8 hours | ~2 hours |
There is currently a maximum cap of 5 million transactions per report in the enhanced system.
Important Considerations
System Separation: Reports created in the new Enhanced Reporting system are not visible in Legacy Reporting, and vice versa. This ensures a clean transition between systems.